
Drawing Demo: Fun With Hats
Feel free to try drawing this simple hat! You can try to do the steps from memory, or from observation. See my workbook for more on the systems for practicing drawing. 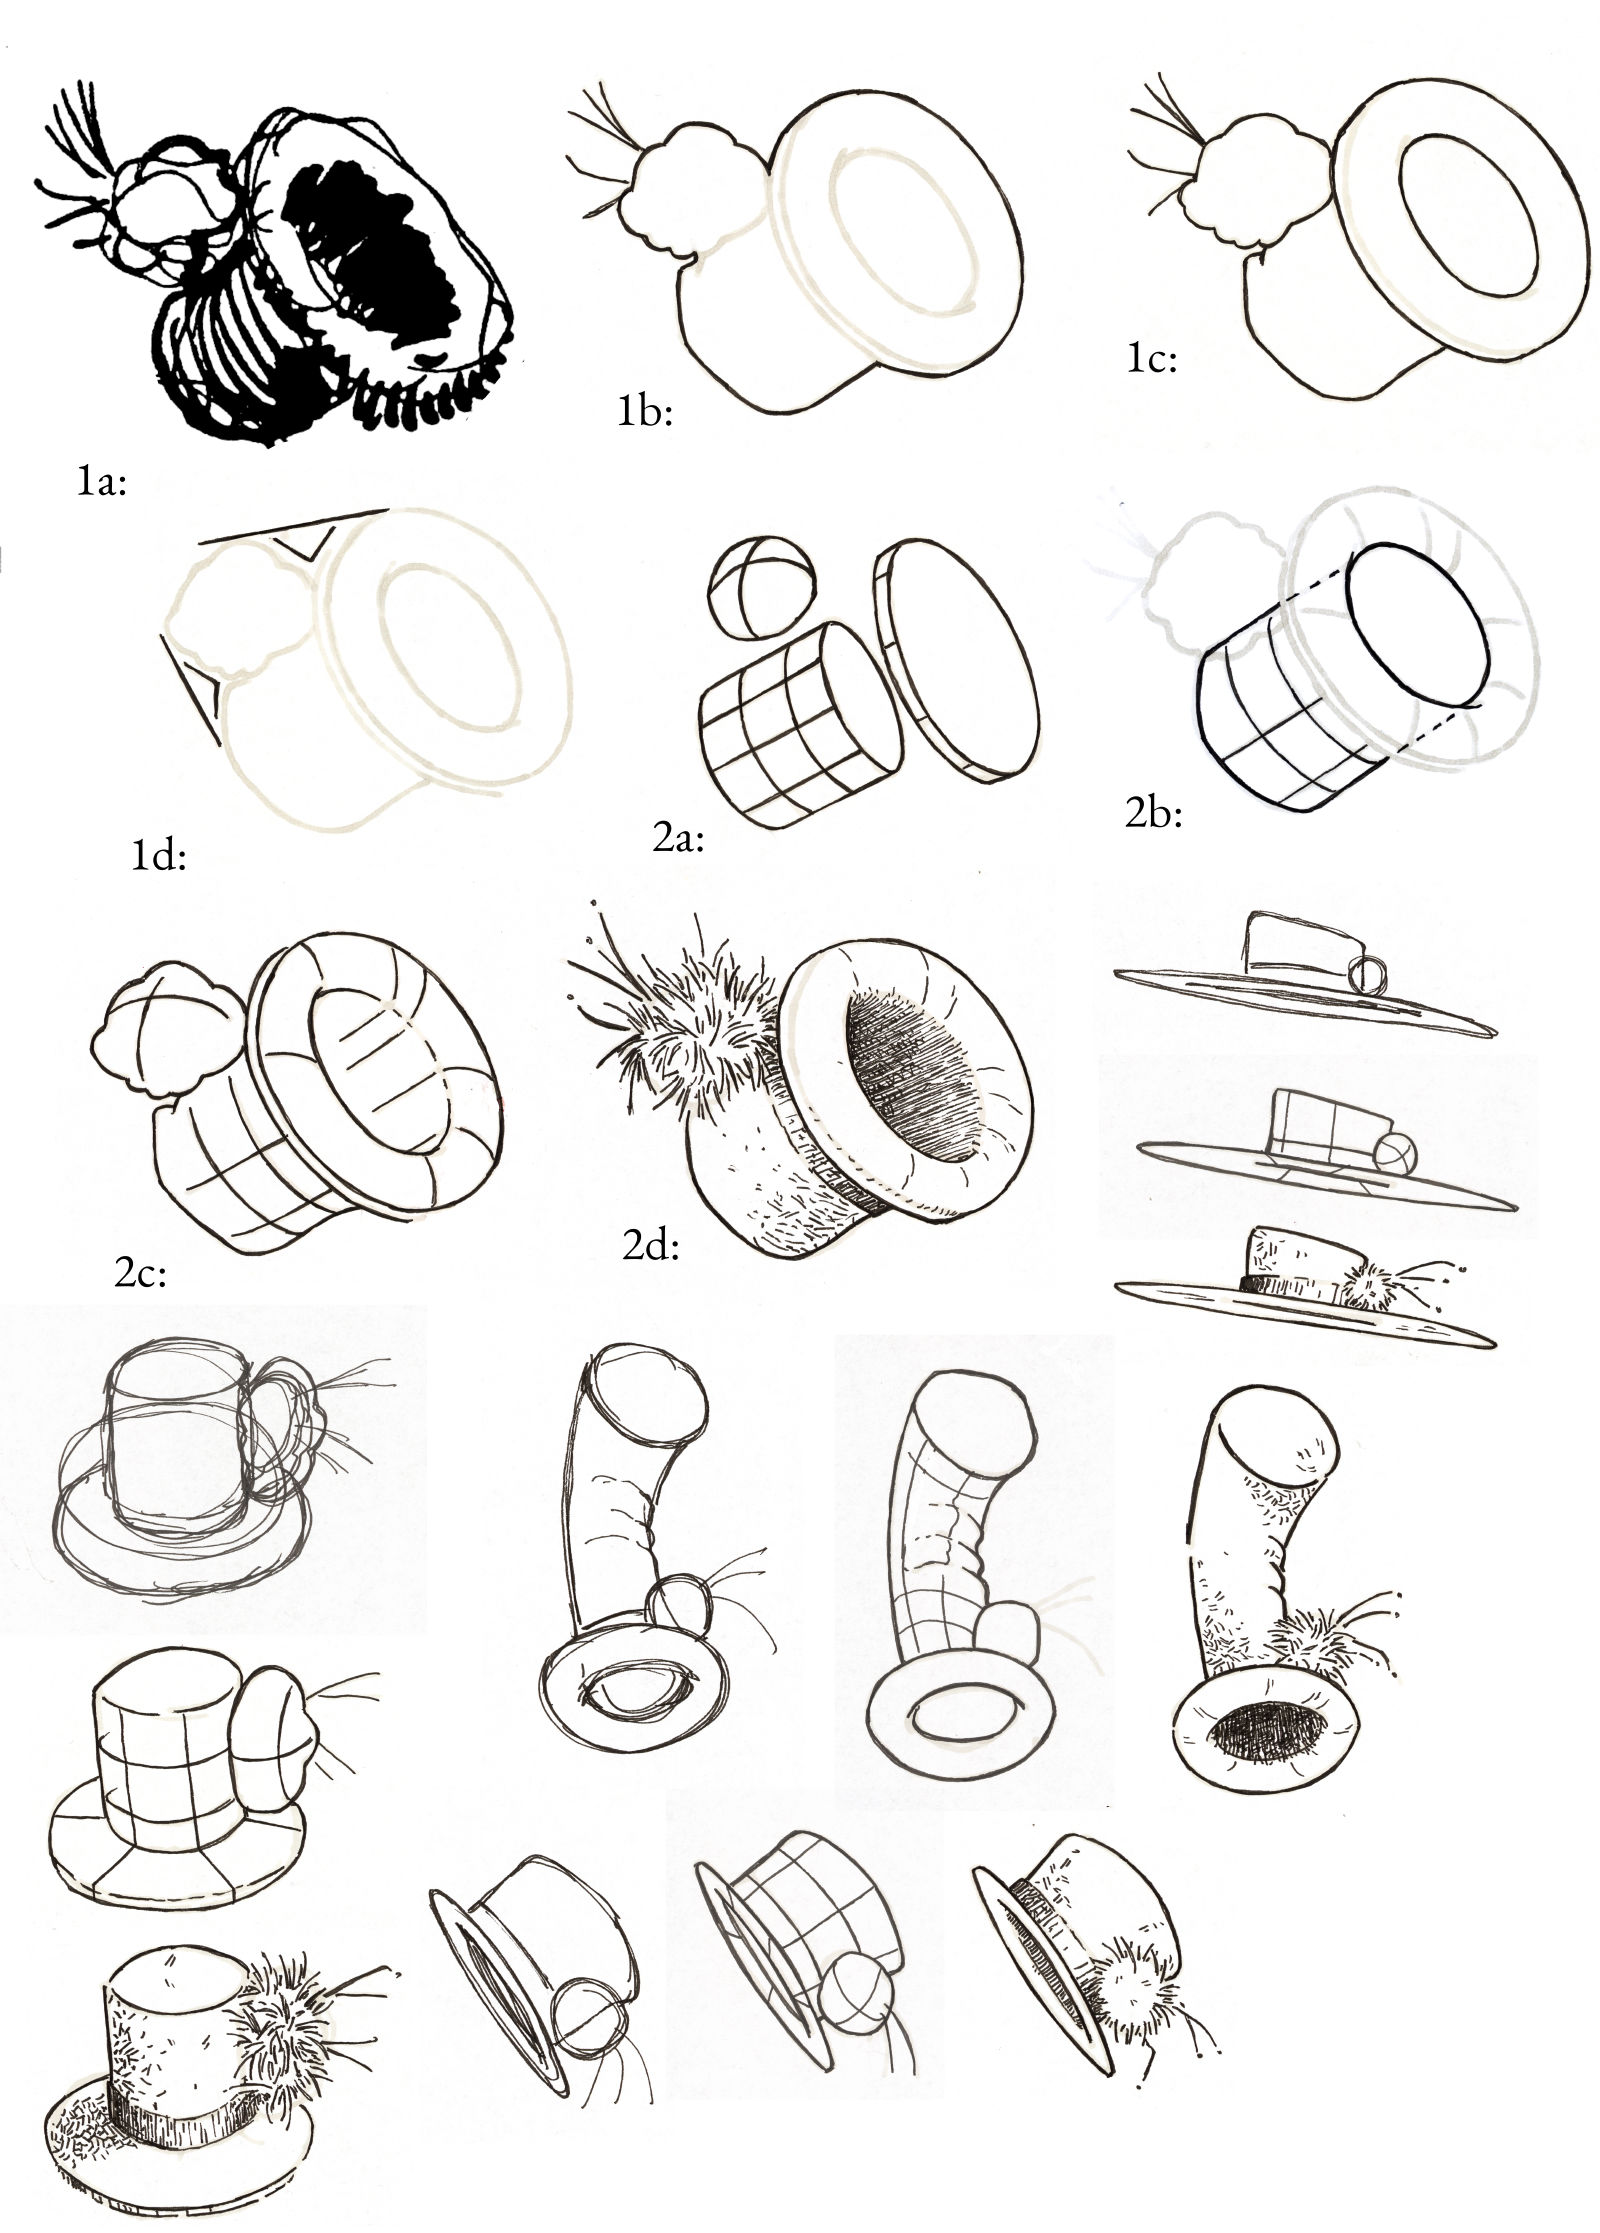
Study Shape
Figure 1a: The reference used for this demonstration: a small part of a larger illustration by Heinrich Kley.
You should do each of the steps below multiple times as quick sketches in your sketchbook until you feel you can sketch them confidently.
Figure 1b: Draw the outline.
Figure 1c: Draw the internal shapes. The outline and shapes studies will help you get a grasp of the proportions of the elements of the hat. and the relative orientations of the elements it is constructed from.
Figure 1d: Notice the angles and dents in this figure. They will help you construct the shapes, and later the forms, more accurately later.
Draw these repeatedly until you have a feel for the proportions and can do it from memory. This will help you place the forms more accurately.
Study Form, Render
Figure 2a: Study and draw the basic primitive forms. Notice that the hat can be constructed from the three primitive base forms: the brim is a flat cylinder, the crown takes the shape of a cylinder, and the fluffy ball on top of the brim is spherically shaped.
Figure 2b: Notice how the circle-shaped opening in the brim of the hat aligns with the cylinder that represents the crown of the hat. That circle is about the only landmark you need to get right for this drawing; if the opening in the brim aligns with the cylinder-shaped crown, all the other proportions and sizes can be varied and deformed at will to arrive at different designs.
Figure 2c: Put it all together. Notice the lines that curve into the hat. Also feel free to start making the design your own.
Figure 2d: Try rendering. You don't have to follow the reference, you can make it your own.
Rotate Form, Deform, Render
If you feel you have a grasp of the hat, try to draw it rotated. Draw a quick sketch of the basic forms first, then draw a tighter version of the underlying forms, and then attempt a render, maybe even without an underdrawing. Feel free to deform, design, change proportions and style of rendering and to make it your own.
The original reference image was a bit rough, but with this method, you can tighten it and turn it into something of your own.