Memory Drawing
A Workbook
Memory Drawing
A Workbook
Copyright 2024
Document Version 2024-04-18-002 -- draft 18
All rights reserved
Ayal Pinkus
Memory Drawing
A Workbook
Ayal Pinkus
Index
Introduction1. Lines I
2. Shapes I
3. Forms I
INTERLUDE: When You Don't Feel Like Drawing
4. Gesture
5. Shapes II
6. Forms II
INTERLUDE: Anatomy of Habits
7. Lines II
8. Parts
9. Imagination I
INTERLUDE: Balance, Yin, and Yang
10. Loose Versus Tight
11. Rotate
12. Memorization
13. Imagination II
Freedom At Last!
Afterword
Heinrich Kley Illustrations
Introduction
This is a boring document.
With that, I mean this book is not meant to be read. It’s a course, a series of drawing exercises. You’re meant to read today’s drawing exercise and then do it. It is like a tutorial, but one where you learn by doing.
In this introduction, I will quickly go over the basic principles that underpin this course so that you understand the why of these exercises. Then, feel free to start drawing immediately!
This introduction provides an overview of a course that contains twelve assignments with two quick, short daily drawing exercises each. They are designed to be easy to start and do in a half hour: fifteen minutes warm-up and fifteen minutes drawing with a reference.
The course begins with an assignment that lets you get acquainted with your tools. The following thirteen exercises should each be repeated for several days. Each assignment shows one aspect of memory drawing; it starts with memorizing simple lines and shapes and later proceeds to use Heinrich Kley’s illustrations for reference. The Heinrich Kley illustrations are ideal because they demonstrate many principles: shape design, simplified underlying forms, gesture poses that tell a story, and anatomy. The illustrations are in the public domain; I scanned them from books from around 1911 myself. The anatomy plate is from Paul Richer and was published in 1890. It is also in the public domain and was copied from Wikimedia Commons.
After the assignments, you can apply what you learned to reference images you collected and decide on the direction you want to take your art.
This course differs from others because it is about something other than teaching how to draw specific things like anatomy or perspective. Instead, it is about a way of practicing that allows you to practice anything yourself. In this course, you will learn to become your own teacher, see mistakes in your work, and plot plans to fix these. Although I will ask you to practice drawing from a specific set of reference images later in the course, it is not about that particular reference.
With drawing, you use your eyes, brain, and hand. In this course, we will exercise all three. Seeing also happens in the brain. We get so much information bombarded at us that our brain is forced to simplify information to symbols. When we see a lion, we don’t notice how the sunlight is subtly reflected into different colors by its fur because then we would be eaten. Our brain reduces it to a symbol: a dangerous predator, and we run. But it is precisely this information about how the light reflects in its fur that we need to draw the lion. Unfortunately, for untrained artists, it is the symbols and the simplifications we readily have in mind and first think of when we want to draw something. When people say they can’t draw, what they mean is they keep drawing the symbols when they want to draw something, whereas you need to draw the abstract elements you see before you, and then the image magically reappears on the page. In this course, we will focus on observing the abstract elements in the reference images, bypassing the step of reducing them to symbols.
But that is not the only part the brain plays. When you draw, you see something, a graphic abstract element, and then you turn to the paper and draw that small element you memorized. You can expand this ability, remember even more, and learn to visualize it on the page before drawing it. You can even access visual information hidden in your brain! Your brain doesn’t just simplify things to symbols; it does also store what things look like. You need to train to access this information through, you guessed it, memory drawing. While drawing from imagination, you will discover that you will remember what things look like without consciously studying them!
Lastly, the hand needs to place the line exactly where you want it. For that, I devised a set of warm-up exercises where you don’t need a reference to tell if a line is off. The warm-up exercises are designed to get you in the right meditative flow mindset to draw. They also make you better at placing lines accurately and with intent. They are designed so that you immediately see if a line is off. You can do these warm-up exercises anytime; you don’t need reference images. And they make you better at placing lines more accurately and with intent.
Later in the course, you can decide whether to do a warm-up exercise, which one, and for how long. You’ll know and feel which one you need. Warm-ups may not be necessary, and it may depend on the day. Sometimes, you may not be in the right mindset at the start of a session, and then you must do the warm-up for a little while. On other days, you may already be in the right mindset, and you may then treat the second half of the exercise, the memory drawing itself, as a warm-up. Ghosting curved lines as a warm-up can also be practiced while drawing from memory.
The second exercise for each day involves seeing the reference image, memorizing it, drawing it from memory, correcting it with the reference, and then drawing it from memory again.
That’s it.
Drawing from memory is an intense exercise; initially, you should do only one daily for 15 minutes. Your brain may be spent after that, so the second drawing might not come out as good. Stop after the first memory drawing comes out good—especially if it comes out good—because you’ll feel satisfied and motivated to do it again tomorrow. That’s why you must ensure that what you memorize is small enough.
You will likely feel like drawing after these exercises, so feel free to proceed to draw from observation or imagination. I like to draw from observation and imagination after doing the memory drawing exercise, so I do both.
You will rapidly get better at memorizing more complex things, and you can do the exercise several times during the day. For example, when you are out and about and waiting somewhere, instead of grabbing your phone, you can memorize something you see around you to draw it from memory later when you have access to drawing tools. This way, you can do drawing exercises even without drawing tools!
Suppose you continue to copy references from observation after doing a memory drawing exercise. In that case, you can treat drawing from observation as a sequence of tiny memory drawing exercises: look at a small bit, try to memorize it, then turn your eyes to the paper and draw it from memory. Look at the reference image again and make corrections.
One great thing this does is help you discover things you do wrong each time. For example, if you draw heads too big or lower legs too short each time, this is the way to find out so that you can be conscious about drawing it correctly next time.
One particularly cool thing about the memory drawing exercise is that it can scale with your ability. You can start by memorizing something really simple—two curved lines—all the way up to memorizing many people in complex poses and costumes. You can do this as a satisfying short warm-up for the rest of your life; it leads to nice-looking sketchbook pages and makes you significantly better at drawing.
Later, when you have filled your visual database, you can also draw better from your imagination.
Try to end with a satisfying result, as it will make it easier to start drawing tomorrow; you’ll be more motivated. For that, let go of accuracy if you forget certain aspects of the reference. Just wing it, have fun and try to make it a nice drawing. Try to feel where lines look good and where they should be placed to make the drawing look good again. That is the end goal, after all: visually pleasing art, not art that is an accurate copy of a reference image. You’re not a camera; you’re an artist.
Drawing from memory is not necessarily about memorizing that one reference. However, it can be used for that, and we will touch on how to, for example, commit anatomy studies to long-term memory. Drawing from memory instead makes you better at visualizing what you want to draw and better at sensing when lines feel right or wrong. You will become better at noticing what is off in your drawing and effectively become your own teacher, seeing the mistakes in your drawings yourself. The memory drawing exercise is that great.
Furthermore, as you are only indirectly working from reference, that frees you to deviate from it more freely and use your imagination to change the proportions in the reference or even change the thing depicted in the reference into something different.
You will be able to repair mistakes and correct drawings on the fly, even in pen, and finish with satisfying drawings, which will keep you motivated to draw.
In this workbook, I will show you many tips that will make drawing from memory easier and more fun, and then we will work on the reference images you collect because they inspire you. Try these short, quick, fun drawing exercises; they will change your life.
To prepare, have a sketchbook ready. An A4, letter-size one is preferable because it gives you space on the page, but those sketchbooks are heavier and less practical to carry around, so a smaller A5 sketchbook that can be carried around more easily is fine. Frankly, you will likely fill just an A5-sized sheet of paper for each session. Printer paper is fine also. These are just exercises.
Grab pens or pencils, whatever you are comfortable drawing with. I like to draw with pens with a fine tip, but ballpoint pens or pencils can be better initially as they allow you to draw softly or even erase. They may be better initially, as the drawing exercises involve drawing something from memory and correcting it using reference. With a ballpoint, you can draw it lightly and then draw darker or with another color to fix it. With a pencil, you can even erase.
You can even use digital tools for the exercises. The purpose is to practice drawing from memory and visualize what you want to draw, and you can do that perfectly fine with digital tools, too.
Ultimately, though, it doesn’t matter what you draw with. What matters is that you draw, so don’t waste too much time choosing drawing tools.
Do the separate parts of the warm-up exercises on separate sheets of paper, as it tends to look better if you do the same type of exercise on the entire page. Do the dexterity warm-ups of a certain kind on one page and the memory drawing exercises of a certain type on another page and go for nice-looking pages instead of each sketch being perfect. You will make mistakes, but the entire page can still look good. Ending the session with nice-looking pages will motivate you to draw again tomorrow.
Try to draw with the same pen or pencil you use for both the dexterity and the memory drawing exercises.
In the first assignment, I will let you get to know your drawing tools, so prepare a sketchbook and pen or pencil now so you can start. Try also to prepare a clear spot where you will draw without distractions.
You will repeat the thirteen drawing exercise assignments after that for several days each. You can find sufficient reference images to work from in the back. I recommend re-reading the same chapter each day before you do the exercise. You may notice something you haven’t seen before, and repetition helps you commit the information to long-term memory.
You can do the same exercises with other images in the book and reference images you can find elsewhere.
When doing this course, it is okay if you miss days. Life happens; don’t beat yourself up over it; it’s okay. The course will be there for you to pick up again days later.
Do write down the date. In the future, you will be glad you did when you browse through old sketchbooks and see how far you have come, at the same time seeing the seeds of what your art eventually became in your early work, which is motivating and joyful. I also place a mark next to each drawing to indicate if I did something from memory (M), observation (O), and imagination (I), and I write down where the reference came from (Heinrich Kley mainly in this case). If I do more than one memory drawing, I will mark them M1, M2, etc., so you can see the progress when doing multiple memory drawings from the same reference.
After doing the memory exercise for the first time and before doing it the second time with the same reference:
1. Note what you got wrong.
2. Write it down, and make a quick, small, rough sketch from observation where you draw it correctly.
3. Do pay careful attention and try to memorize.
Try filling pages with lots of drawings, as that looks good. Looking at these pages in the future will motivate you to start drawing.
Who This Book Is For
I do not pretend to know what it takes to become a professional artist, as I am not one and do not plan on becoming one. This is just a workbook with short warm-up exercises that benefit any artist. It is for any artist who wants to improve at drawing while still enjoying it. So, with that said, let’s start drawing!
1. Lines I
Welcome to the first of my daily little drawing warm-ups! These are warm-ups where I explain how to do the memory drawing exercises. They start very easy but will get more challenging as the course progresses.
You can repeat this warm-up for several days, as you wish. Feel free to move to the next warm-up when the one you are currently doing is boring or too easy.
For each of the warm-ups in this workbook, re-read them each day before you do them.
Each warm-up consists of a dexterity exercise and a memory drawing exercise.
Have a sketchbook ready. A big letter-size one is preferable, but a smaller one, or printer paper, is fine too.
Grab pens or pencils, whatever you want to draw with. The drawing tools don’t matter; the exercises are about memory drawing. Pick what you find most comfortable to draw with.
Dexterity
As a warm-up drawing exercise, begin by drawing some circles and ellipses.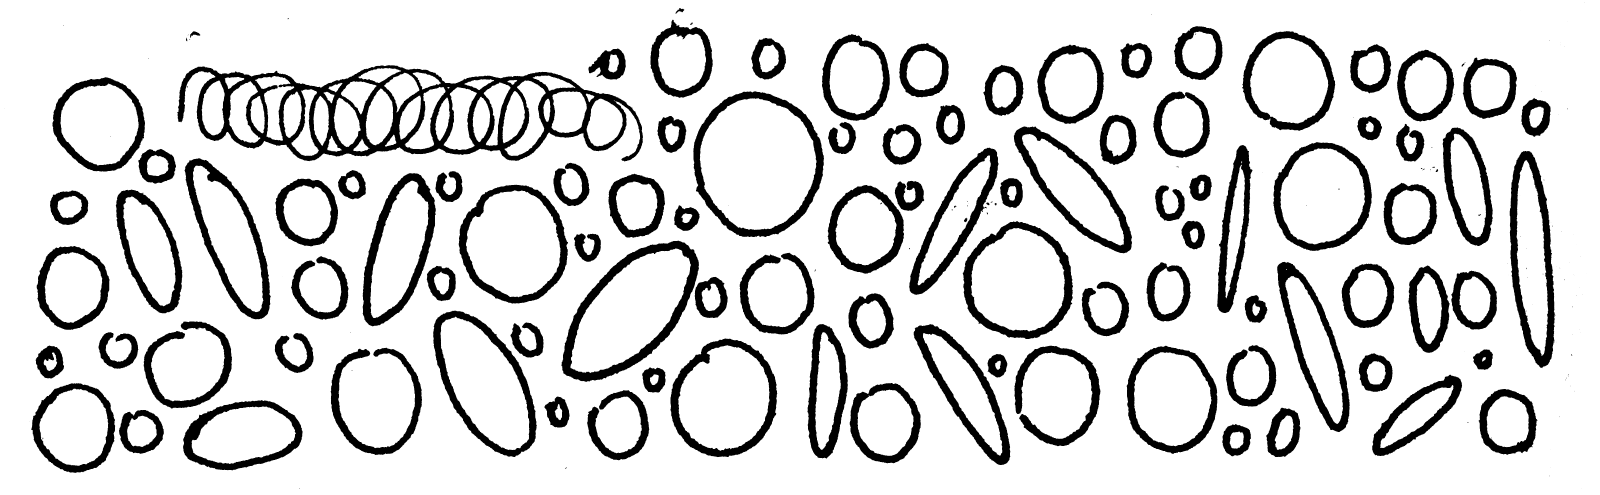
You can use cylindrical objects like glasses for reference. Being able to draw these will come in handy more often than you realize. Repeat the exercise until you feel the resistance fading and you get into the flow.
Draw from the shoulder, or the elbow, or maybe the wrist. Try to resist the temptation to draw with your fingers. Hold your pen or pencil some distance from the tip so you are more inclined to “paint” than “write.” This may feel uncomfortable at first, but keep at it.
A cool trick, a warm-up before the warm-up, is to make motions with your hand to draw a spring to get your hand moving correctly.
Another cool trick is to draw long, straight, or curved lines and to draw circles and ellipses between them, making sure the circles or ellipses touch both lines and the circle or ellipse next to it. This adds other points you can aim for with your pen and allows you to see where you missed the mark.
Draw slowly and carefully; try to see the line ahead of your pen or pencil as you draw it.
Memory Drawing
Now, on to the memory drawing. Use a separate page for that. The sketchbook pages look better if you do just one type of exercise on each page: the dexterity on one and the memory drawing on another page. The pages will look better. You can use the same pages over several days and do the dexterity exercises on one page and the memory exercises on the other until they are full.All the warm-ups in this workbook (except for the gesture warm-up) come in this form: a dexterity exercise and a memory drawing exercise.
Look at the image at the end of this assignment. It has several simple shapes.
Draw them from memory using the following procedure:
1. Pick a shape and study it carefully. Try to memorize how the lines are oriented relative to each other, at what angle the lines begin and end, and where line endpoints are relative to other line endpoints and lines.
2. Put the image away and draw it from memory. You mustn’t cheat. The point is to find out which details you forgot or missed. If you cheat and look at the image, the information is just in your short-term memory, and you forget it as soon as you place the line correctly. By not cheating, you discover the hiatuses in your knowledge of the shape.
3. If you are drawing with a pencil, use the reference to fix your mistakes. If you are drawing with a pen, redraw the reference, but now do it from observation while comparing it to the drawing you made from memory. Carefully and consciously focus on what was incorrect and find ways to remember the new information. Is some line or point positioned relative to another line or point so it is easy to remember?
4. Put away both the reference image and your drawing. You may have to cover your drawing with a piece of paper or a Post-It note if you are drawing on the same page.
5. Draw it from memory again.
6. You should have done better the second time. You can repeat drawing the reference from memory and observation until you can confidently draw it from memory.
We will work with progressively more complex images as this course progresses. If you drew the reference correctly from memory the first time, the reference was too easy, and you may consider moving to the next assignment. If you need more than two attempts, the references at this level are still challenging, and you could stick to doing the same assignments as a warm-up before you start your creative sessions.
However, feel free to move on to the next assignment when you start feeling bored with the current one.
Feel free to keep doing the warm-ups or to continue drawing from observation or imagination after the warm-up.
2. Shapes I
This is the next drawing exercise assignment in a series of drawing warm-ups. We’ll do this exercise for several days again, one session each day. As previously, and for all future assignments, feel free to move on to the next assignment when you feel ready.
For each of the exercises in this course, re-read them each day before you do them.
Grab a sketchbook, preferably letter size, but any sketchbook will do, and grab a pen or pencil, brush, or whatever you want to draw with. The exercises are about memory drawing, and you should use any drawing tools you find most comfortable.
Dexterity
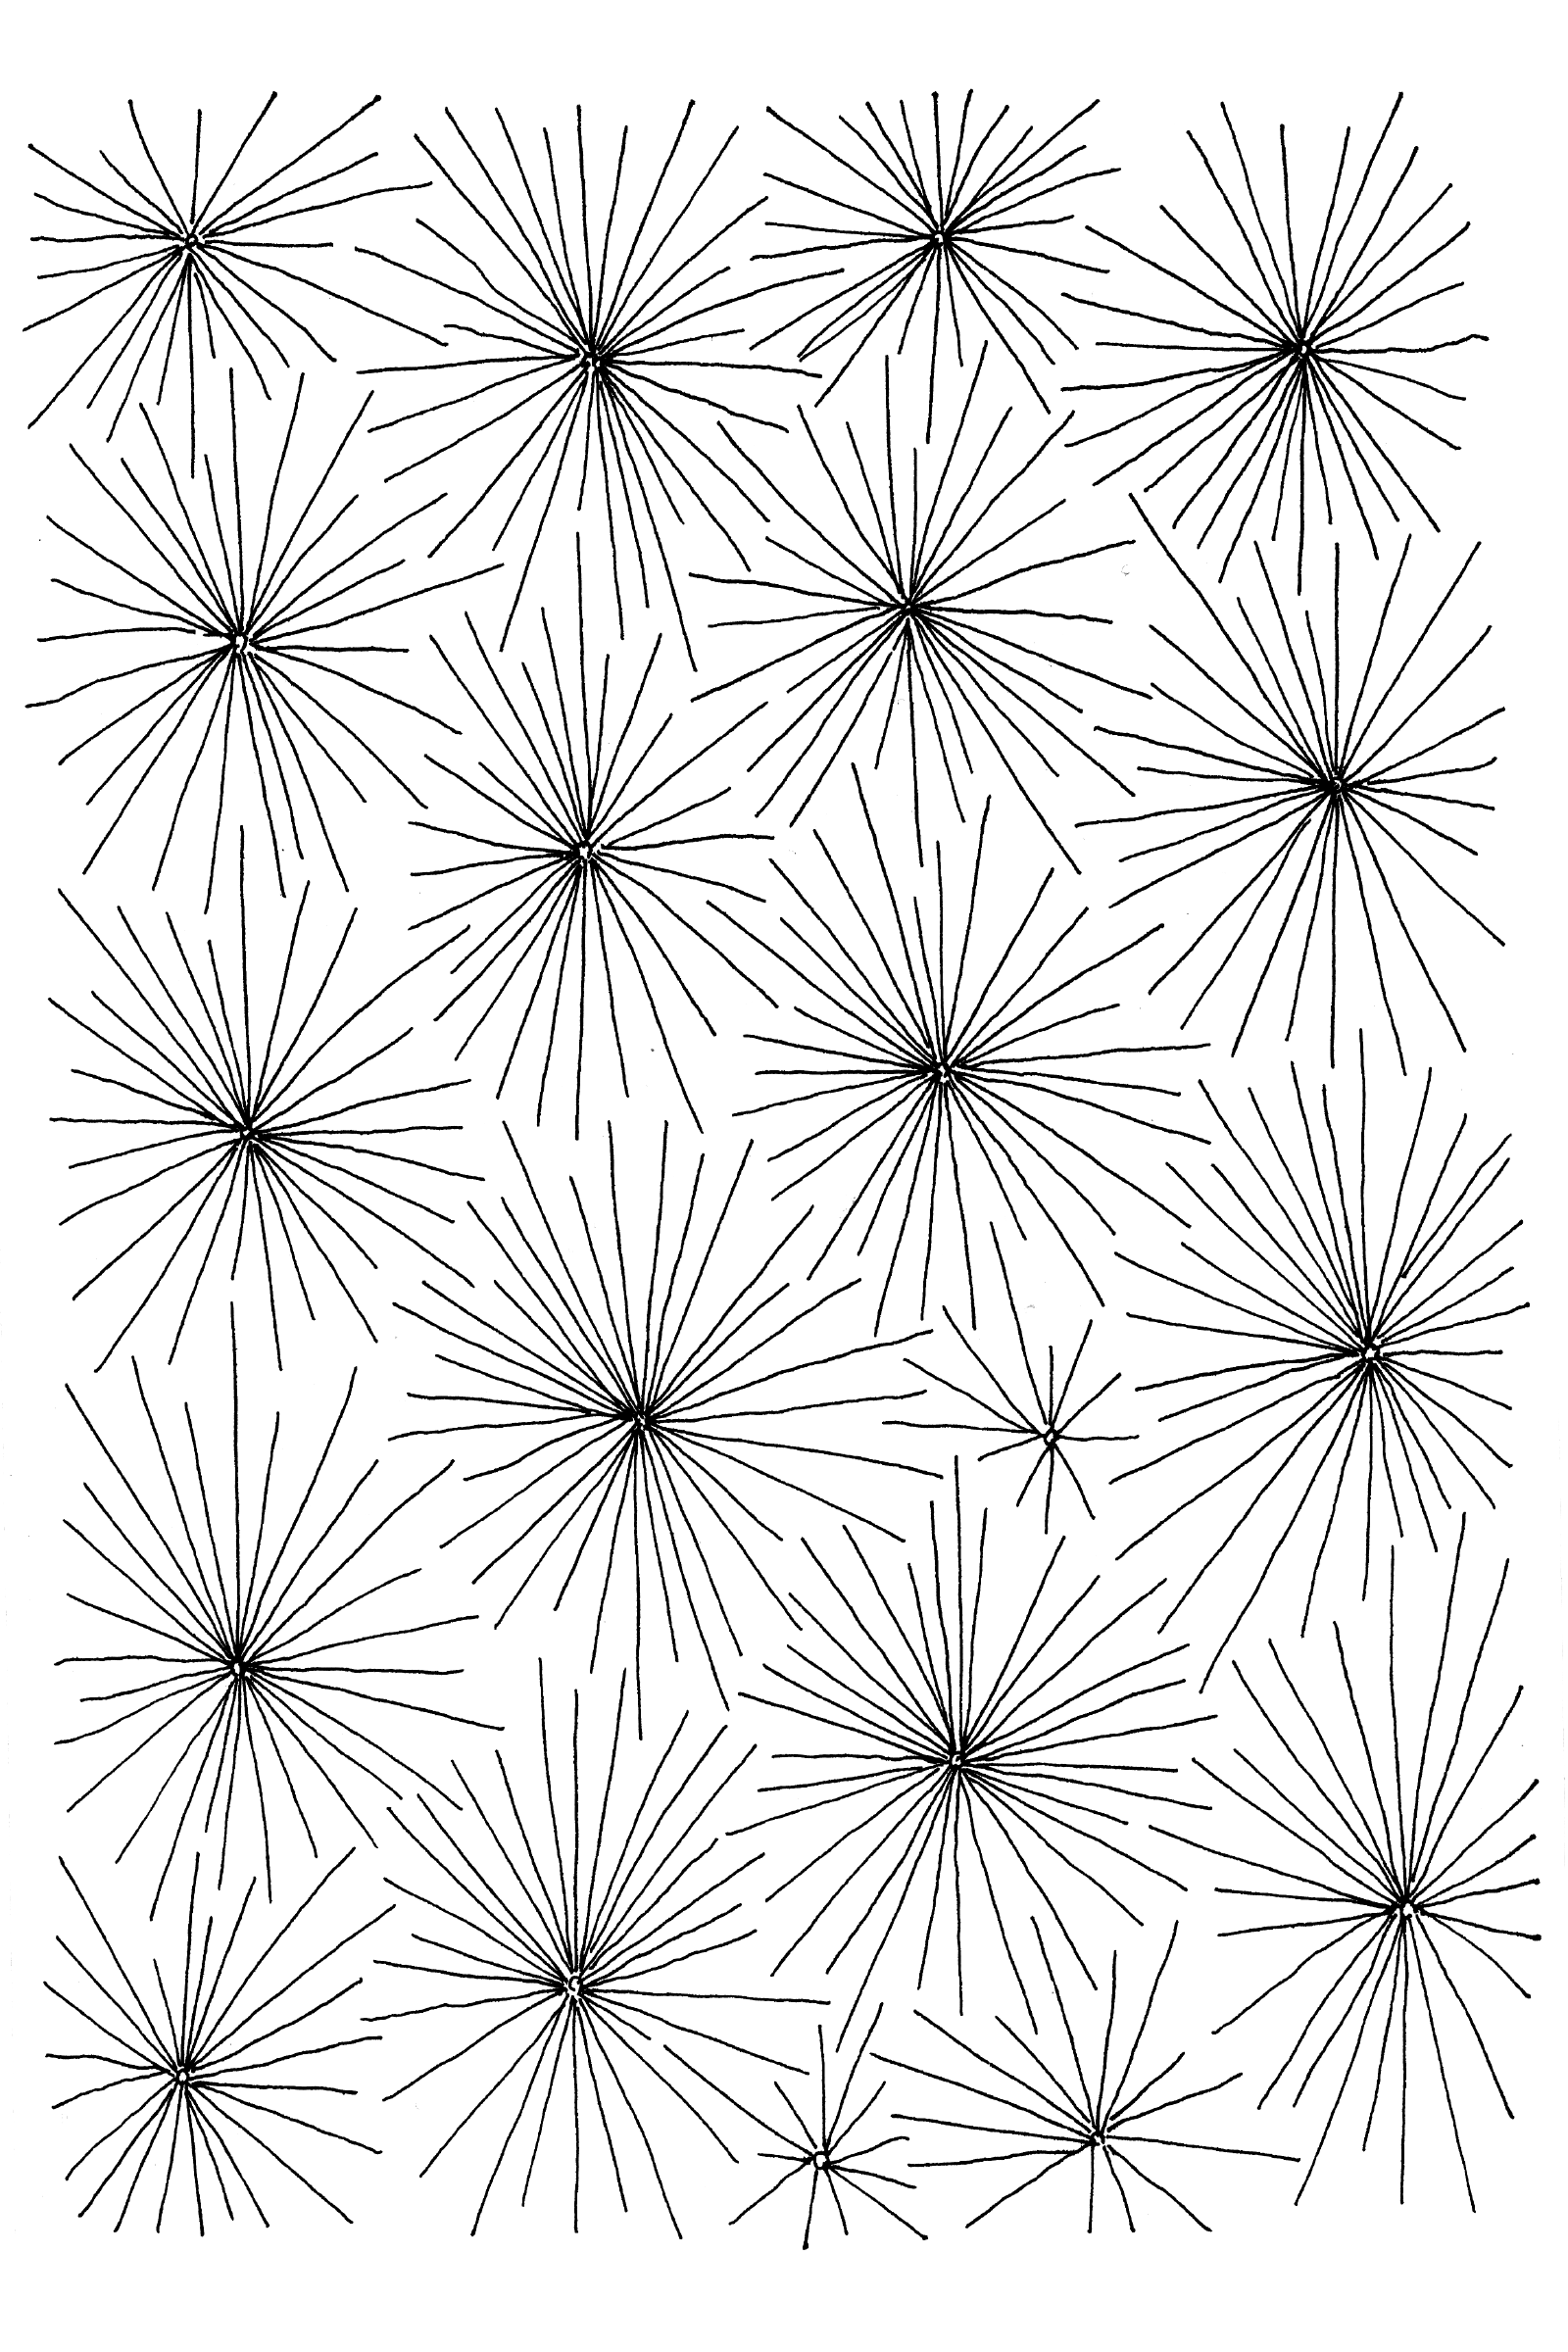
As a warm-up, we’ll draw lines from many angles to a point.Start by drawing a tiny circle with a white dot in the middle. Then, draw straight lines to that dot from any angle without rotating the page.
Draw from the shoulder, or the elbow, or maybe the wrist. Try to resist the temptation to draw with your fingers. Hold your pen or pencil some distance from the tip so you are more inclined to “paint” than “write.” This may feel uncomfortable at first, but keep at it.
Draw slowly and carefully; try to see the line ahead of your pen or pencil as you draw it.
You will notice that your elbow and shoulder mechanics make it easier to draw in certain angles. What you can do is rotate the page so that you can keep practicing the problematic angles using the same white dot. As with yesterday’s warm-up, repeat the exercise until you feel the resistance fading and get into the flow.
Memory Drawing
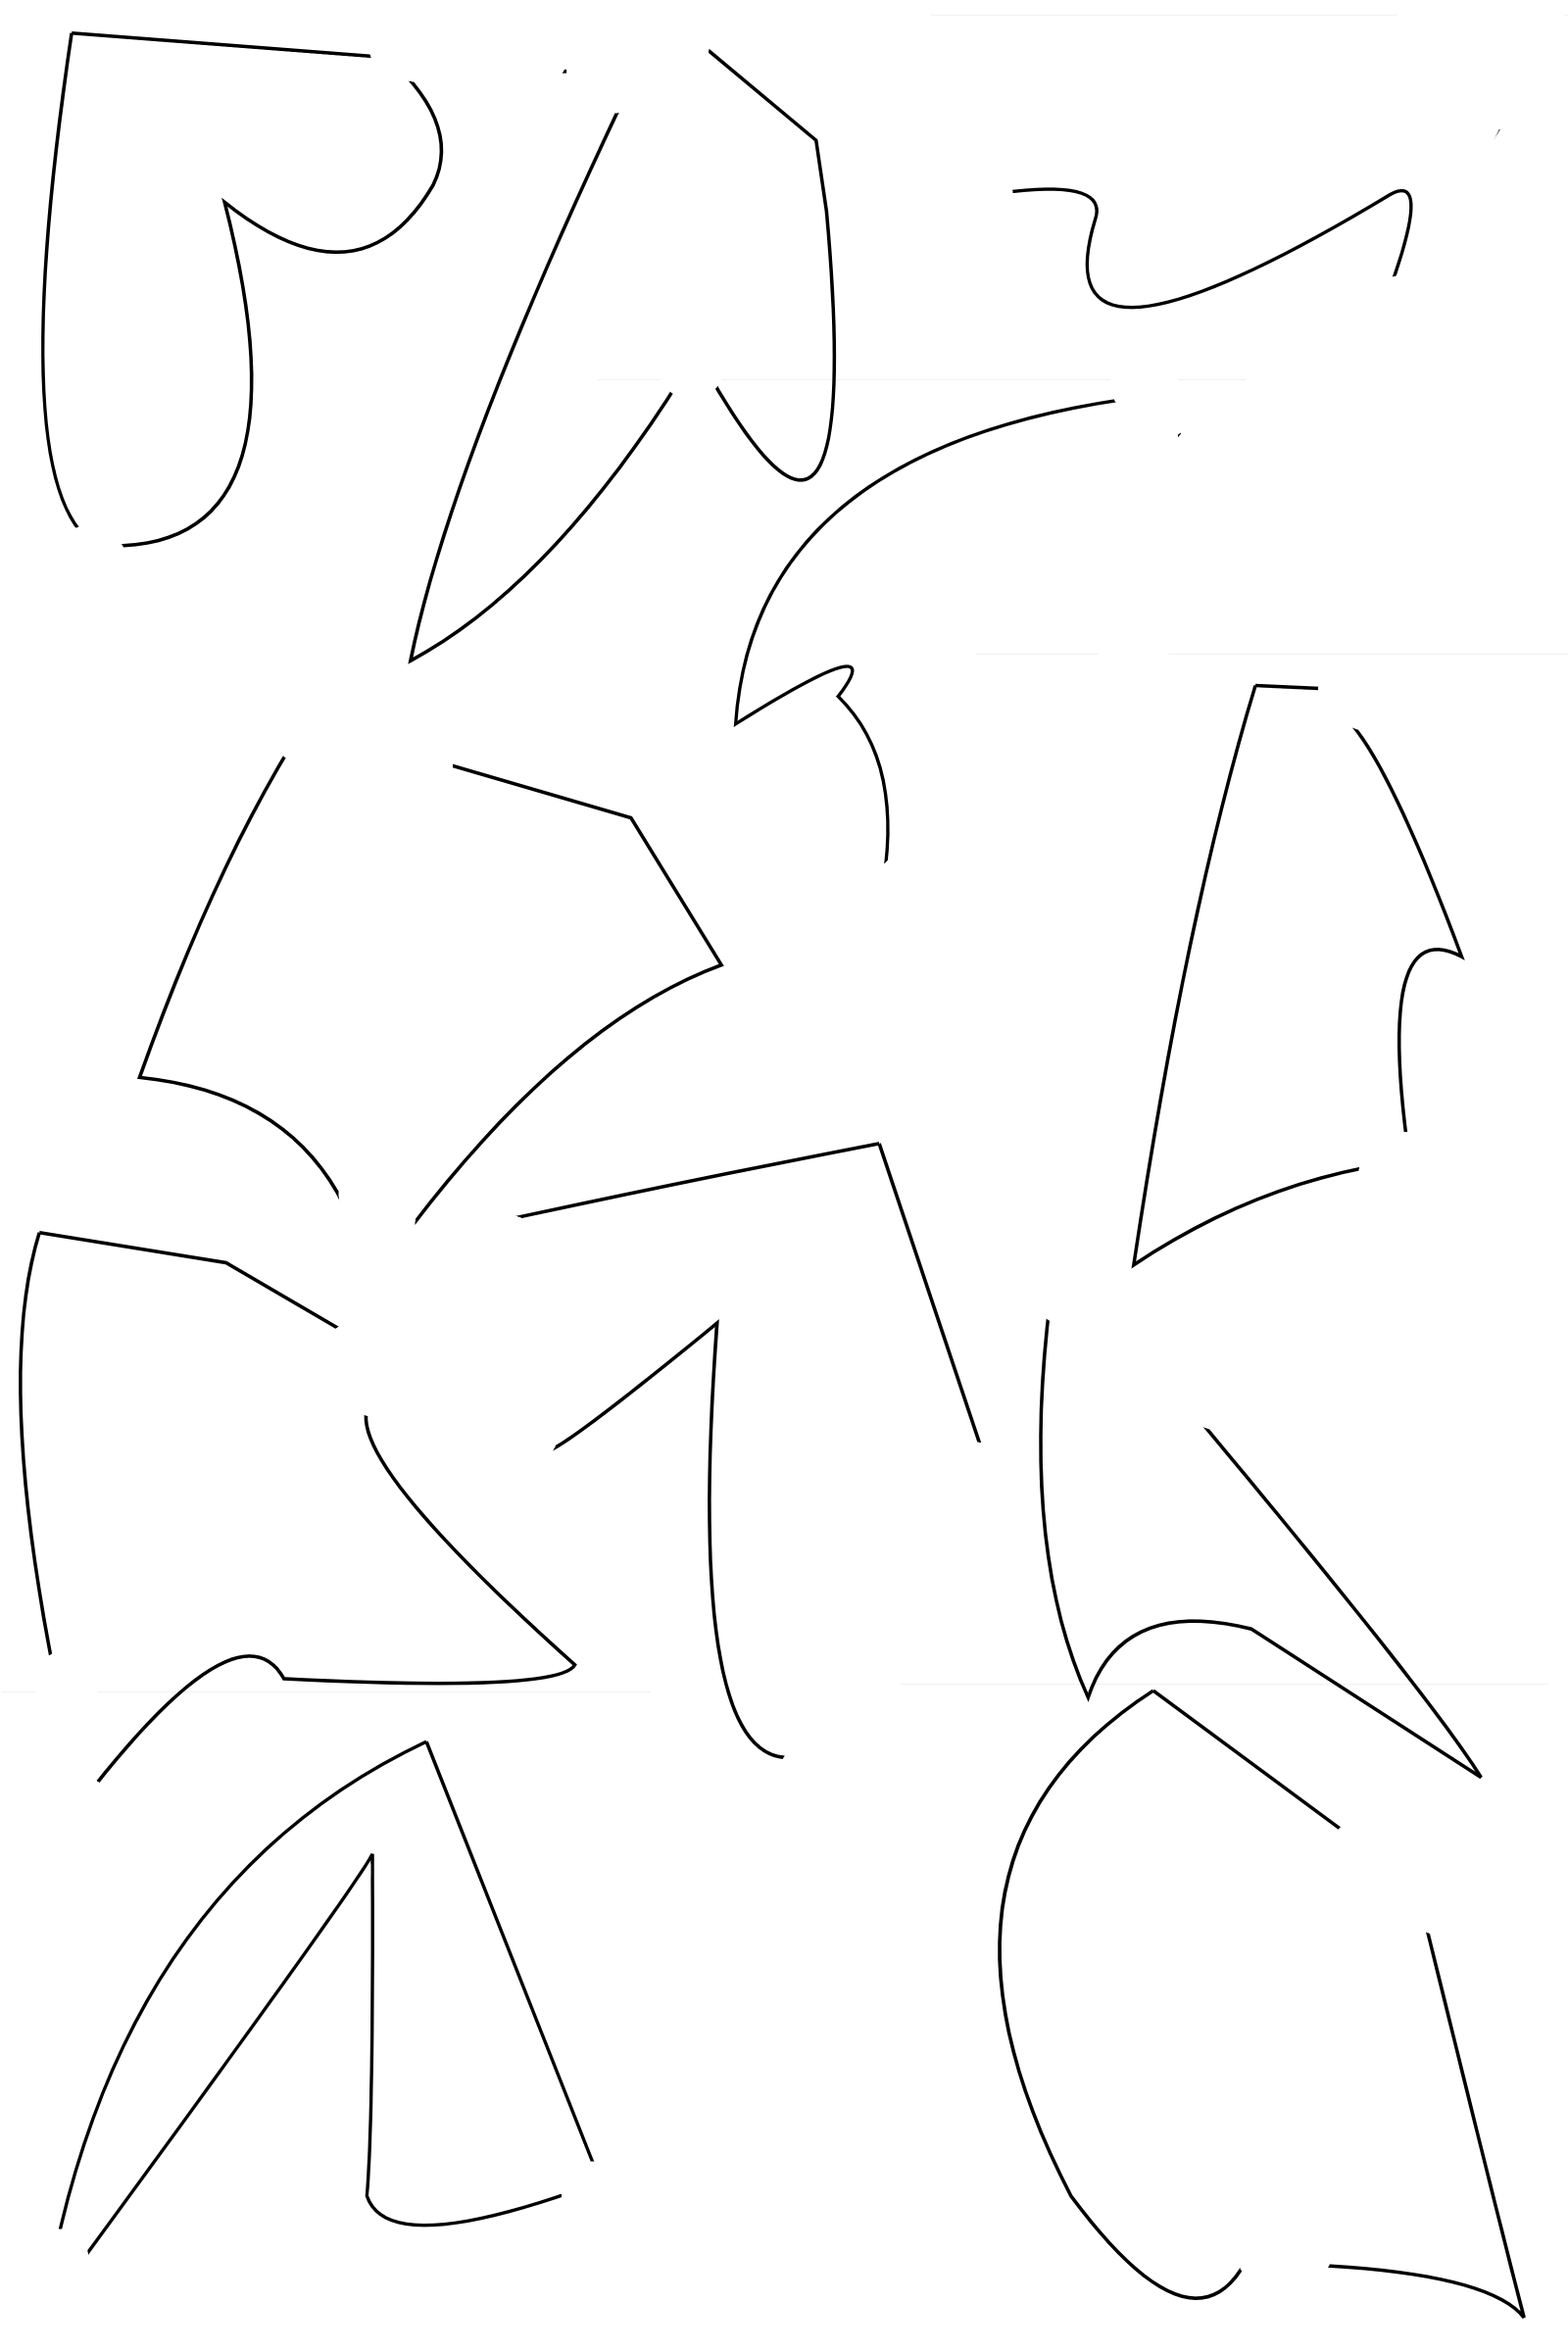
Now, on to the memory drawing. At the end of this assignment are two images of shapes that form a human figure. They are studies I made of George Bridgman illustrations. Choose one shape, or two or more if you are up to it, for the assignment.Notice the angles the lines in the shape make, their relative lengths, and the relative orientations of the corner points. If you are doing more than one shape, then notice the relative orientations, positions, and proportions of the shapes as they relate.
Close your eyes and draw in your mind, then open your eyes and see what you got wrong, and draw in your mind’s eye again.
When ready, put the image away and draw on paper from memory.
Again, you must refrain from cheating! Find out which details are missing in your memory so you can focus on memorizing these details in the next step. If you cheat, you rob yourself of the opportunity to discover what you still need to memorize.
Compare with the original image, correct or redraw from observation, carefully notice what you got wrong.
Put both the reference and your drawings away and draw from memory again.
One important thing is to clear your mind completely. Try to have silence in your head, no inner monologue, no words. You will start to sense where lines need to go and feel that parts of your brain become excited about the marks being made. You’re drawing something from memory; it's like magic!
Keep drawing from memory repeatedly, correcting from observation using the reference image.
Again, these exercises are not about memorizing this specific shape but better recalling and projecting the image you want on paper and then drawing it accurately.
Feel free to keep doing the warm-ups or to continue drawing from observation or imagination after the warm-up.
 George Bridgman study.
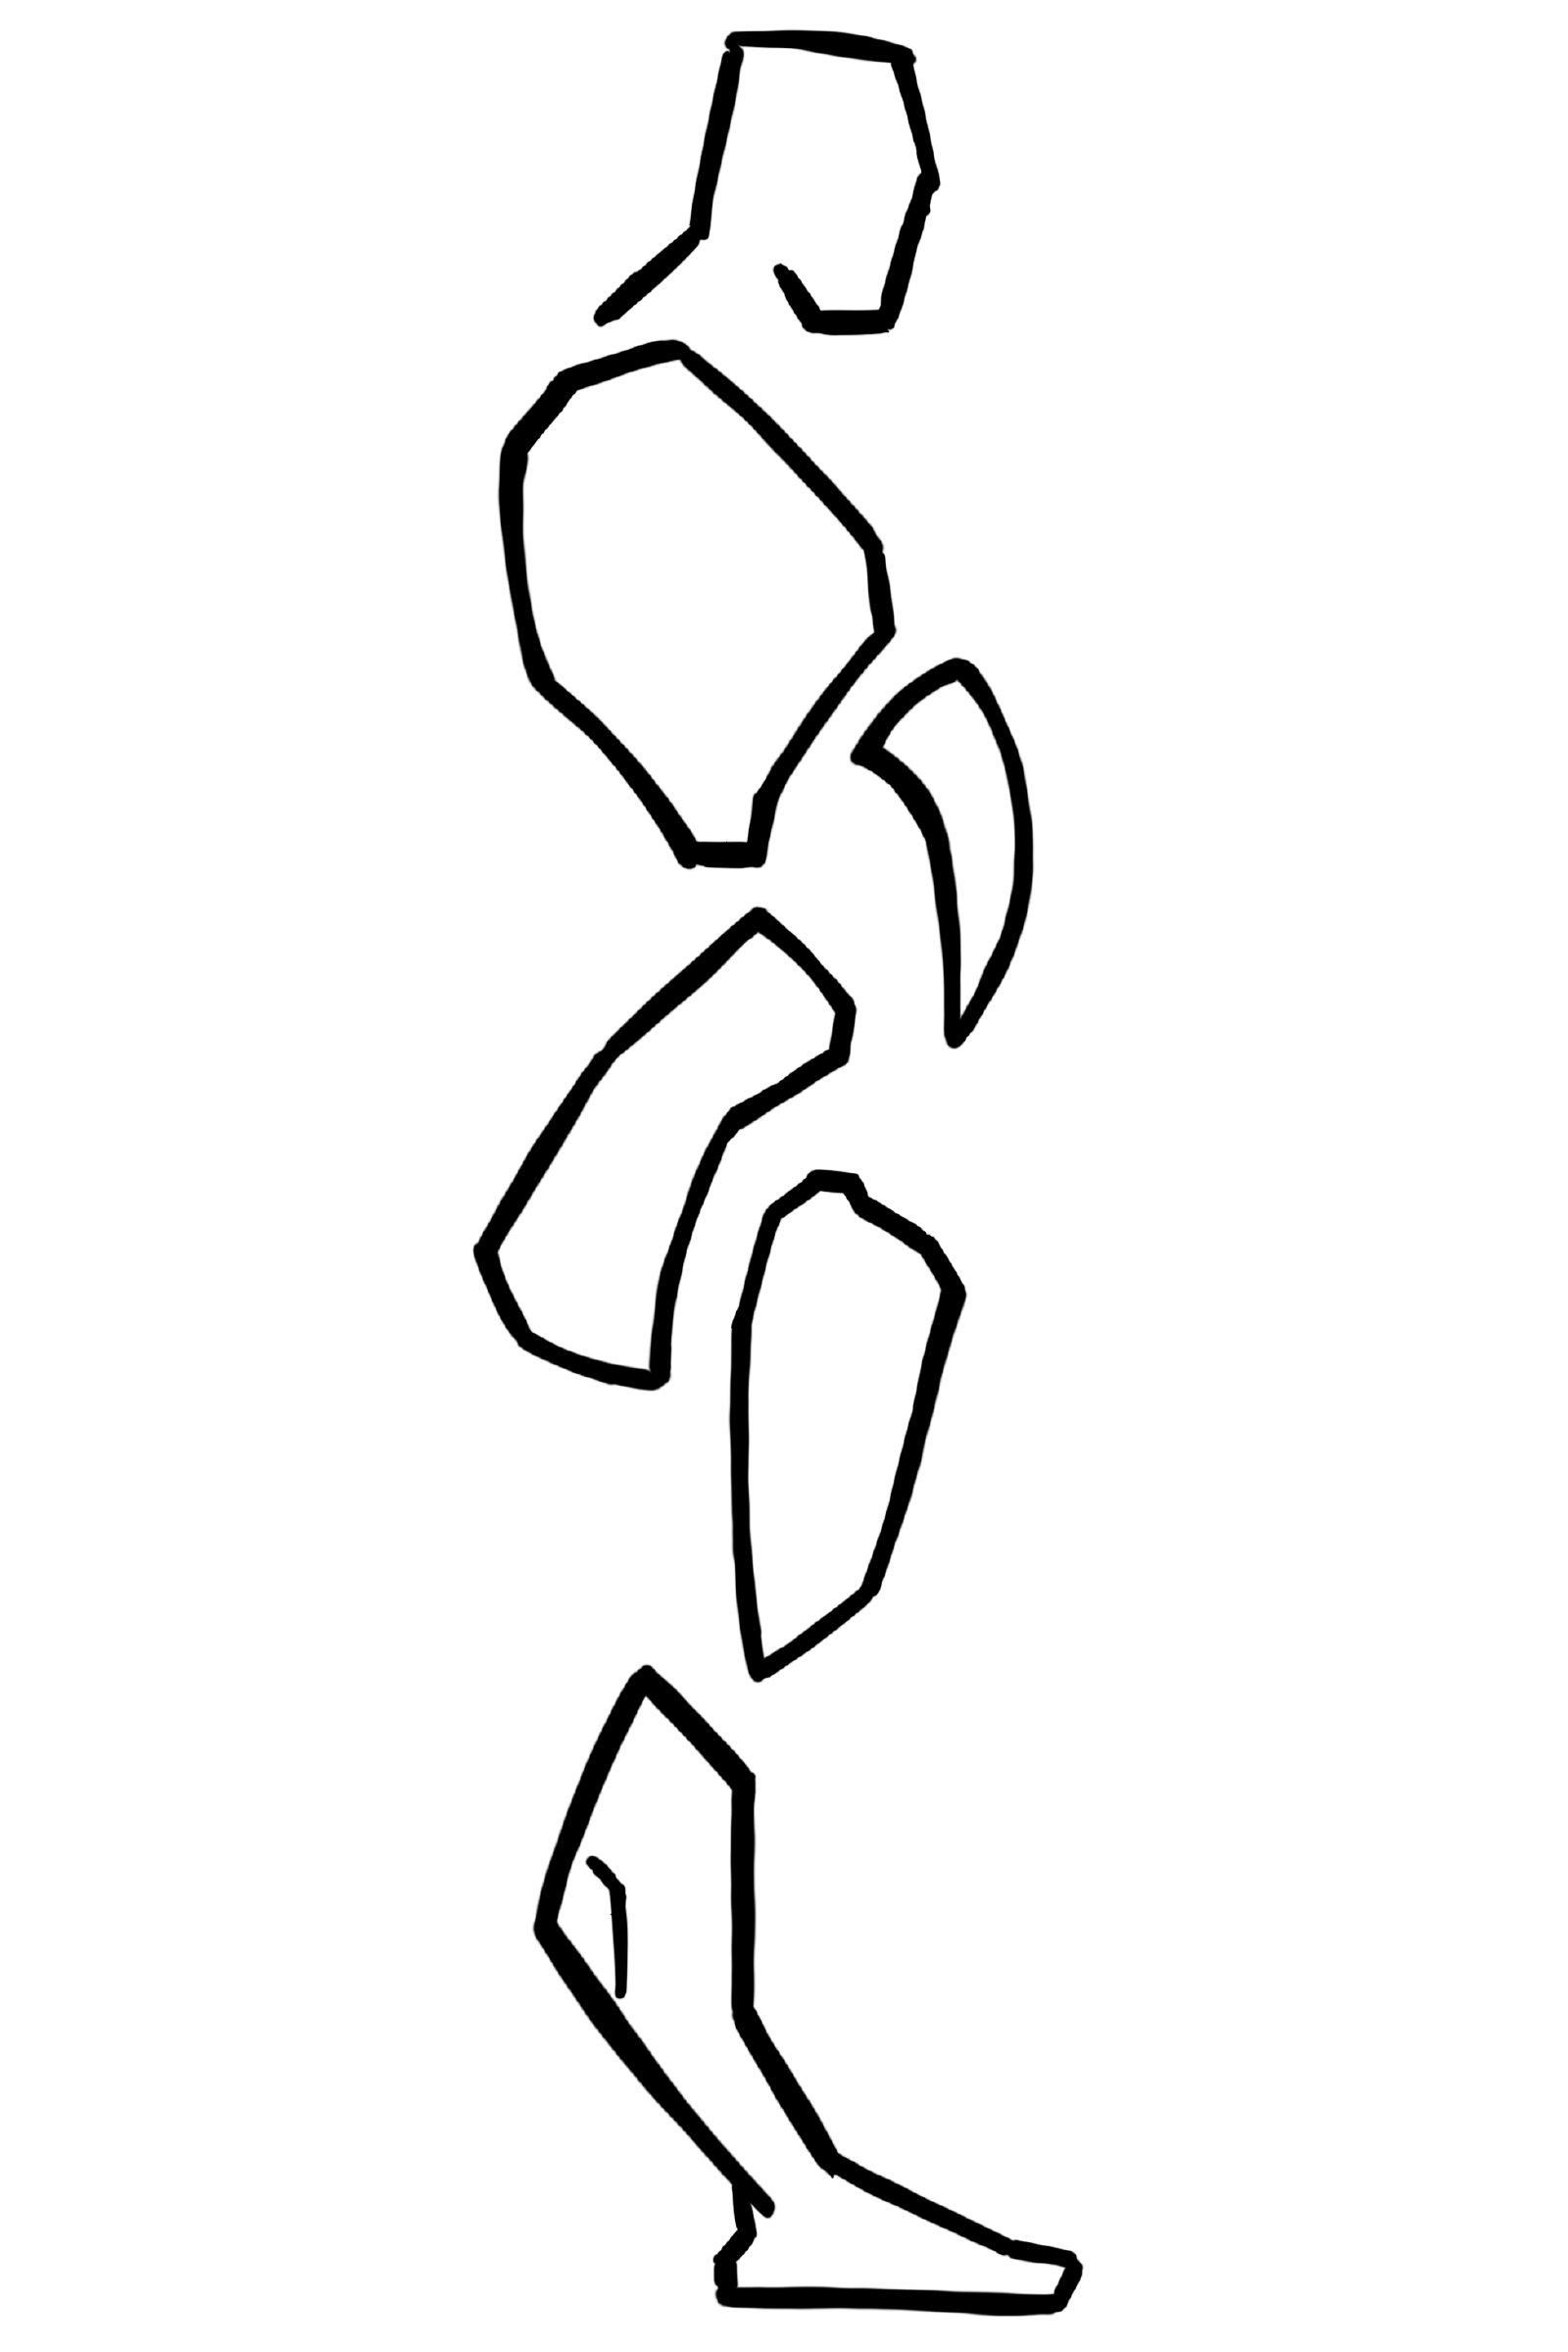 George Bridgman study.
3. Forms I
This is the next in a series of drawing warm-ups. We'll do this exercise for several days. You will know when you are ready to move to the next assignment. Make sure it stays fun.
Dexterity
First, as a warm-up, draw lots of boxes, spheres, cones, and cylinders in lots of orientations in space. If unsure, look at natural objects with those forms, hold them in your hand, and rotate them.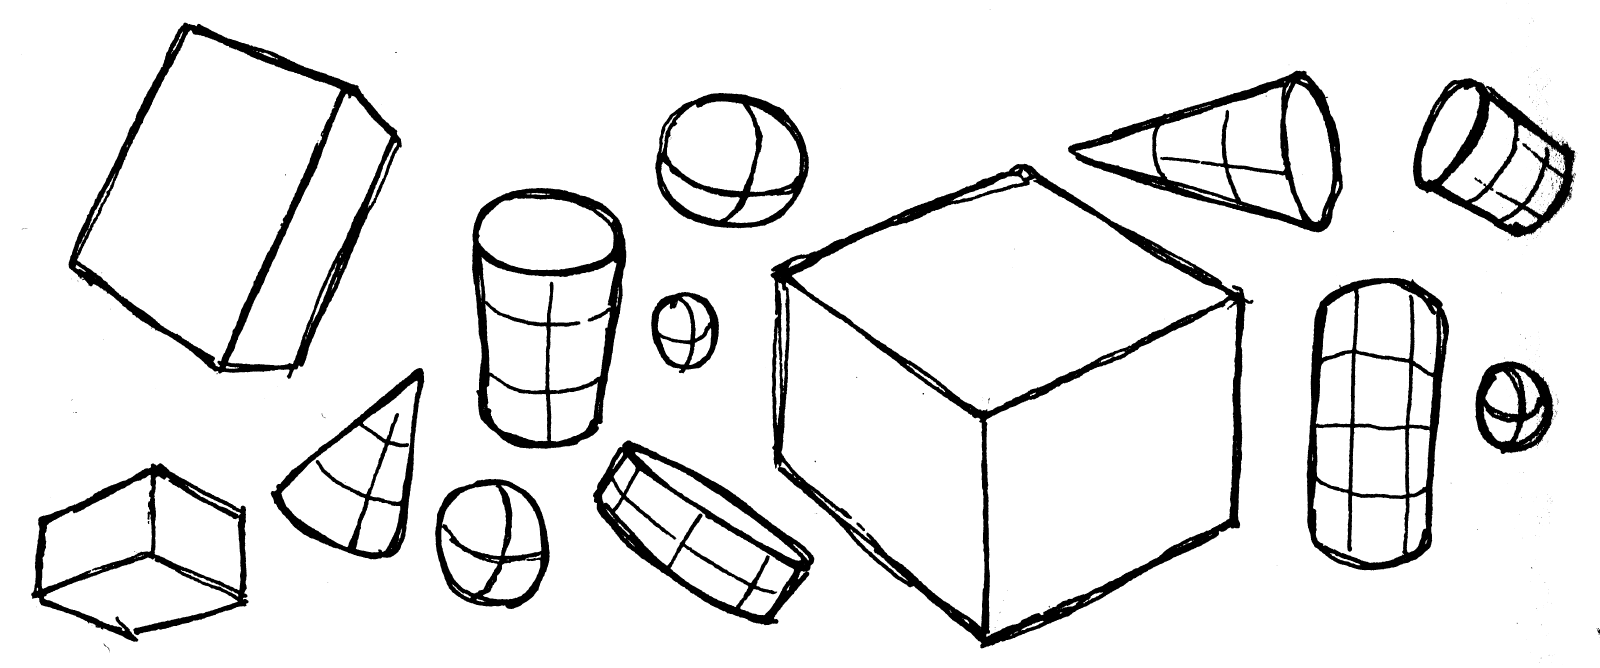
You can also refer to the practice sheets.
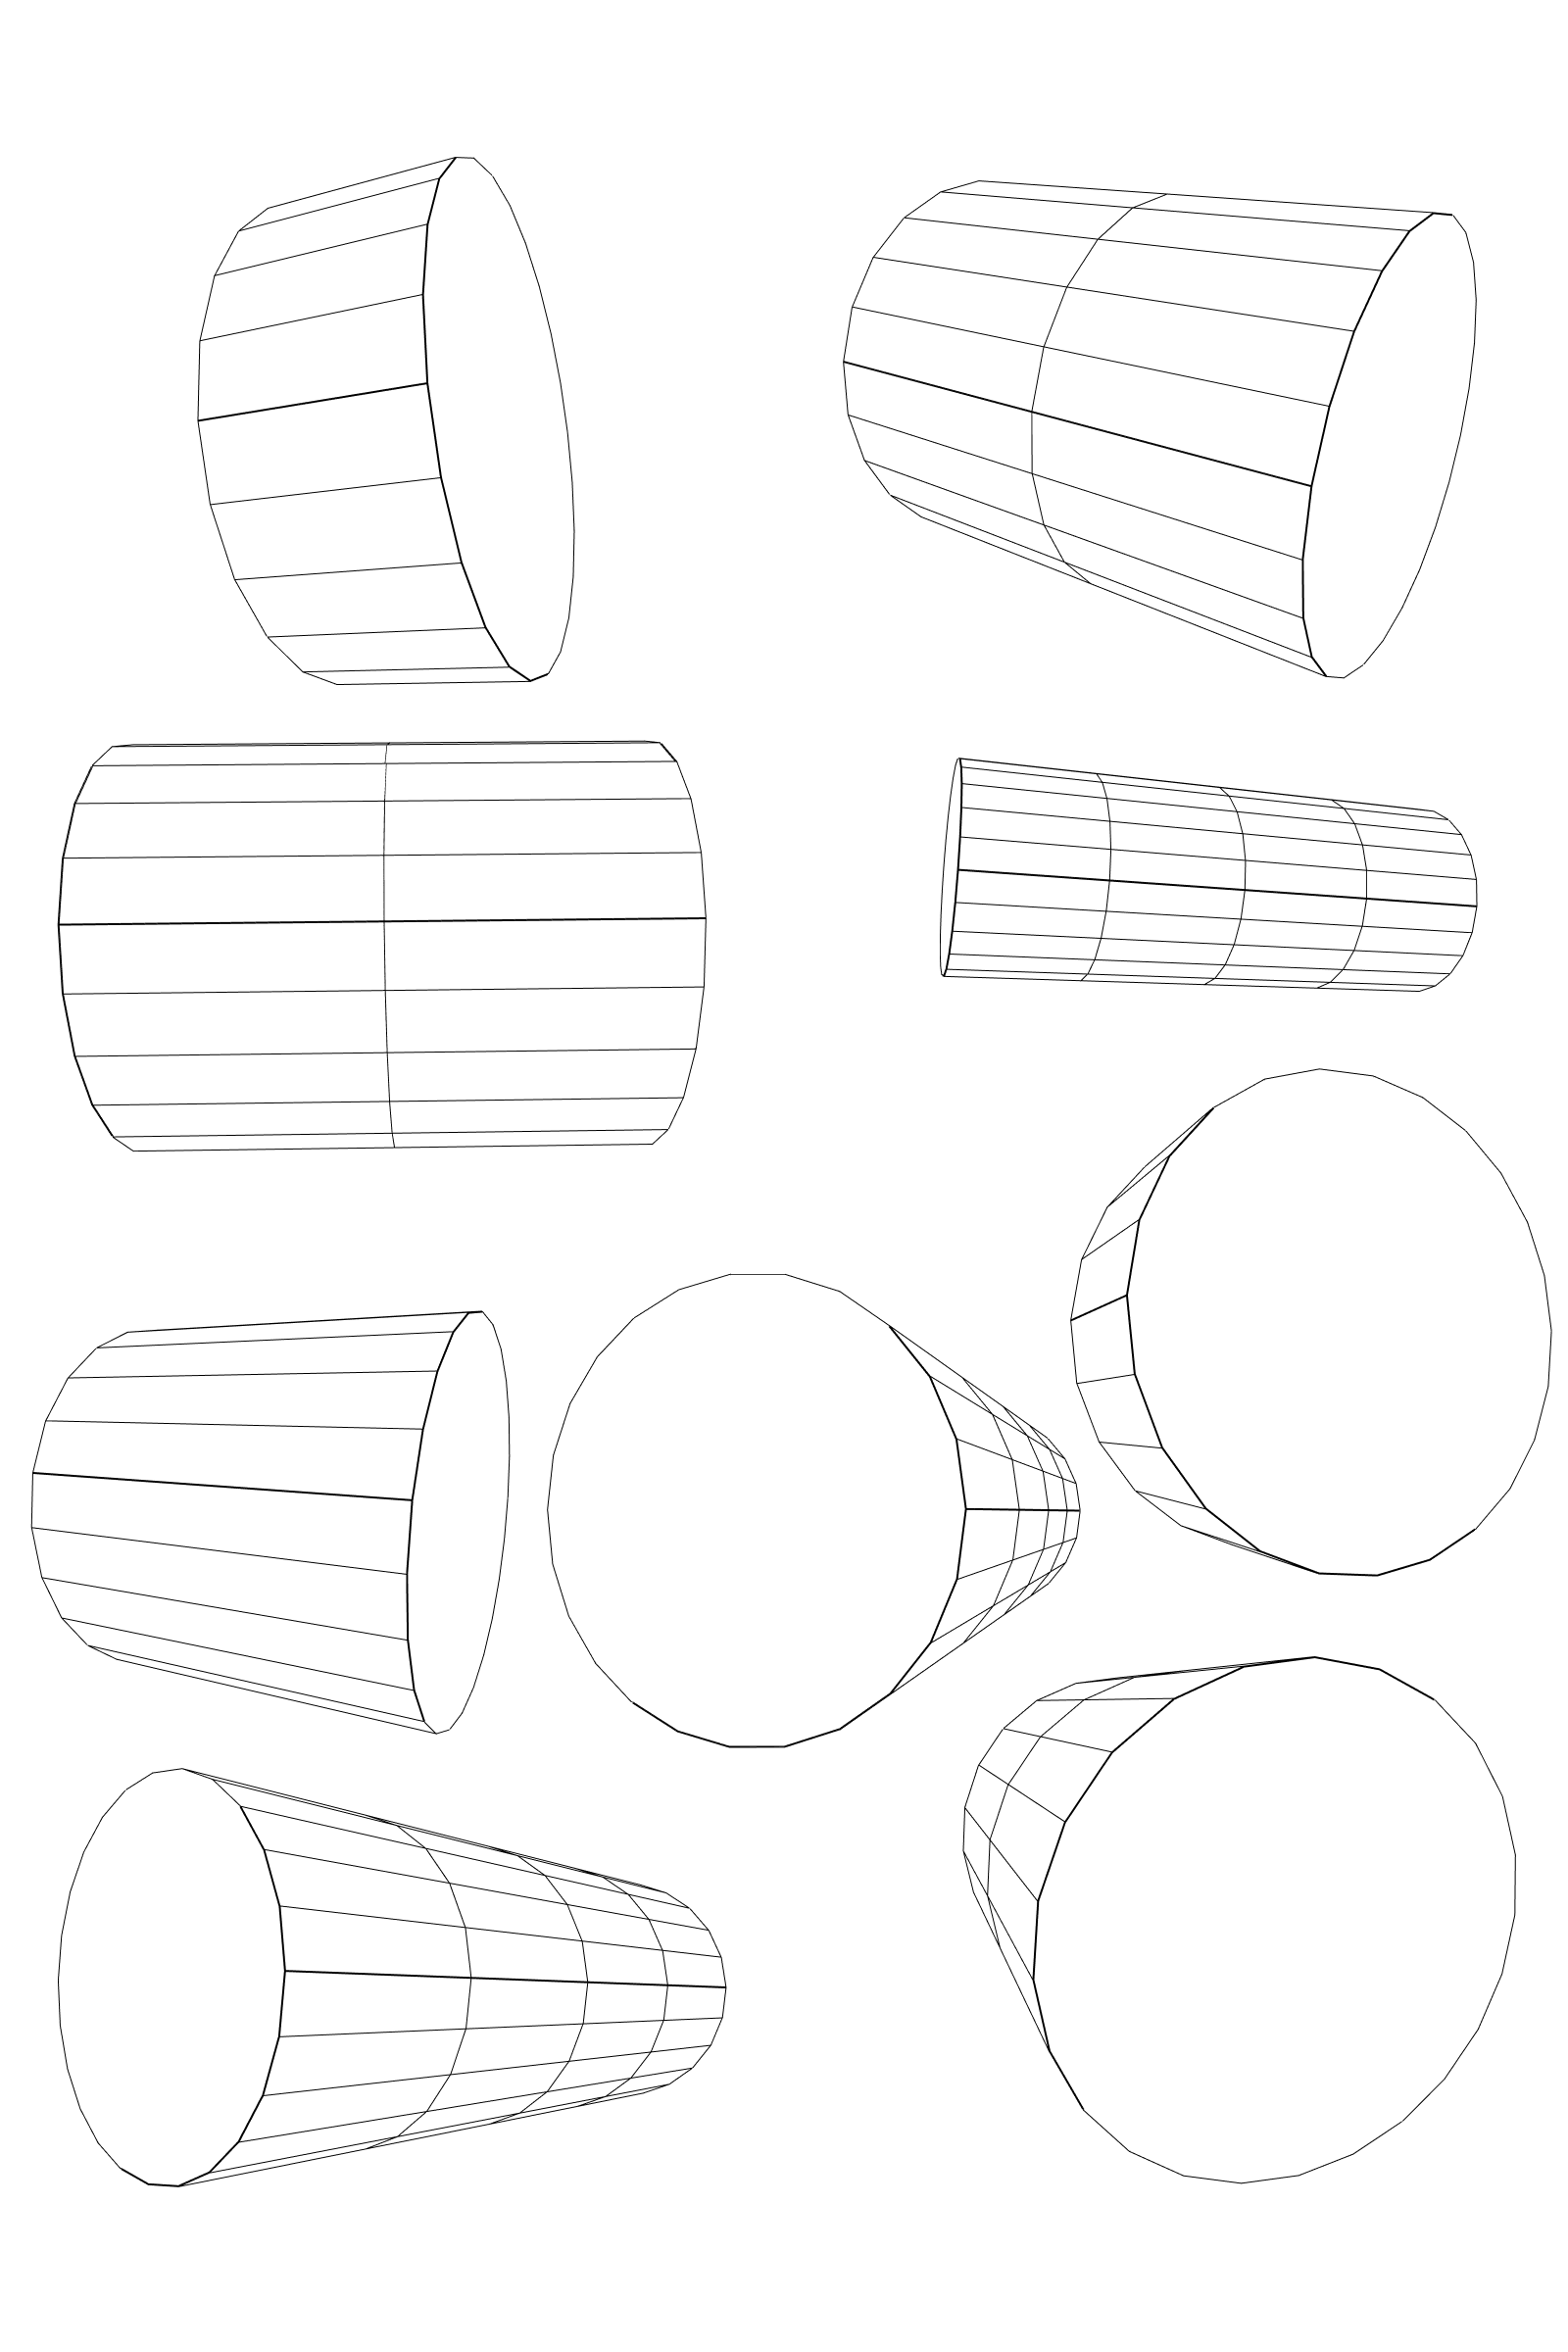 Warm-up reference primitive forms: cylinders.
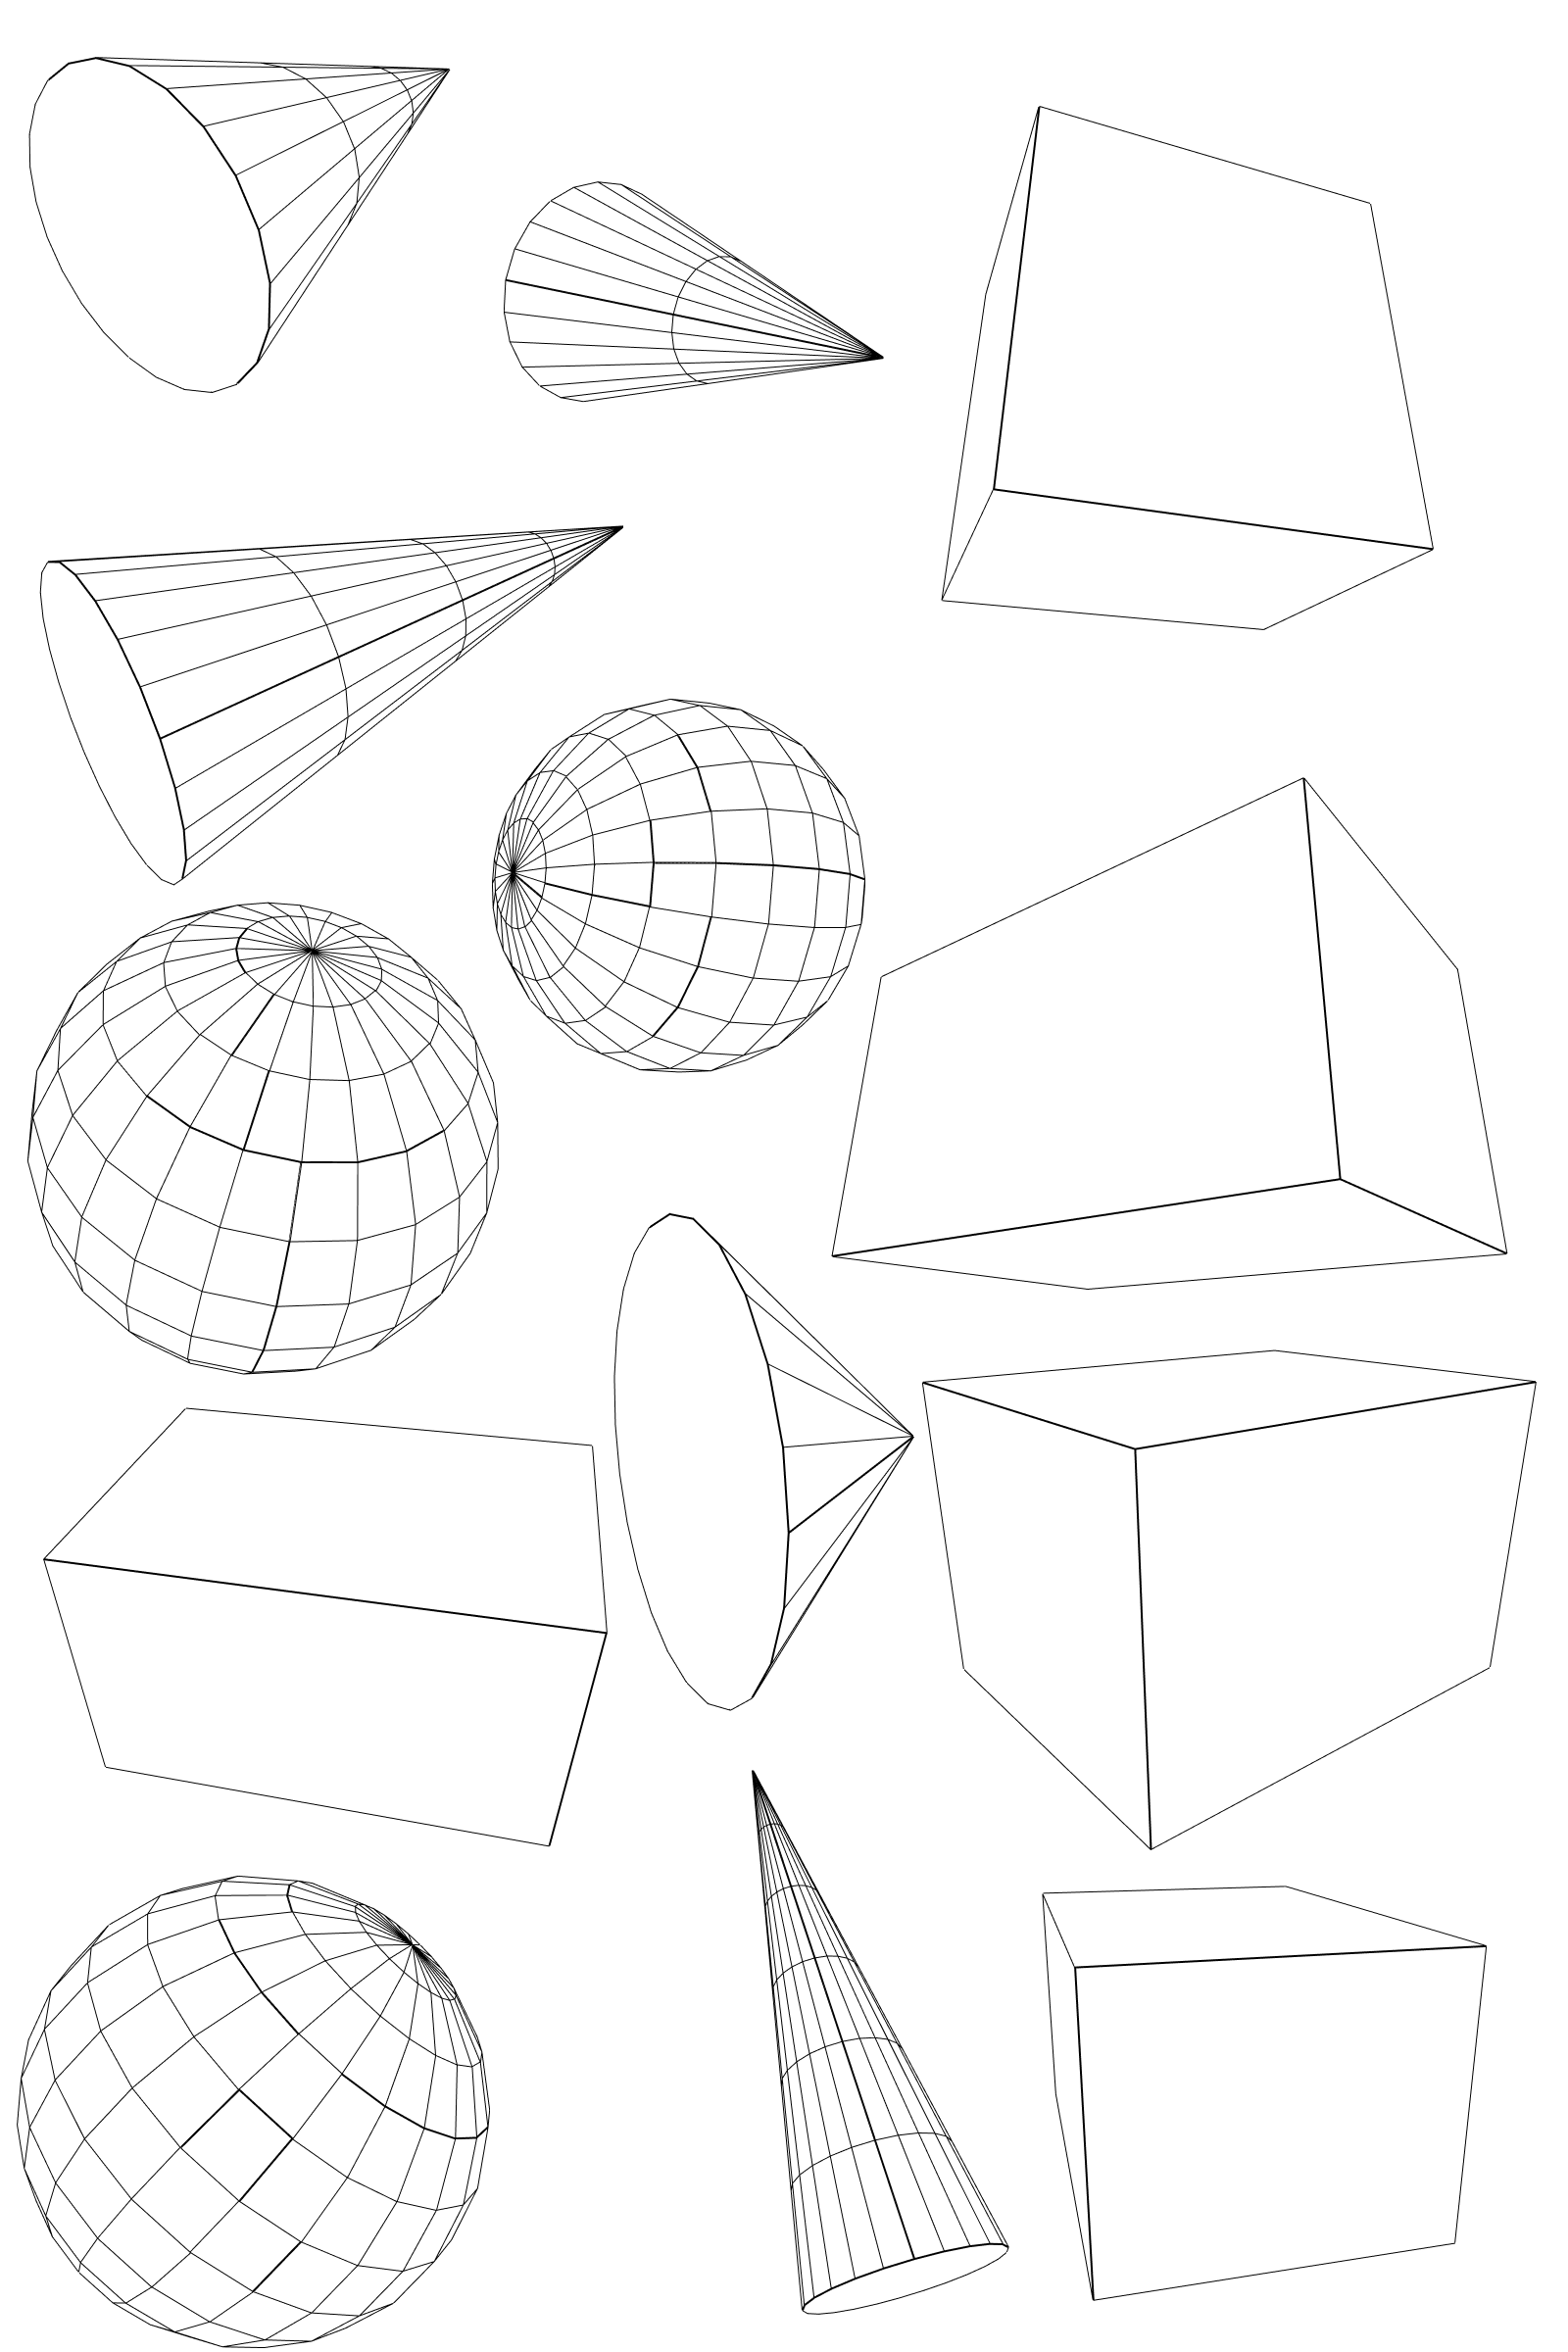 Warm-up reference primitive forms: spheres, cones, and boxes.
Memory Drawing
Now, do the memory drawing exercise with the reference image at the end of this assignment. Select one of the organically deformed primitive forms to memorize, or choose one here: practicedrawingthis.com/3d-models-indexTry to memorize them. Proceed to draw it in your mind, opening your eyes and noticing what you got wrong.
When you’re ready, draw it on paper from memory.
Then consciously correct, paying attention to what you got wrong. And then immediately drawing from memory again.
You did shape memorization in the previous warm-up and form memorization in this warm-up, and this is where we can start putting these exercises together: You can start by memorizing and drawing the shape outline first before going on to memorize the form. This is a valuable approach when tackling reference images of natural objects later. Studying the shapes helps you get a feel for proportions.
Keep drawing from memory repeatedly, correcting from observation using the reference image.
These exercises are, again, not about memorizing these specific shapes but about becoming better at recalling and projecting the image you want on paper and then drawing it accurately as intended.
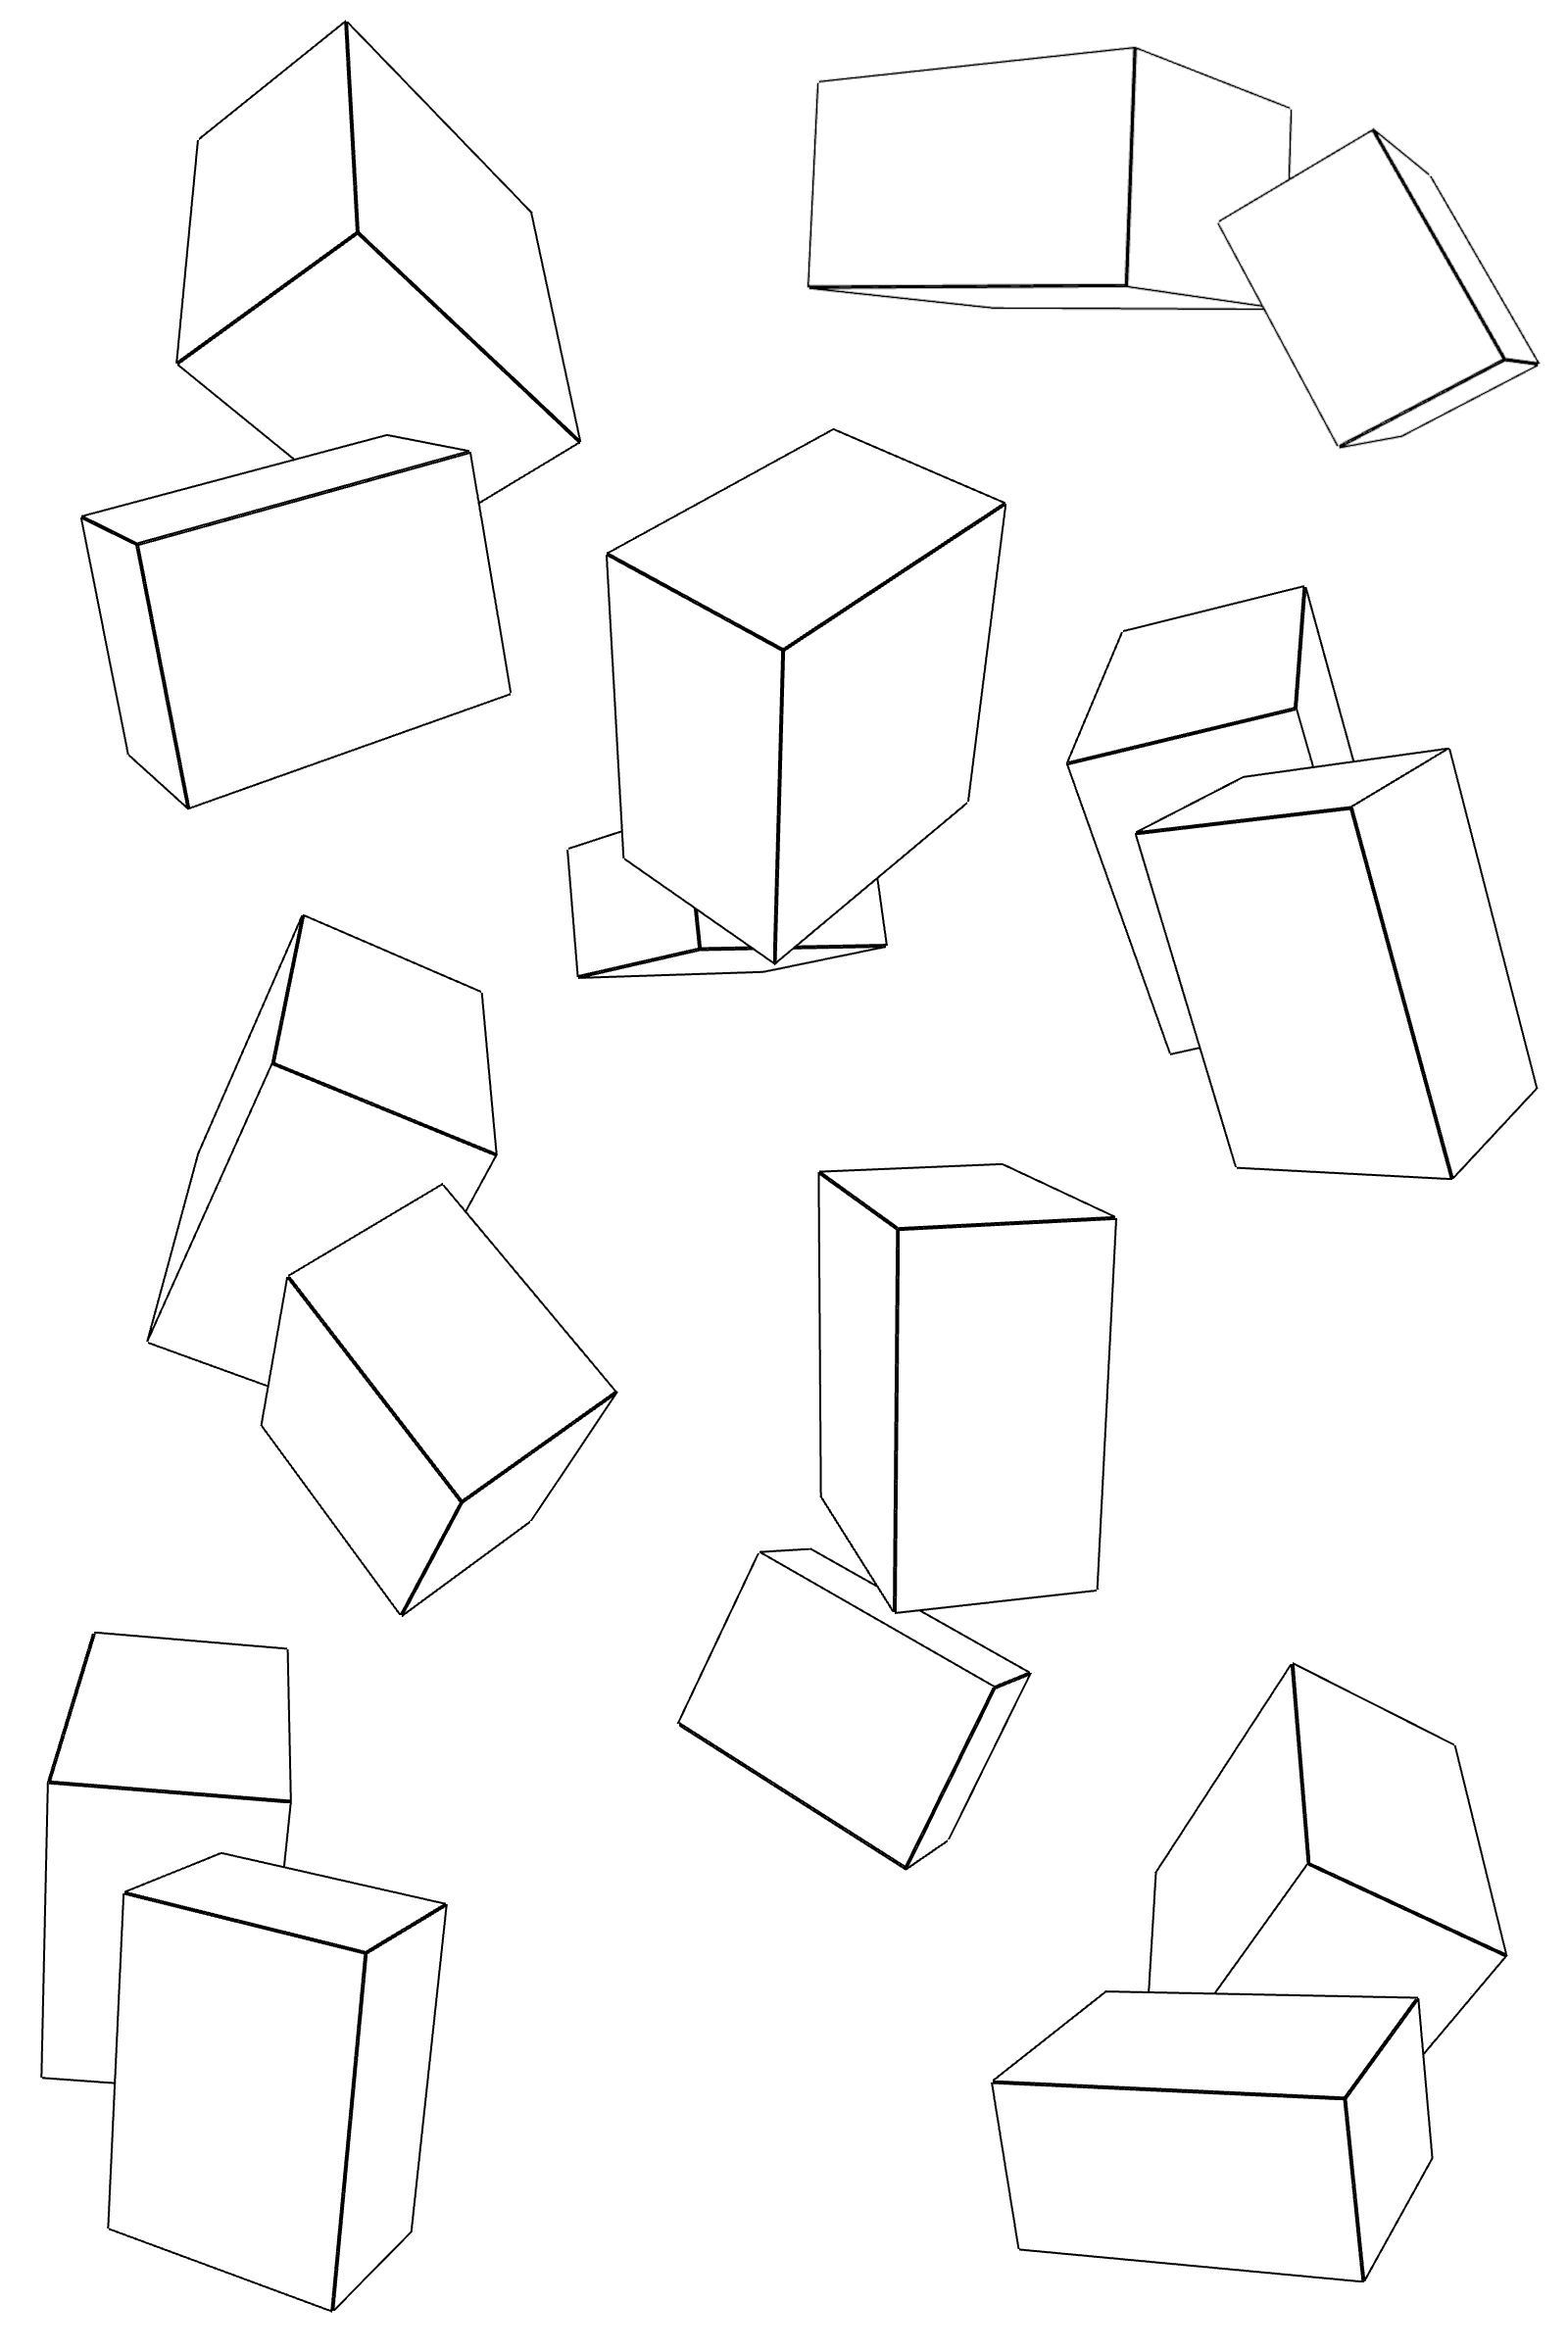 Two boxes.
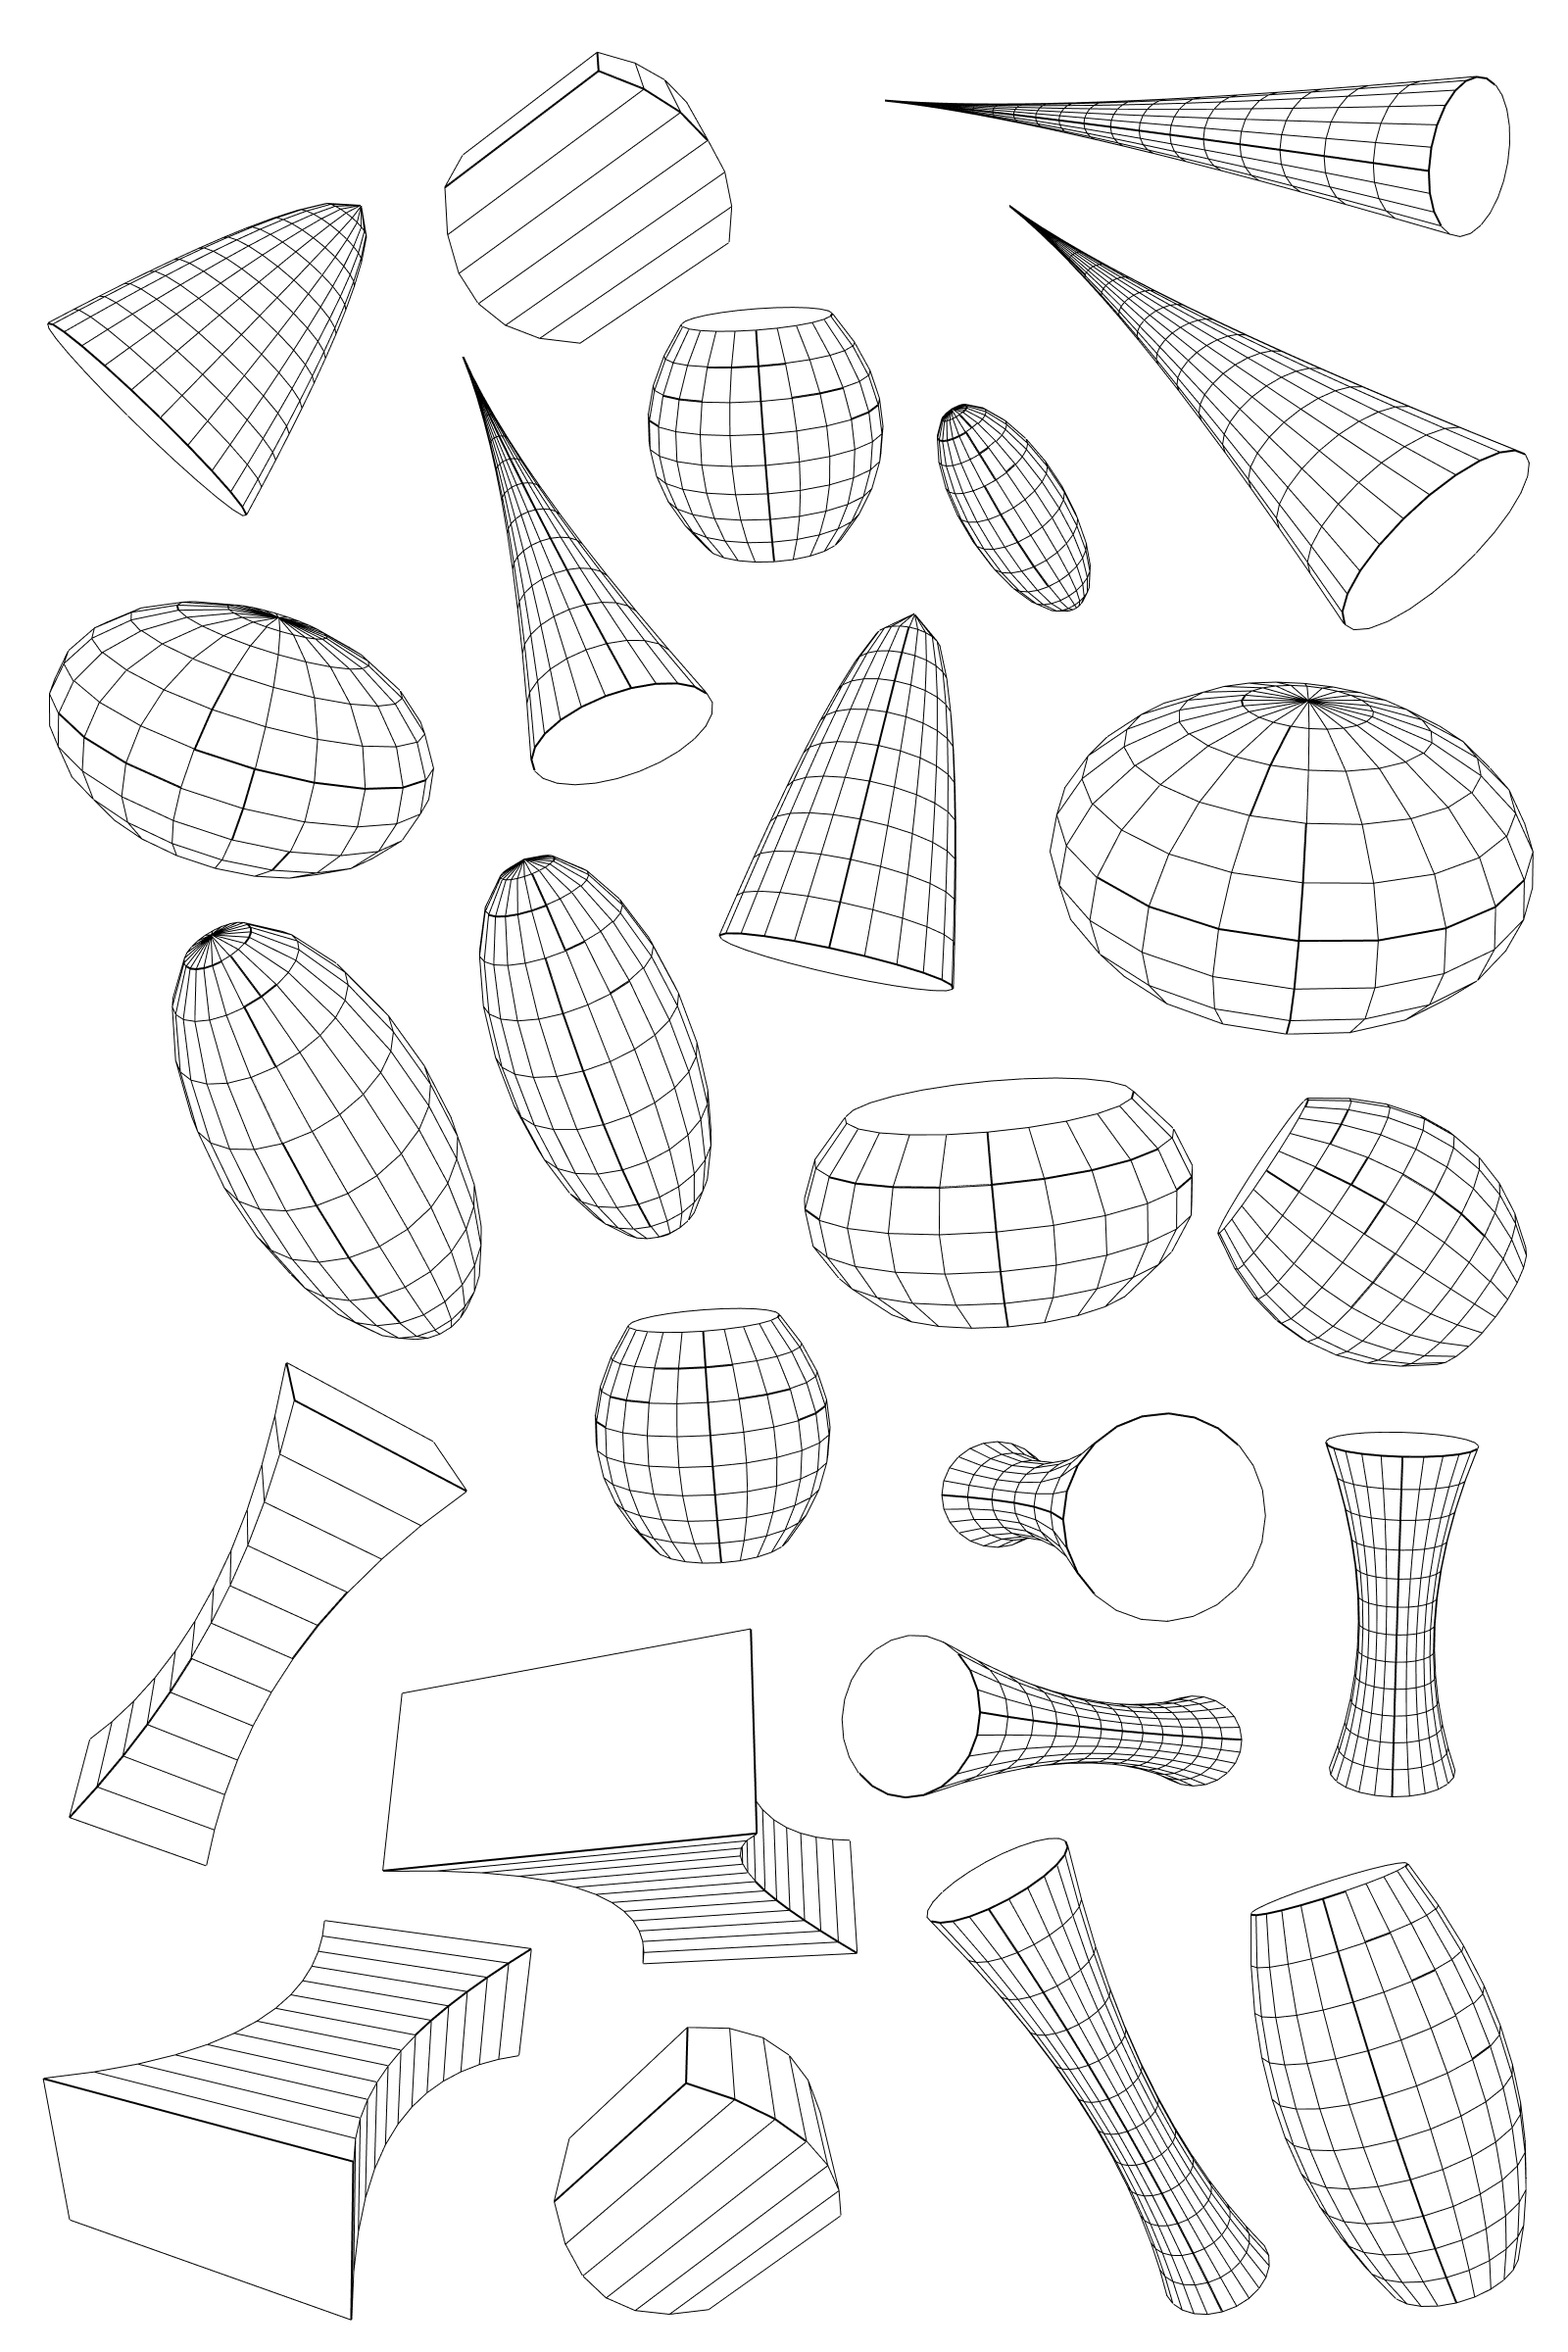 Stretched and squeezed primitive forms.
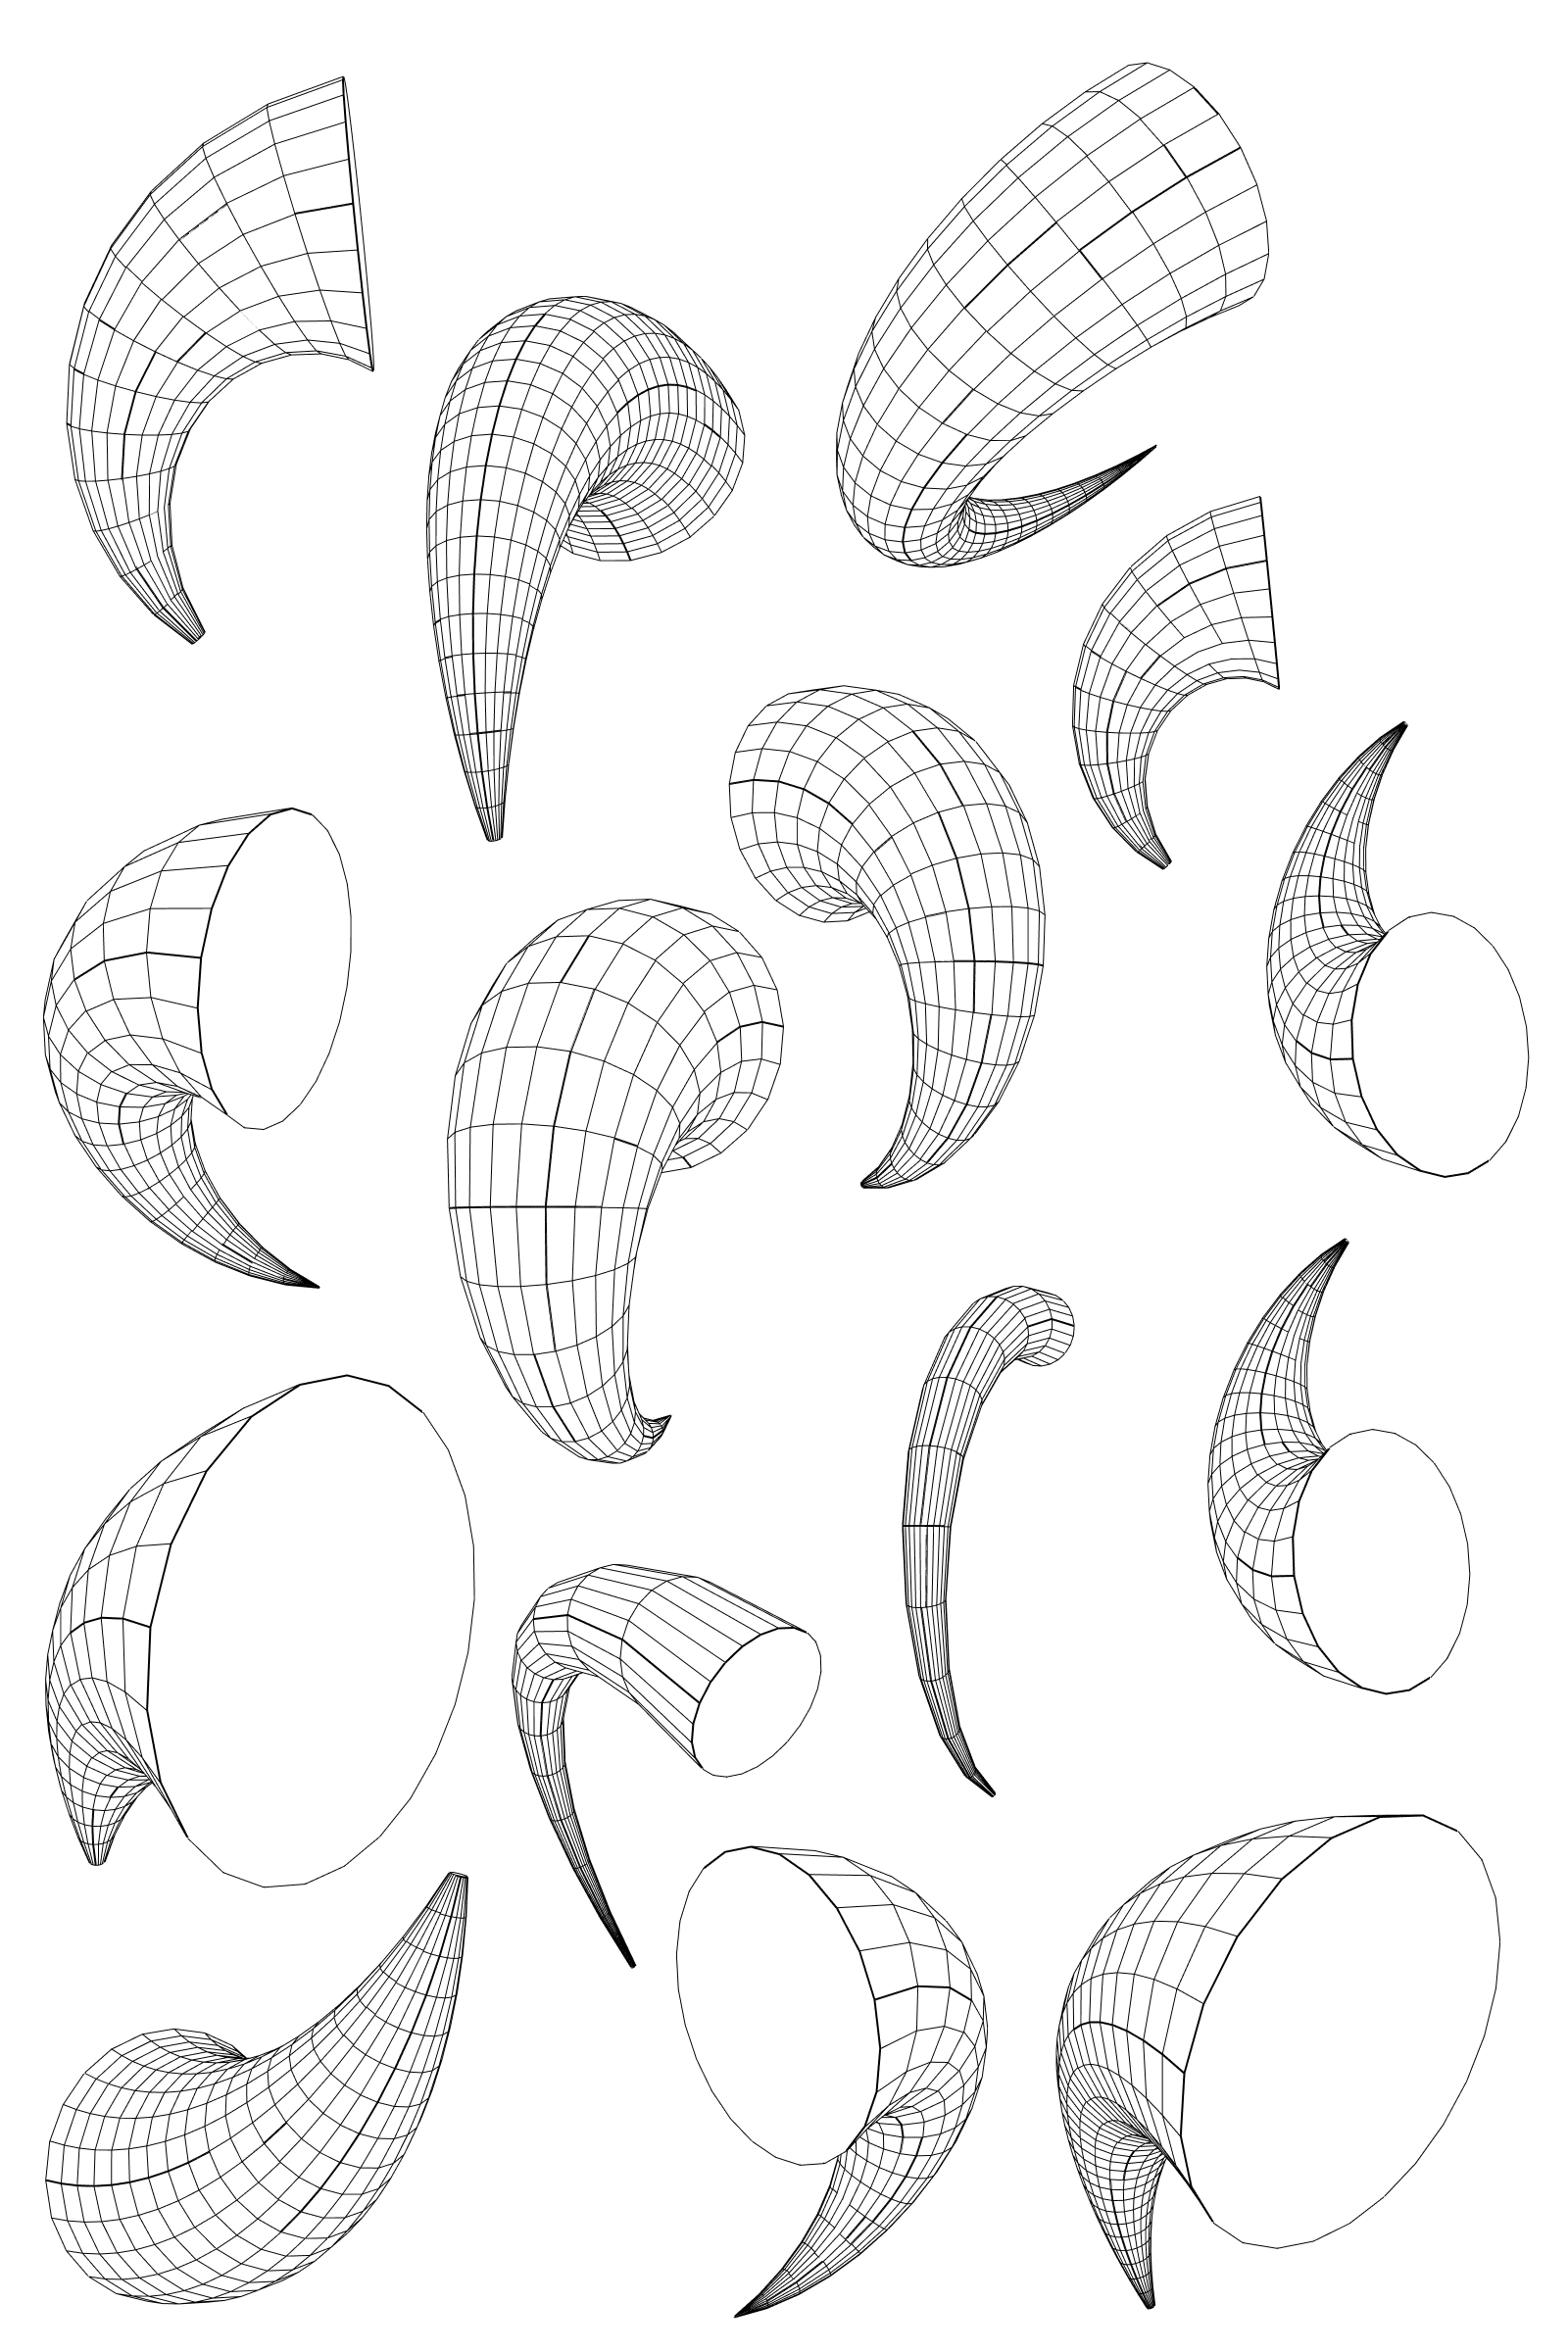 Bent cones.
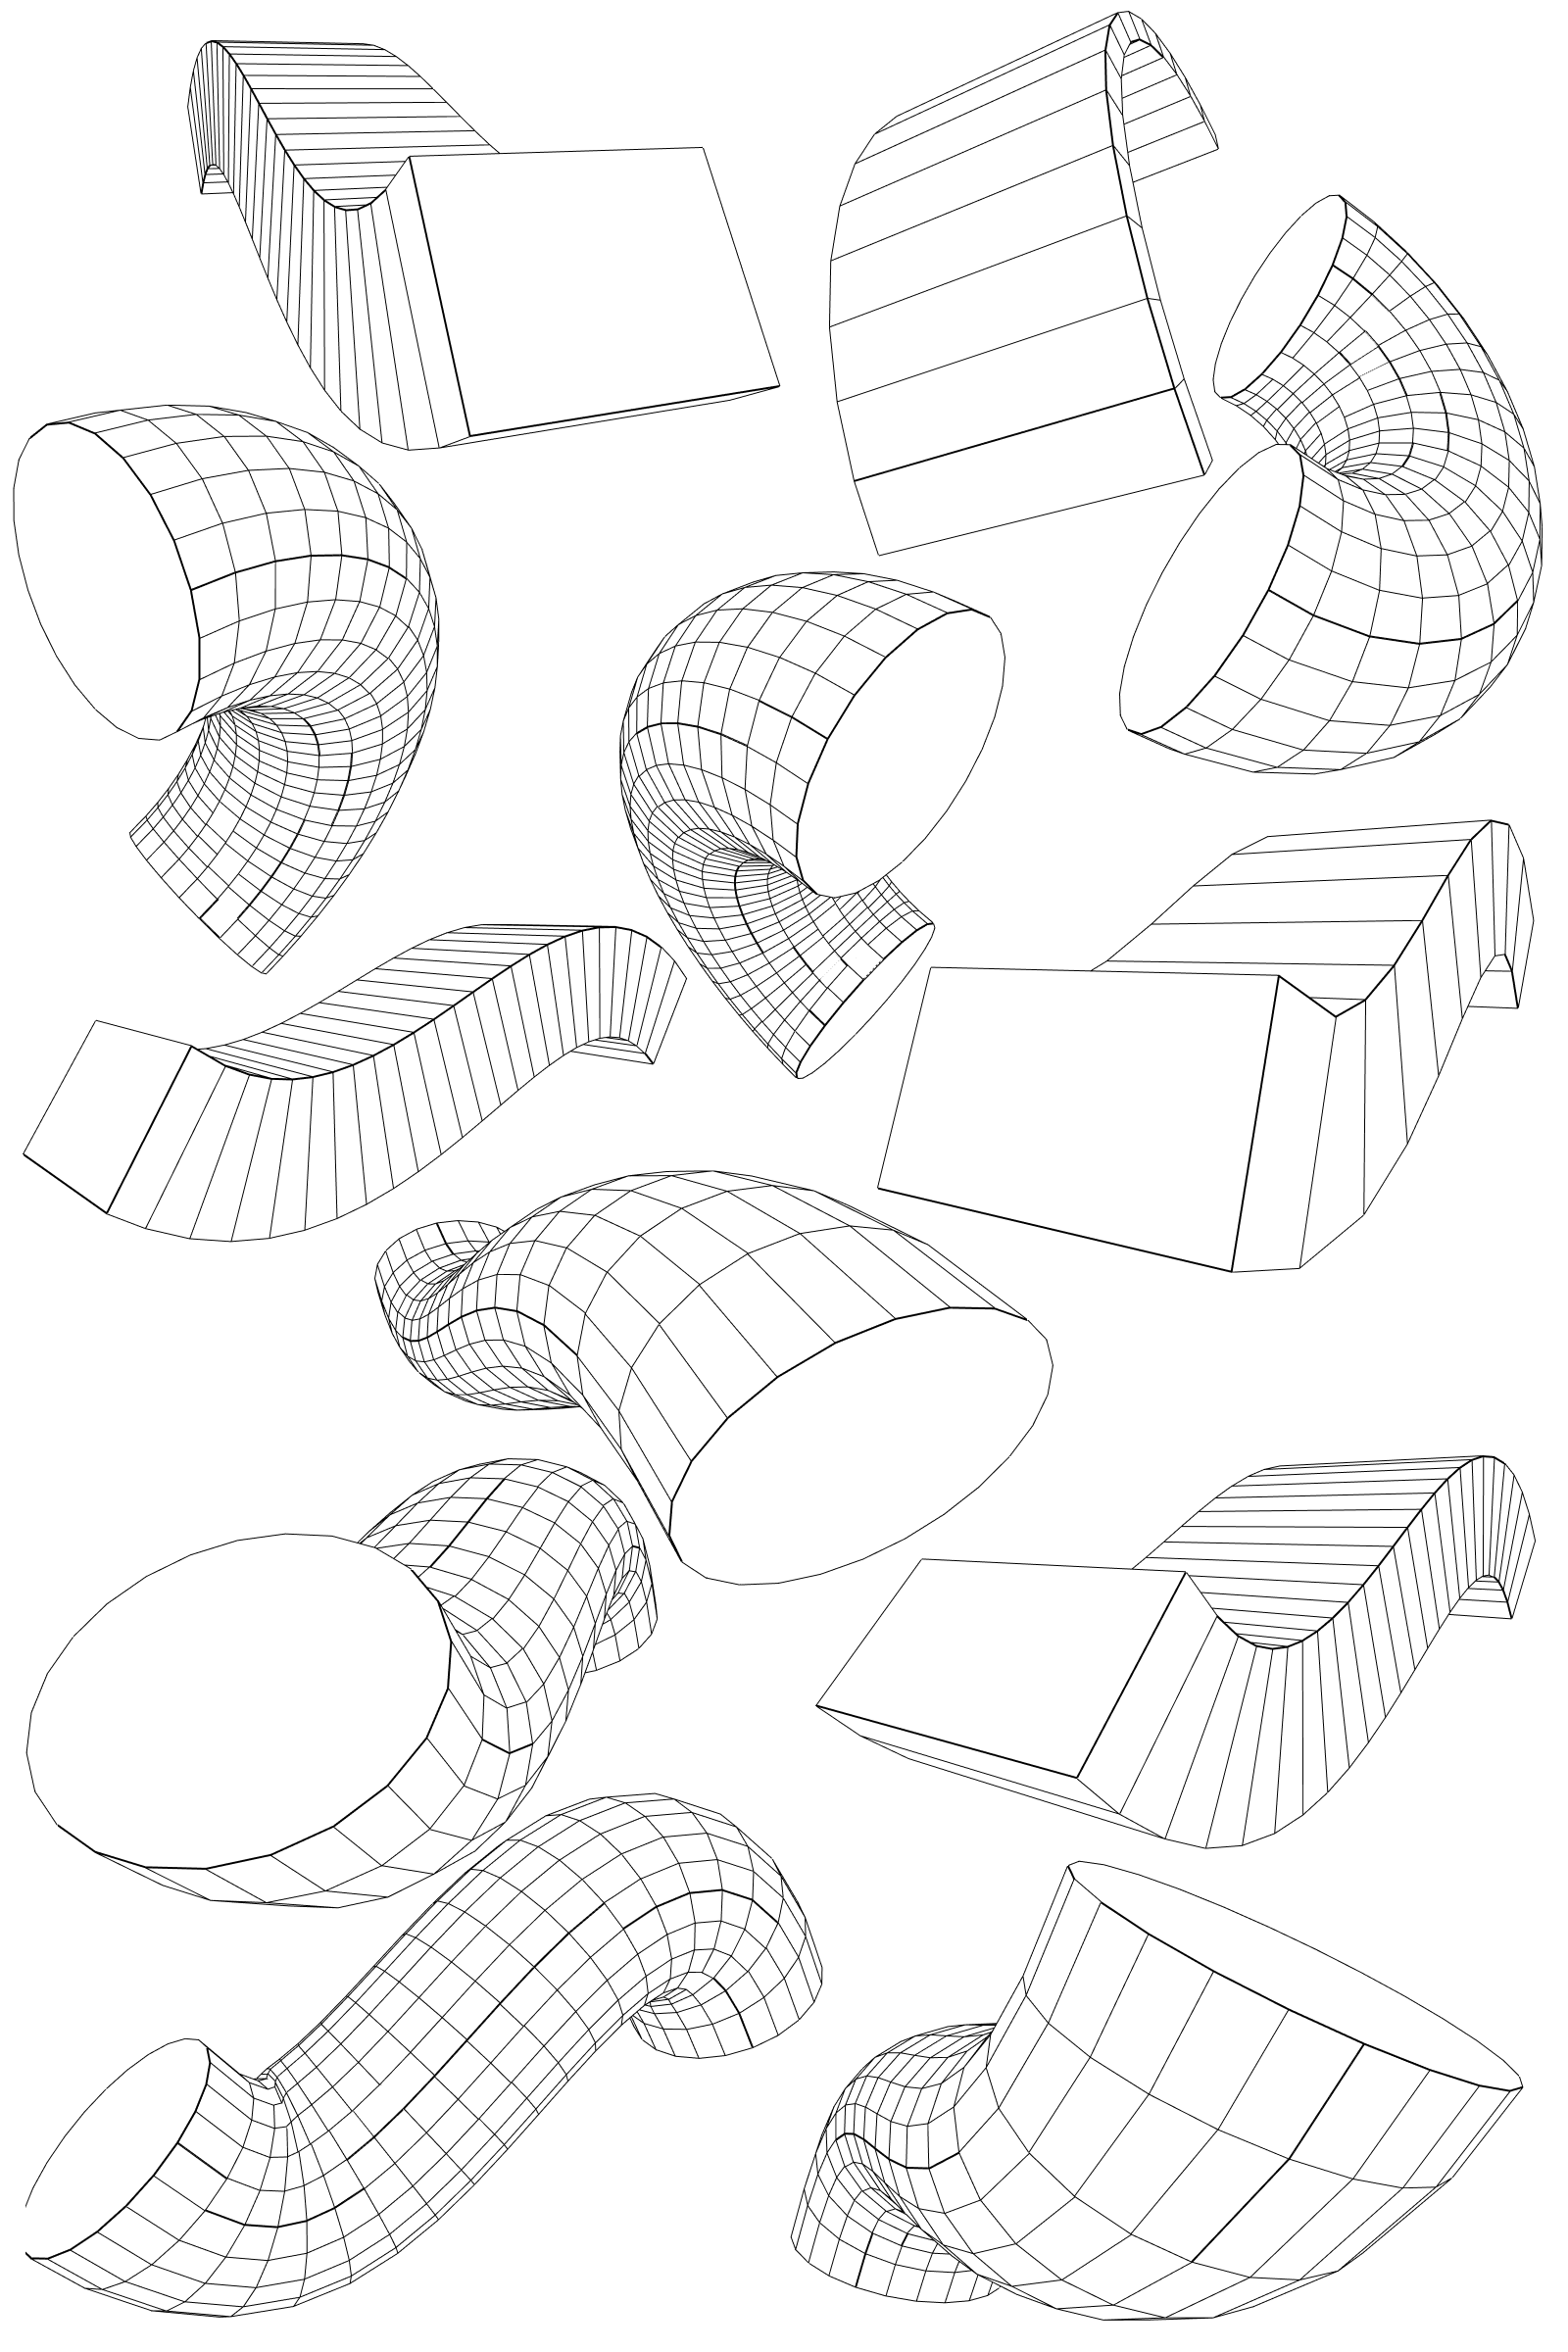 Bent forms.
INTERLUDE: When You Don’t Feel Like Drawing
There are days you may not feel like drawing. Here are some tips.
 My workspace after a decluttering session.
It is surprising how important it can be to have an uncluttered workspace. The clutter distracts your brain considerably. If you don’t feel like drawing, and your workspace is not ideal, clean it up and organize the space so that it is easy to do the right thing and hard to do the wrong thing. Have drawing tools ready, and remove addictive distractions like your mobile phone. Music, podcasts, a nice view outside, or pleasant sounds from outside can help and be beneficial. See this as part of your creative process, as doing something. You are investing in future drawing sessions, which will be much better and more pleasant.
Looking at art by artists you admire makes you want to draw, so surround yourself with books with that art and posters that showcase that art. This is a very personal exploration. Choose artists who inspire you the most. After doing the exercises in this course for a while, you will start to appreciate the results, and as you flick through the pages of your sketchbook the next day, you’ll be more likely to feel like drawing as your art will inspire you.
If you don’t feel like drawing, collect photos online and take pictures with your mobile during the day. Get into the habit of collecting striking images so you have a library of images to do memory drawing exercises from. I won’t always be there to provide you with reference images! You may prefer to go in a different direction visually.
A unique form of reference collecting is memorizing something you see during the day and drawing it from memory the next day or later in the day. You’ll find that you are more free to augment what you memorized with imagined details as it was recorded in your mind much earlier. And this is a form of drawing you can do when you don’t have drawing tools with you! Close your eyes and draw it in your mind while standing before it; open your eyes, notice things you got wrong, and try again. People won’t see that you’re drawing in your mind. Then, draw it on paper the next day.
4. Gesture
For today’s exercise, you don’t need to warm up first, as this drawing exercise is a warm-up in its own right: we’re talking about gesture drawing! You might already know this exercise, but I’ll add a twist: you are to draw it from memory.
What is gesture drawing?
Gesture drawing is about quickly noting a pose in one to three minutes.
In model drawing class, you often start with a few quick poses. This serves as a drawing warm-up, and it gives you a chance to study many poses in a short time.
It is also a great way to create dynamic poses because you draw loosely. That looseness allows you to give poses that extra punch.
Lastly, it is also a lot of fun!
The Exercise
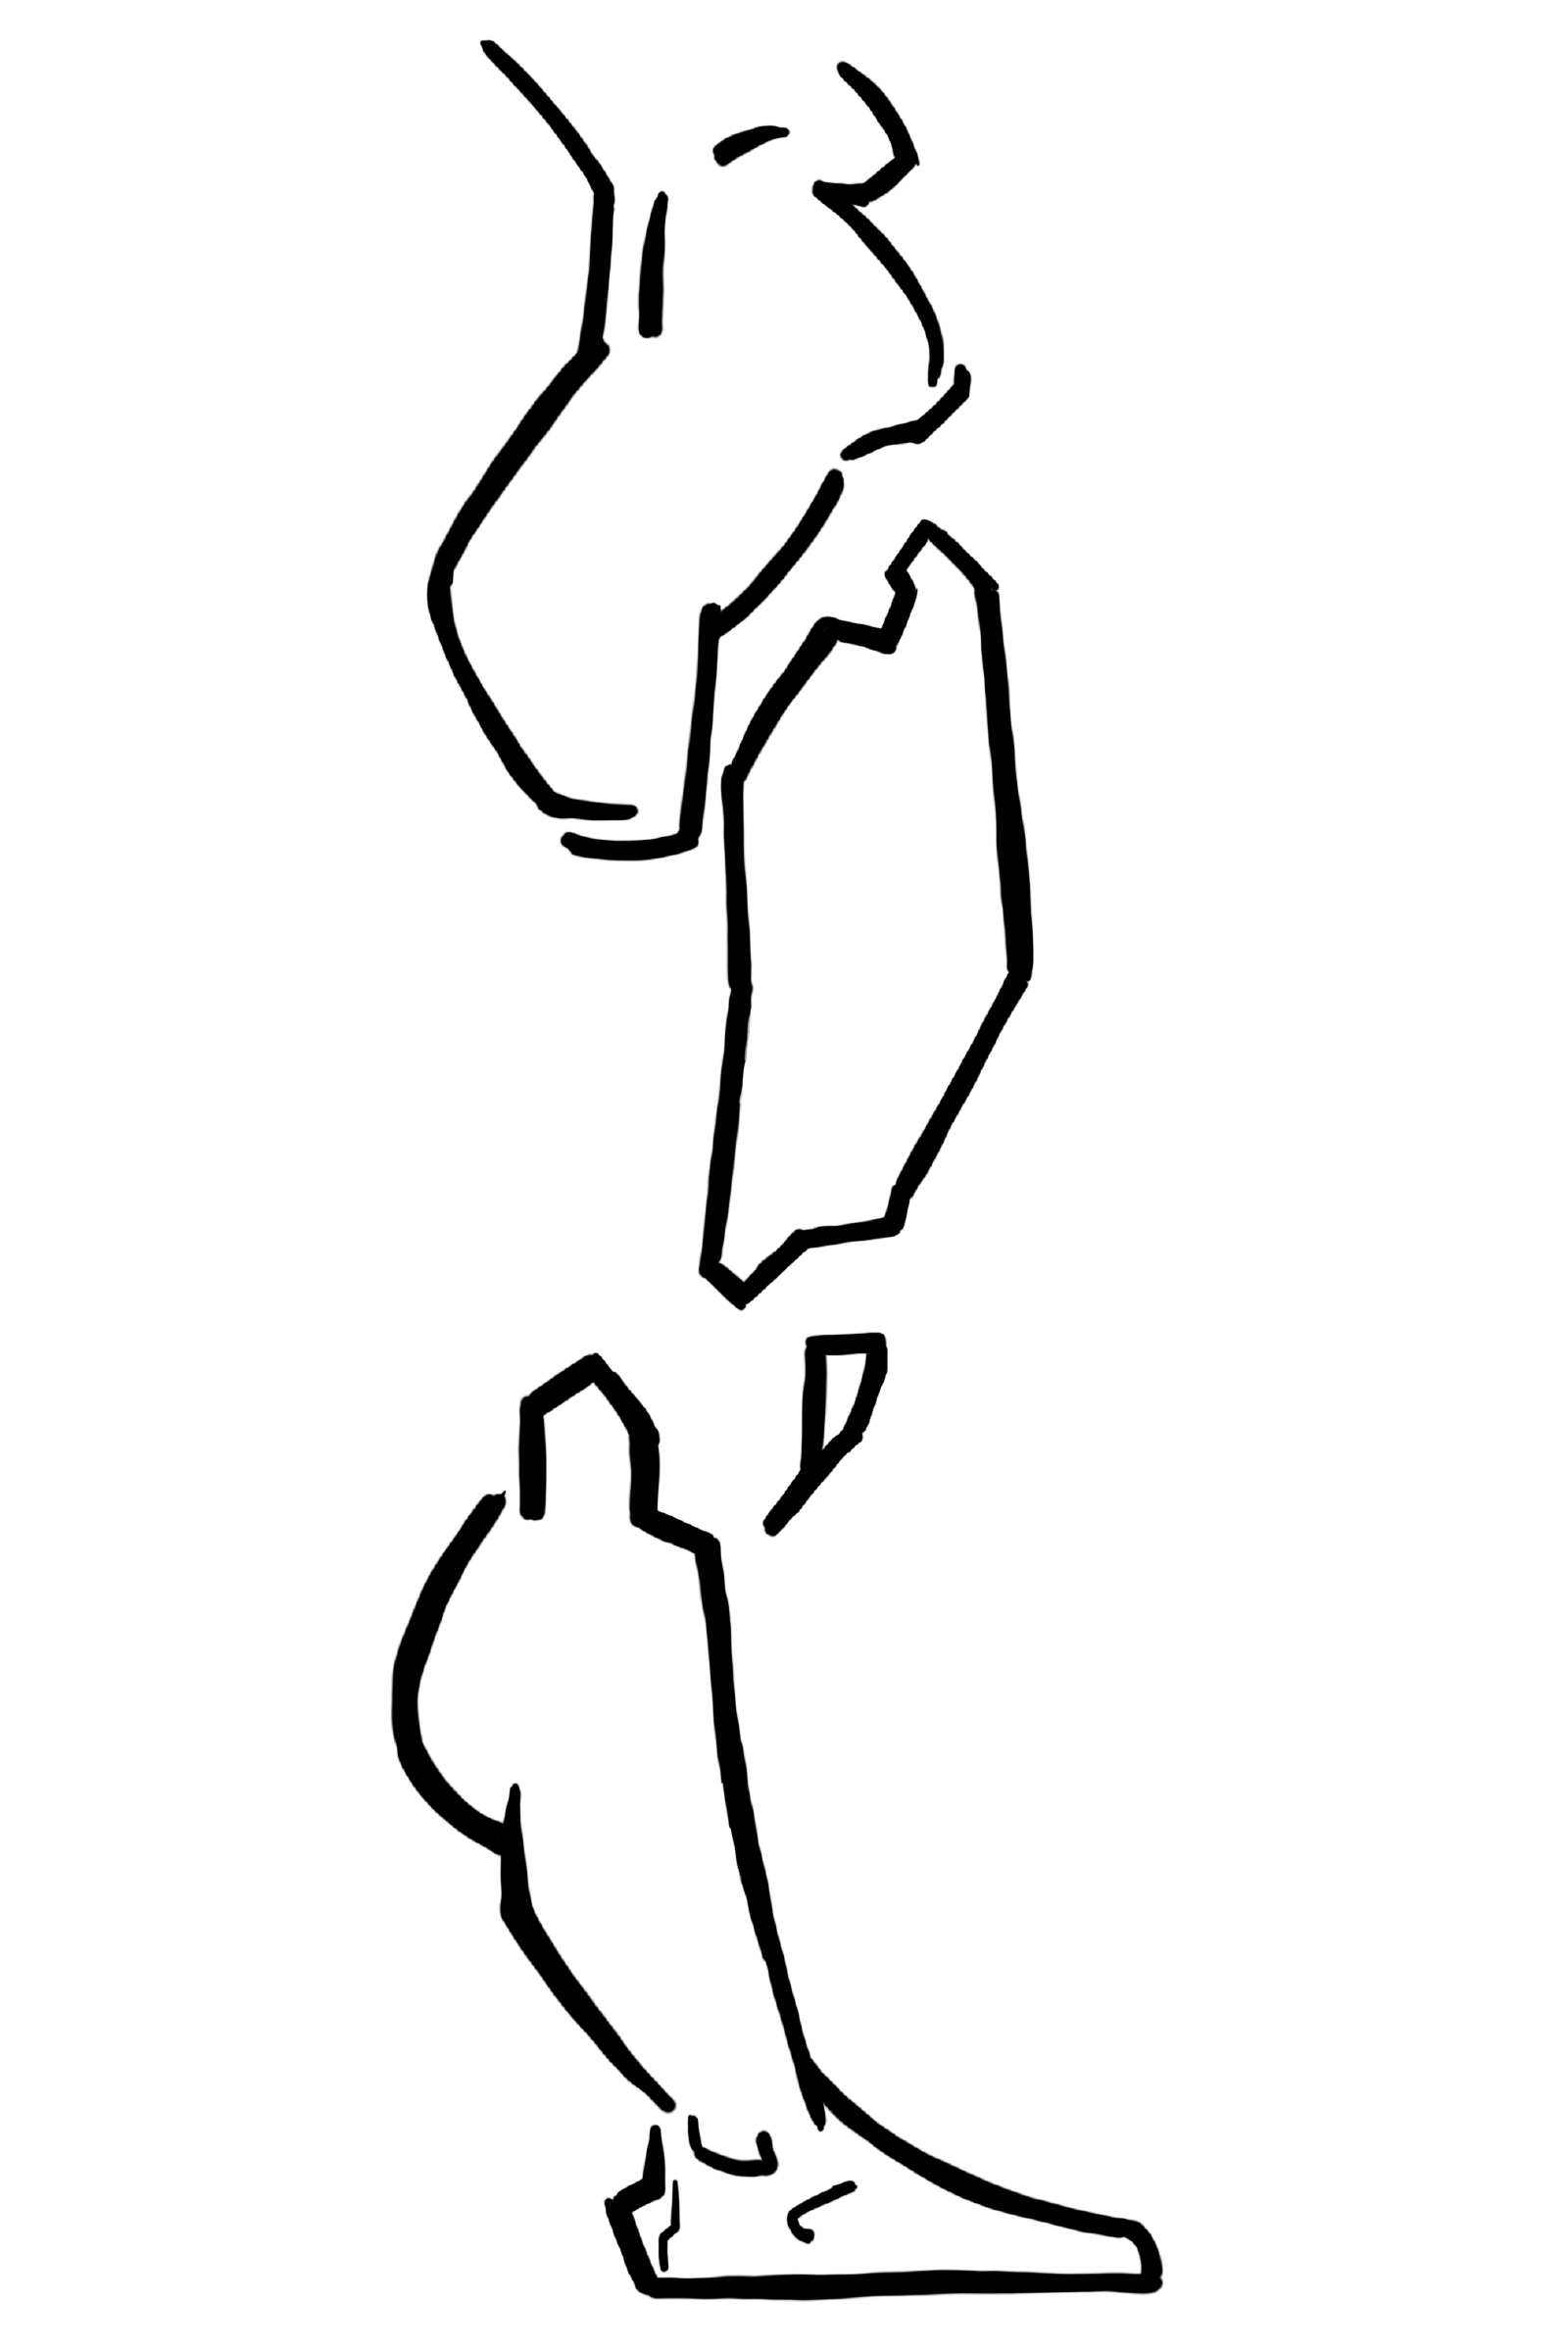
To start, you need a model to look at. This can be at a model drawing class, but there are now many places online where you can look up posed models to use for drawing reference. You can also do gesture drawing exercises based on existing art. Many Heinrich Kley illustrations at the back of this document are excellent reference material for gesture drawing exercises.
If you look around you, almost everything has a gesture: inanimate objects, but also animals, plants, and trees.
Try to exaggerate the poses. It is not about the anatomical correctness of the drawing but rather about creating and noting down expressive and dynamic poses that can tell a story.
Gesture drawing is a great warm-up and a way to create dynamic poses. Find reference photos of people in action or dynamic poses and make many quick sketches based on the reference images. Try to exaggerate the poses. It is not about anatomical correctness but noting down dynamic poses. Don’t spend a lot of time on each. Instead, do many.
Consider and exaggerate the movement inside the body (the “line of action”). Make the whole pose serve this one line of action, and the pose will feel coherent.
See how the chest and hip form one contorted volume and exaggerate that.
The chest and hips are connected through the spine and, together with the belly, can be considered one bendable volume. Try to draw them as one thing, a bean or a deformed sack of wheat.
Also, one of the first things to draw, or at least note, is the angle of the shoulders relative to the angle of the hips. Note them with a quick line.
Don’t fill in the facial features. Chances are, you are drawing too small to get them right anyway, and you will feel it is a failed drawing. Focus on the pose instead. Keep the head simple: an ellipse or maybe a bent cylinder, and perhaps draw a central line where the nose would go and a line where the eyes would go to indicate the direction the head is facing. That’s all you need to note down the pose, as far as the head goes.
Ensure the head and feet are positioned so the model would not topple in real life.
Also note the relative positions of the hands, elbows, knees, and feet. It helps you construct the pose correctly. Position the torso first, though. Then the head, then the arms and legs, and lastly the hands and feet. A fun exercise is drawing the hands and feet before the arms and legs.
Don’t spend a lot of time on each. Instead, do many. If you can’t resist the urge to keep drawing the same pose, you can use an alarm clock to tell you when to move to the next pose.
Look at the Heinrich Kley illustration you chose today and try to memorize the gesture.
Then, draw it from memory. Feel free to exaggerate the pose or to deviate from “proper” proportions.
A note on “proper” proportions: there is no such thing. No two humans are alike; no human has “average” proportions. You’re far better off feeling the right proportions and playing with them. It will be more fun, AND it will yield better results.
Also, try to draw it from memory from different angles. Imagine the pose before and after this one, and draw that, too.
When rotating, instead of trying to recreate the pose accurately—and we can’t because the reference is likely missing information—start with a line of action instead and try to make a similar, believable, pleasing pose.
Feel free to look up additional poses in other places to continue doing gesture studies, but now it’s okay to draw them from observation.
5. Shapes II
Dexterity
Start with the following warm-up: draw two parallel lines approximately one inch apart. Now, draw parallel lines that start precisely on the one line and end precisely on the other line.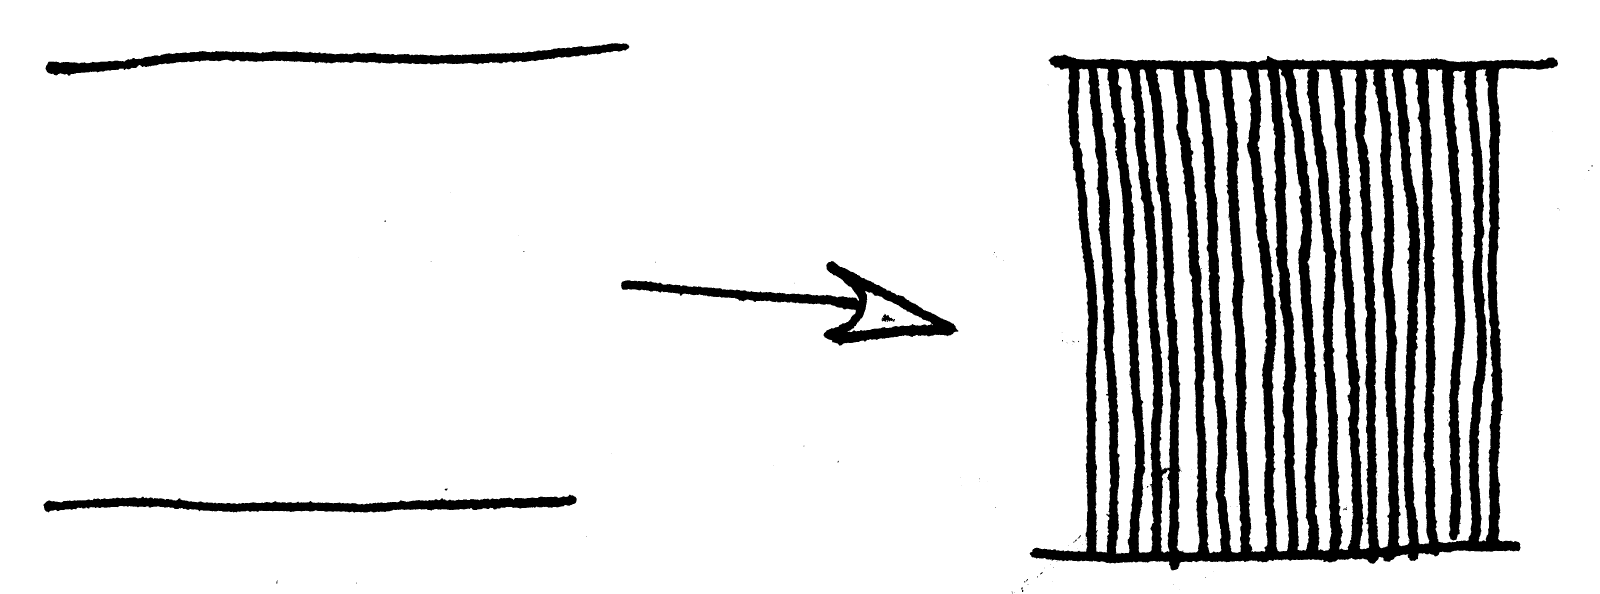
As you try to draw parallel lines, draw them straight (obviously), look slightly ahead of your pen as you draw, but also make it the most important thing that new lines are equidistant to the line next to it everywhere. Consider lines as related to the lines already on the page.
If you feel resistance against drawing, keep drawing these until you feel the resistance fading and start to get into the flow. You’ll know when you’re ready to go to the next step.
Memory Drawing
Warm up as necessary, then look up a Heinrich Kley reference image for the day in the back of this document and draw the shapes you see in the reference image from memory.At this point, you can also draw the reference from observation to better understand it. Drawing from observation forces you to look more carefully. The end goal is to have pleasing sketchbook pages you are satisfied with. But do try to aim to be able to draw it from memory.
When drawing complex things like hands from reference, it can help to draw the outline and the shapes first. This bypasses what you think you know about the subject, and you start drawing what you see. The abstract shapes are also often what makes a visual beautiful.
6. Forms II
Dexterity
As a warm-up drawing exercise, first, draw a curved line on the page.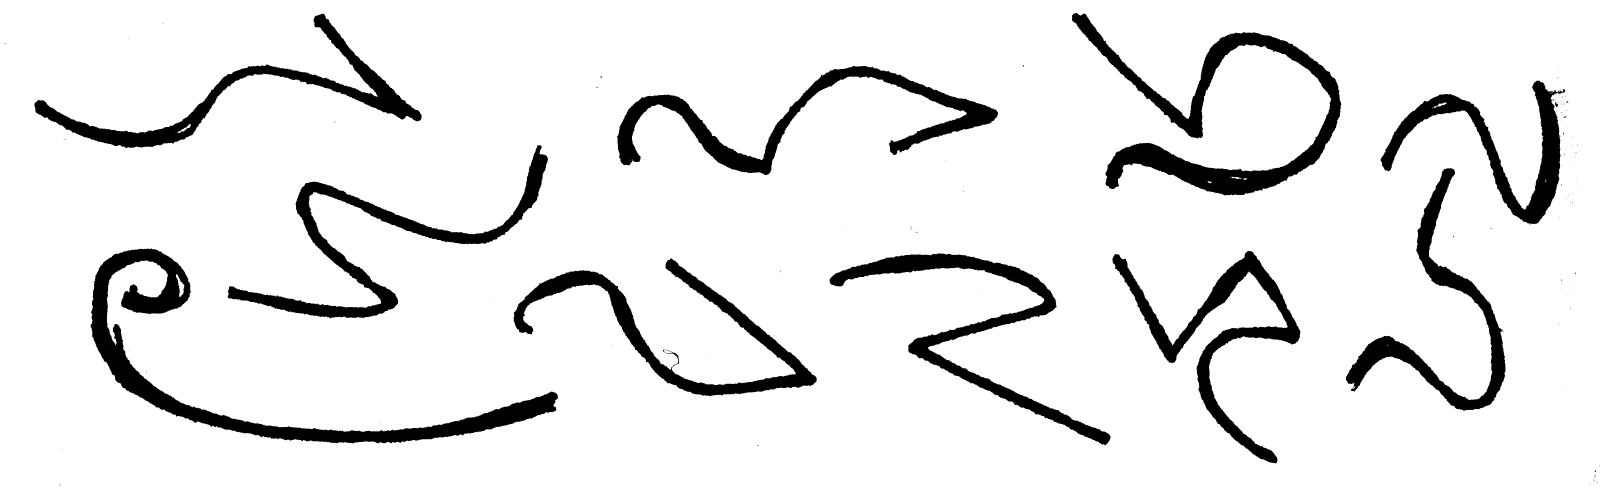
Now trace over it with a pen. It helps to focus on where the pen will be a second later. Draw slowly and carefully. Trace repeatedly over the same line. Hold the pen or pencil some distance from the tip so that you “paint” more than you “write.”
Draw slowly and carefully; try to see the line ahead of your pen or pencil as you draw it.
Place more curved lines and repeat the process, tracing over the curved line with your pen. If you feel resistance against drawing, keep drawing these until you feel the resistance fading and start to get into the flow. You’ll know when you’re ready to go to the next step.
You can also informally do this with curved lines in your drawings while drawing from observation or memory.
Memory Drawing
After your dexterity warm-up, look up a Heinrich Kley reference image for the day in the back of this document and draw the forms you see in the reference image from memory.Draw simplified forms and cross contour lines that suggest the underlying form.
You can use more complex forms, but don’t go overboard. The image will be stronger if the forms are simplified and if they read well. This is what they mean when they say everything can be broken down into primary forms like boxes, spheres, cylinders, cones, or pyramids. Simplify the reference to primitive forms.
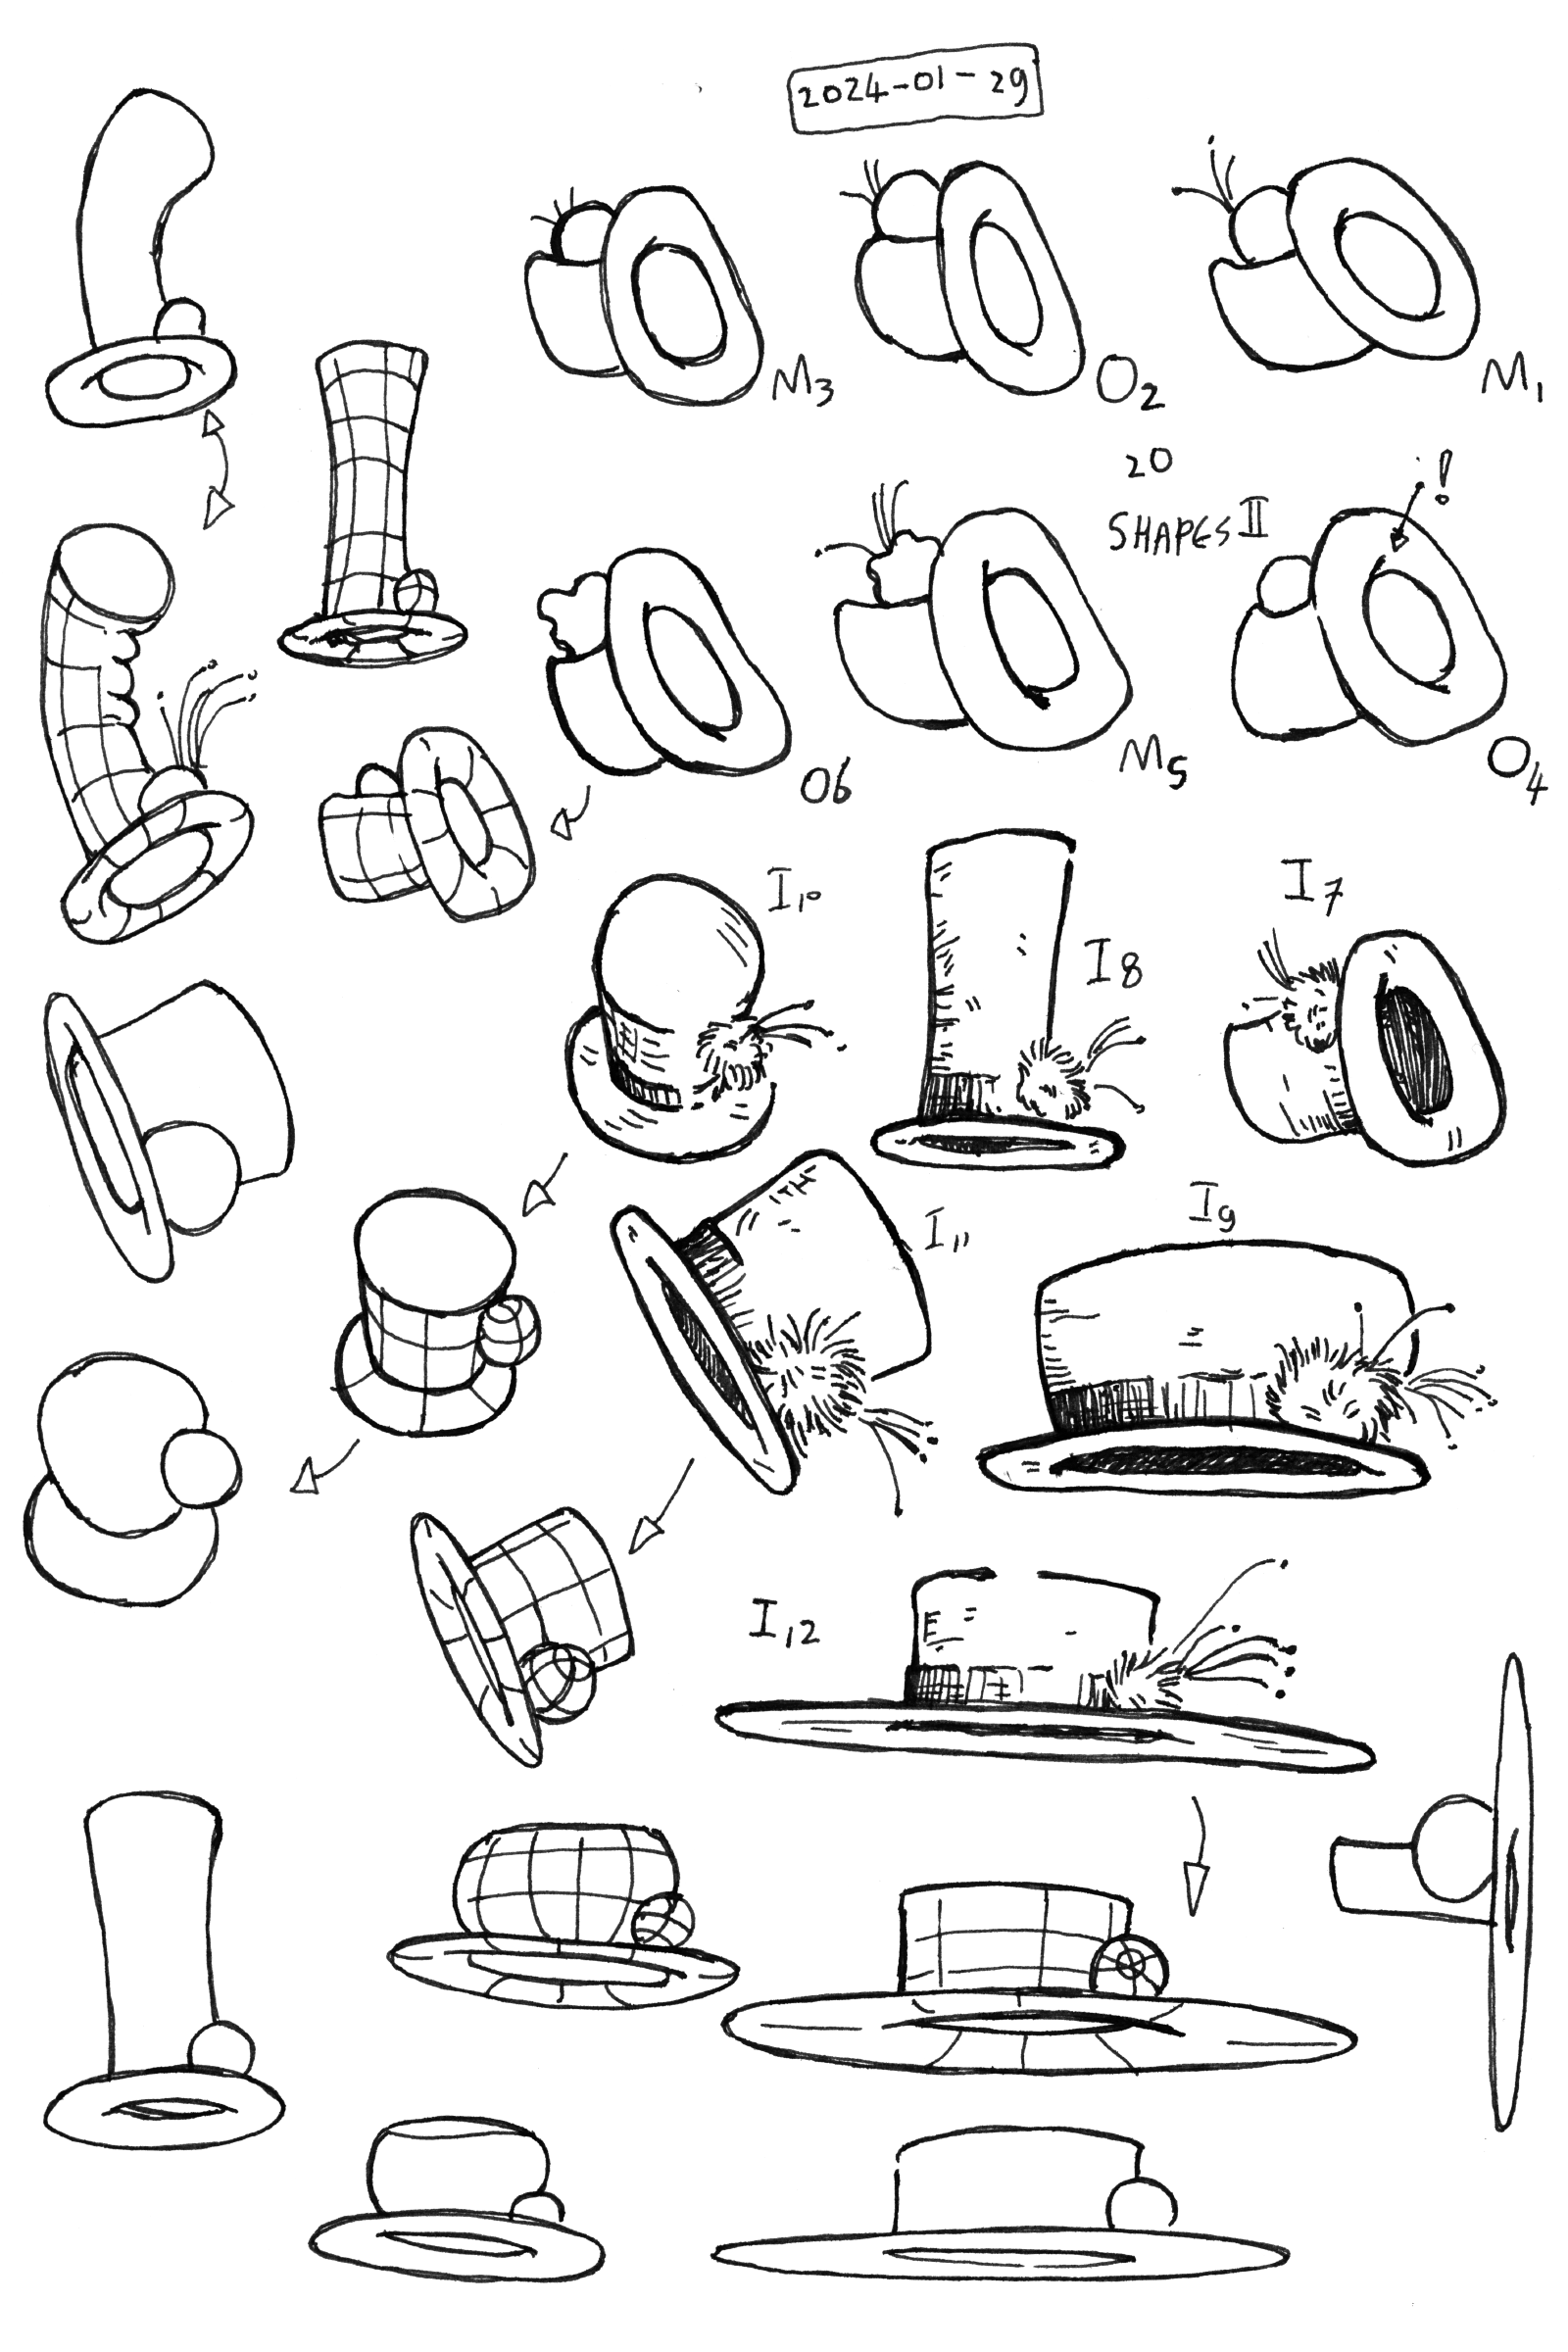 Shape and form studies, deforming, rotation, imagination, part of a Heinrich Kley illustration
INTERLUDE: Anatomy of Habits
We want to form a daily habit, so it is beneficial to study the anatomy of a habit to design one: a drawing habit.
A habit has the following stages: the trigger, the craving for the reward, the pleasant to execute habit, and the reward and an overall rationalization for its use.
I’ll use brushing one’s teeth as an example here.
The trigger typically is a time, a place, an event, or a combination of these. Brushing your teeth may be something you do late at night; you are home and about to go to bed. That is the trigger. Then comes the craving for the reward: in this case, a fresh taste in your mouth. You perform the habit of brushing your teeth, which isn’t unpleasant, and you end with the reward, which is the fresh taste in your mouth, which makes you feel clean, attractive, and good about yourself. The overall rationalization is that you are taking care of your teeth.
It is important to note that even though we brush our teeth to care for them, that is not how we choose toothpaste! We choose it based on taste. We choose the reward when choosing toothpaste. We don’t look at the ingredients that take care of our teeth.
When buying toothpaste, we choose based on the taste, which is the reward.
I call this a near-perfect habit. Another perfect habit is The Morning Pages: as soon as you wake up (trigger), you crave the satisfaction of having three pages written; you write for 30 minutes, three pages of long-hand, just writing and writing without stopping to think (the habit). Writing with a nice pen on good paper can be an enjoyable activity. And then you end up with satisfying pages covered in text. These pages tend to look good! “I just wrote that!” The rationalization is that it helps you process thoughts. What happens in your mind is what is essential about the exercise. You can throw away the pages later; they are just a byproduct.
Both brushing teeth and Morning pages are near-perfect habits. They are good for you, and they can be addictive; you do them on autopilot every day.
We want that for our drawing habit, too!
We often have little control over the trigger. It can be impossible to find a guaranteed time, place, or daily event as a trigger for a daily drawing habit, especially if you have kids. In the evenings, I’m tired; during the day, other things may take precedence. I could get up extra early. I have done that in the past. It works but requires significant discipline. My go-to trigger is an Event: when I’m bored, I look around or on my phone for reference images to memorize. If I have drawing tools handy, I can also do memory drawing.
The pleasant habit, for me, is making marks with a pen, building up lines, carefully sculpting them, painting them carefully, and installing each line with patience and intent. This may be different for you. Find the actual drawing method that feels like a pleasure every second.
A huge complicating factor in developing a drawing habit is that we see the mistakes in our drawings. After a drawing session, we see the errors in our drawings, and it doesn’t feel like a reward. The next day, we aren’t motivated to draw, as we miss the craving for the reward as the result didn’t feel like a reward the day before.
But like with toothpaste, which we choose for the taste, which is the reward, we can do so too with drawing by deciding what to focus our attention on. For example, I love how a messy sketchbook page looks, so I will fill pages with lots of lively drawings. It is satisfying to look at such pages and note things that came out well. I’ll also interpret the reference freely, using different proportions, for example, so that it doesn’t have to be so accurate and can be more joyful and fun-looking.
With an activity like drawing, the most important thing you can focus on because it is so hard to get right relative to the other steps is finding a way to be satisfied with your work to have that reward. Note how you feel at the end of a session and why. For example, consider ending a session if you arrive at a beautiful finished drawing or a page. Also, notice how posting it on social media immediately can make you feel down, as the engagement with your post is invariably unsatisfying. It feels like a punishment, not a reward. If you want, you can post it days later, but stick with something you control that makes you feel good about your work.
When drawing from memory, the reference image was too easy if you got it right the first time. If you get it wrong even on the second try, the reference may be too hard, and at any length, it won’t be fit for purpose as you need to be able to finish with satisfying results.
The exercises in this course will help you arrive at beautiful, rewarding sketchbook pages that are fun to draw. All the rest follows: you’ll get better and create a body of work.
While I strongly hope you arrive at pretty drawings during this course, the exercises are actually about changing what happens in your mind as you try to retain visual information. The most valuable result, in this case, will be an improved ability to visualize what you want to draw and to place lines accurately and with intent, becoming better at sensing when lines are right or when they are off and visualizing a solution before you draw it.
7. Lines II
Welcome to the next of my daily little drawing exercise assignments that are part of a a series of memory drawing warm-ups. We’ll do this exercise for several days. How many days depends on when you feel ready. Feel free to move to the next assignment if the assignments are boring or too easy.
For each of the exercises in this course, re-read them each day before you do them.
Ensure you have a sketchbook and pen or pencil ready. A big letter-size one is preferable, but a smaller one, or printer paper, is fine too. And grab pens or pencils, whatever you are comfortable drawing with.
Dexterity
Start with the following warm-up: draw long, straight lines.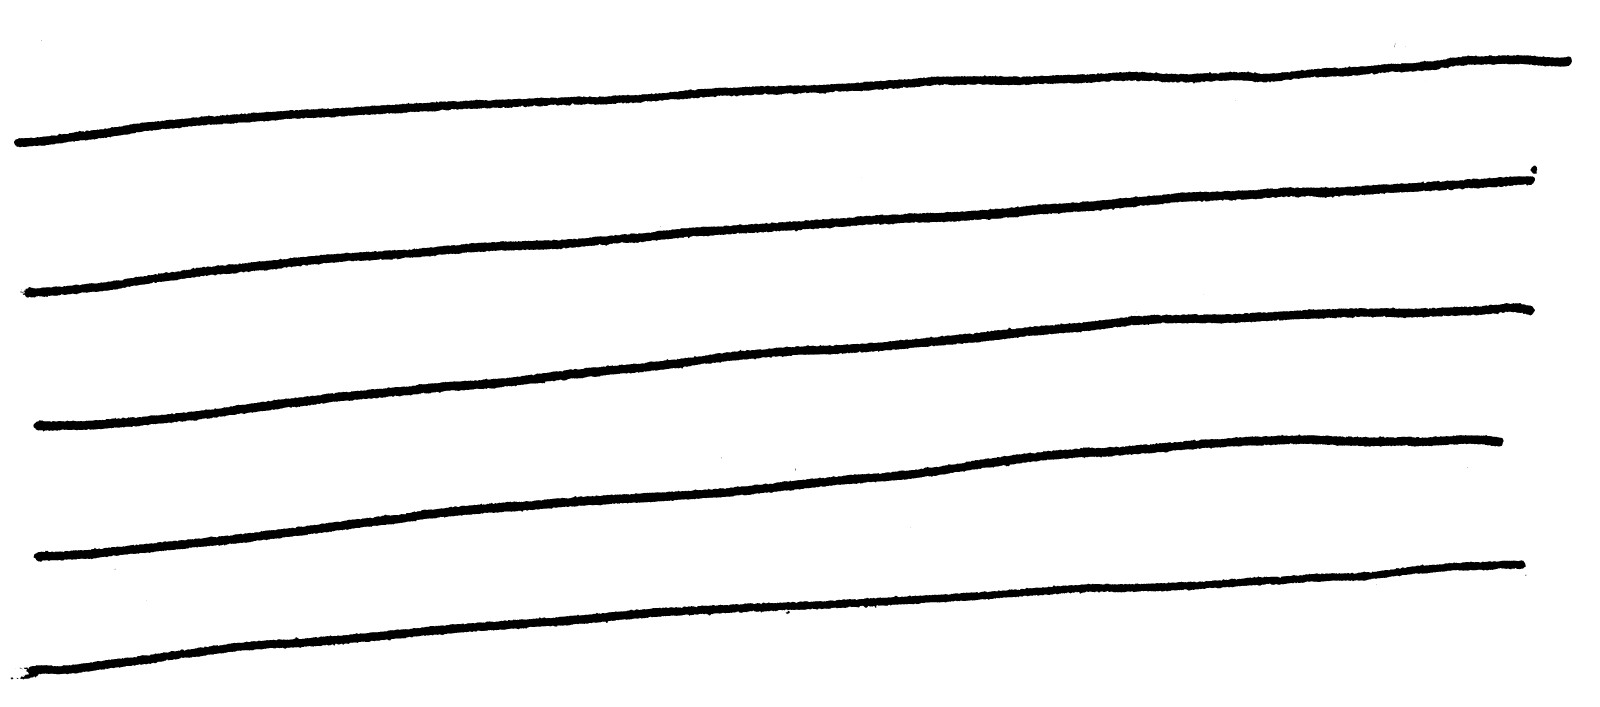
Draw from the shoulder, or the elbow, or maybe the wrist. Try to resist the temptation to draw with your fingers. Hold your pen or pencil some distance from the tip so you are more inclined to “paint” than “write.” This may feel uncomfortable at first, but keep at it.
Move your eye near the paper and look alongside the paper to see if the line is straight.
If you feel resistance against drawing, keep drawing these until you feel the resistance fading and start to get into the flow. You’ll know when you’re ready to go to the next step.
Memory Drawing
Now, on to the second part of this memory drawing exercise assignment.Pick one of the line art images I provide at the end of this assignment. If you don’t find any of them inspiring, you can do this assignment with one of the Heinrich Kley illustrations at the back of this document. Now, select one, two, or maybe even three lines near each other in these illustrations.
Study them; notice how long they are relative to each other, where the endpoints are relative to each other, and how they are oriented relative to each other.
Now, close your eyes and try to draw the lines in your mind. Open your eyes and see if you got it right. If not, close your eyes and try again.
When ready, put the image away and draw the lines on paper from memory.
You mustn’t cheat! Find out which details are missing in your memory so you can focus on memorizing these details in the next step. If you cheat, you rob yourself of the opportunity to discover what you still need to memorize.
Look at the original lines, and consciously focus on fixing mistakes if you drew in pencil, or redraw the reference from observation if using a pen. Notice where you deviated from the reference. Pay attention to where your memory drawing was off. Focus studiously on remembering the corrections.
Now, put away both the original image and your drawings, and draw it from memory again.
One important thing is to clear your mind completely. Try to have silence in your head, no inner monologue, no words. You will start to sense where lines need to go and feel that parts of your brain become excited about the marks being made. You’re drawing something from memory; it's like magic!
Keep drawing from memory repeatedly, correcting from observation using the reference image.
The drawing exercises are not about memorizing that specific thing but about becoming good at seeing a drawing on a page with your mind’s eye, getting the lines where you want them, and feeling where the line would look well. That’s why the exercises in this course are structured that way; they each start with a warm-up where you train to place lines exactly where you want them. These warm-ups are chosen so that you instantly see when they’re off. Then comes an exercise that trains you to see the lines on the page before you place them accurately.
Write down the date. Don’t worry if there are days you can’t draw; you won’t get punished for skipping days! Life happens. Maybe tomorrow. Do the course, but feel free to take days off in between.
 Heinrich Kley, scanned from 1911 book.
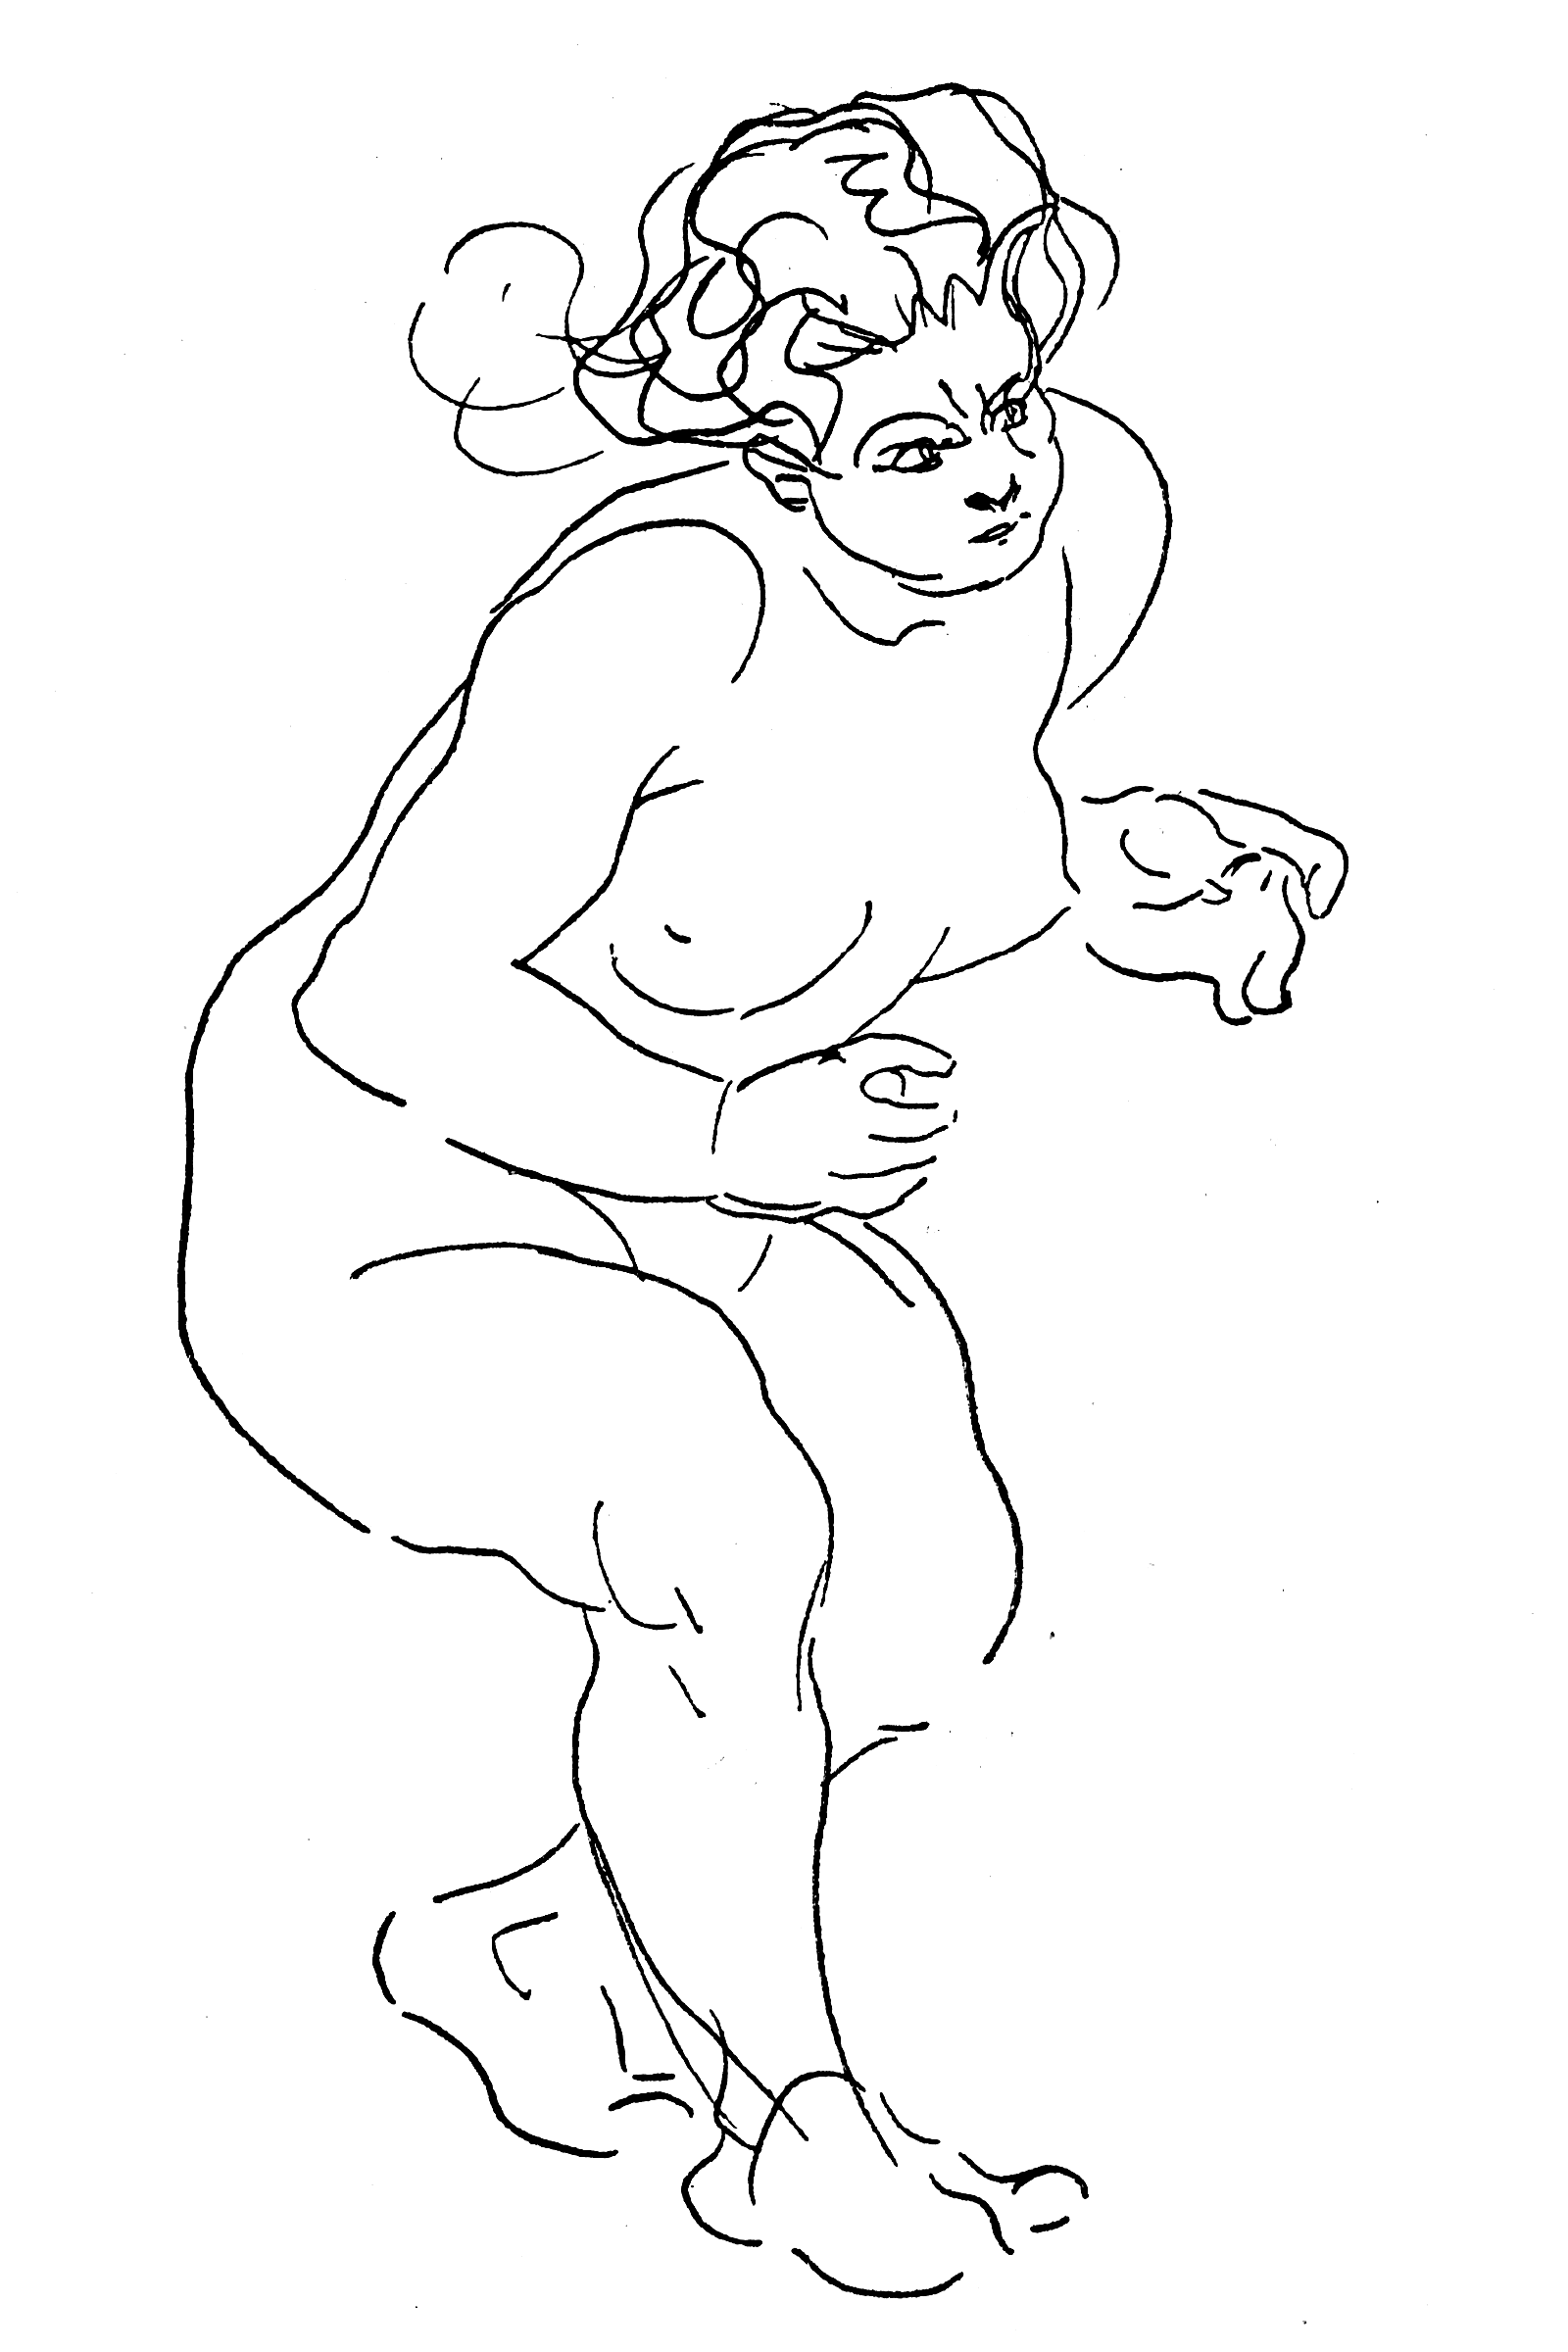 Heinrich Kley, scanned from 1911 book.
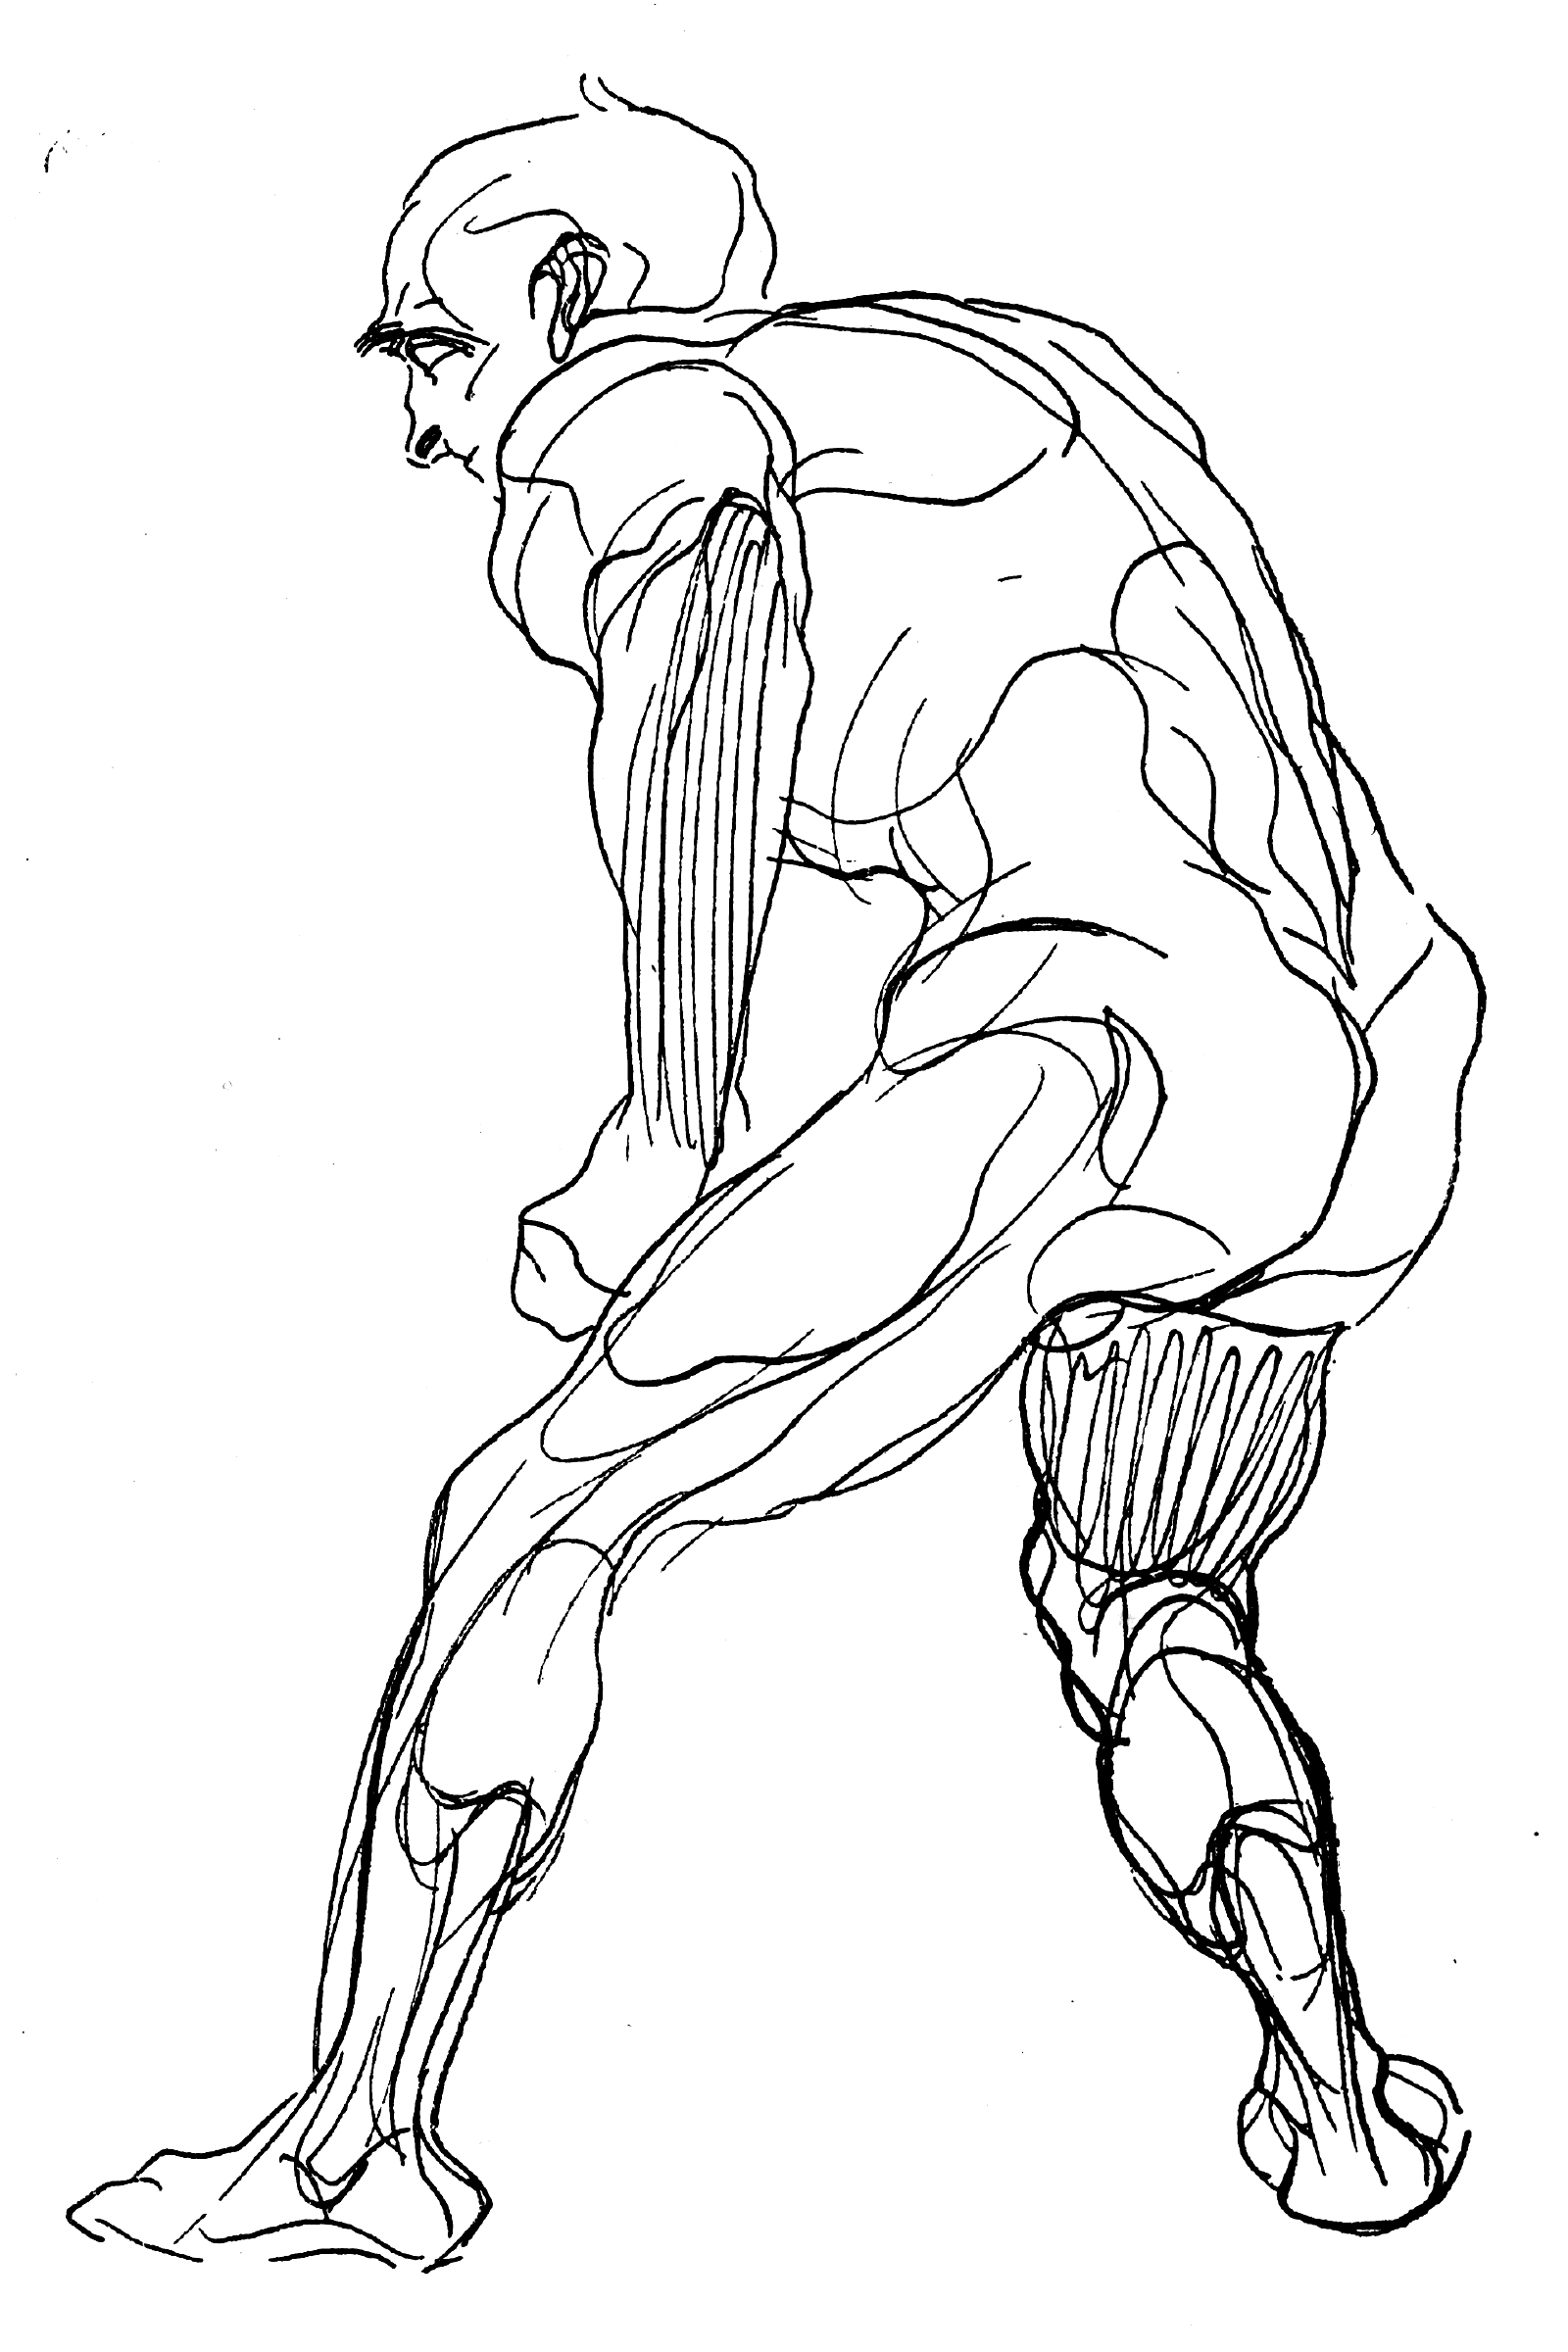 Heinrich Kley, scanned from 1911 book.
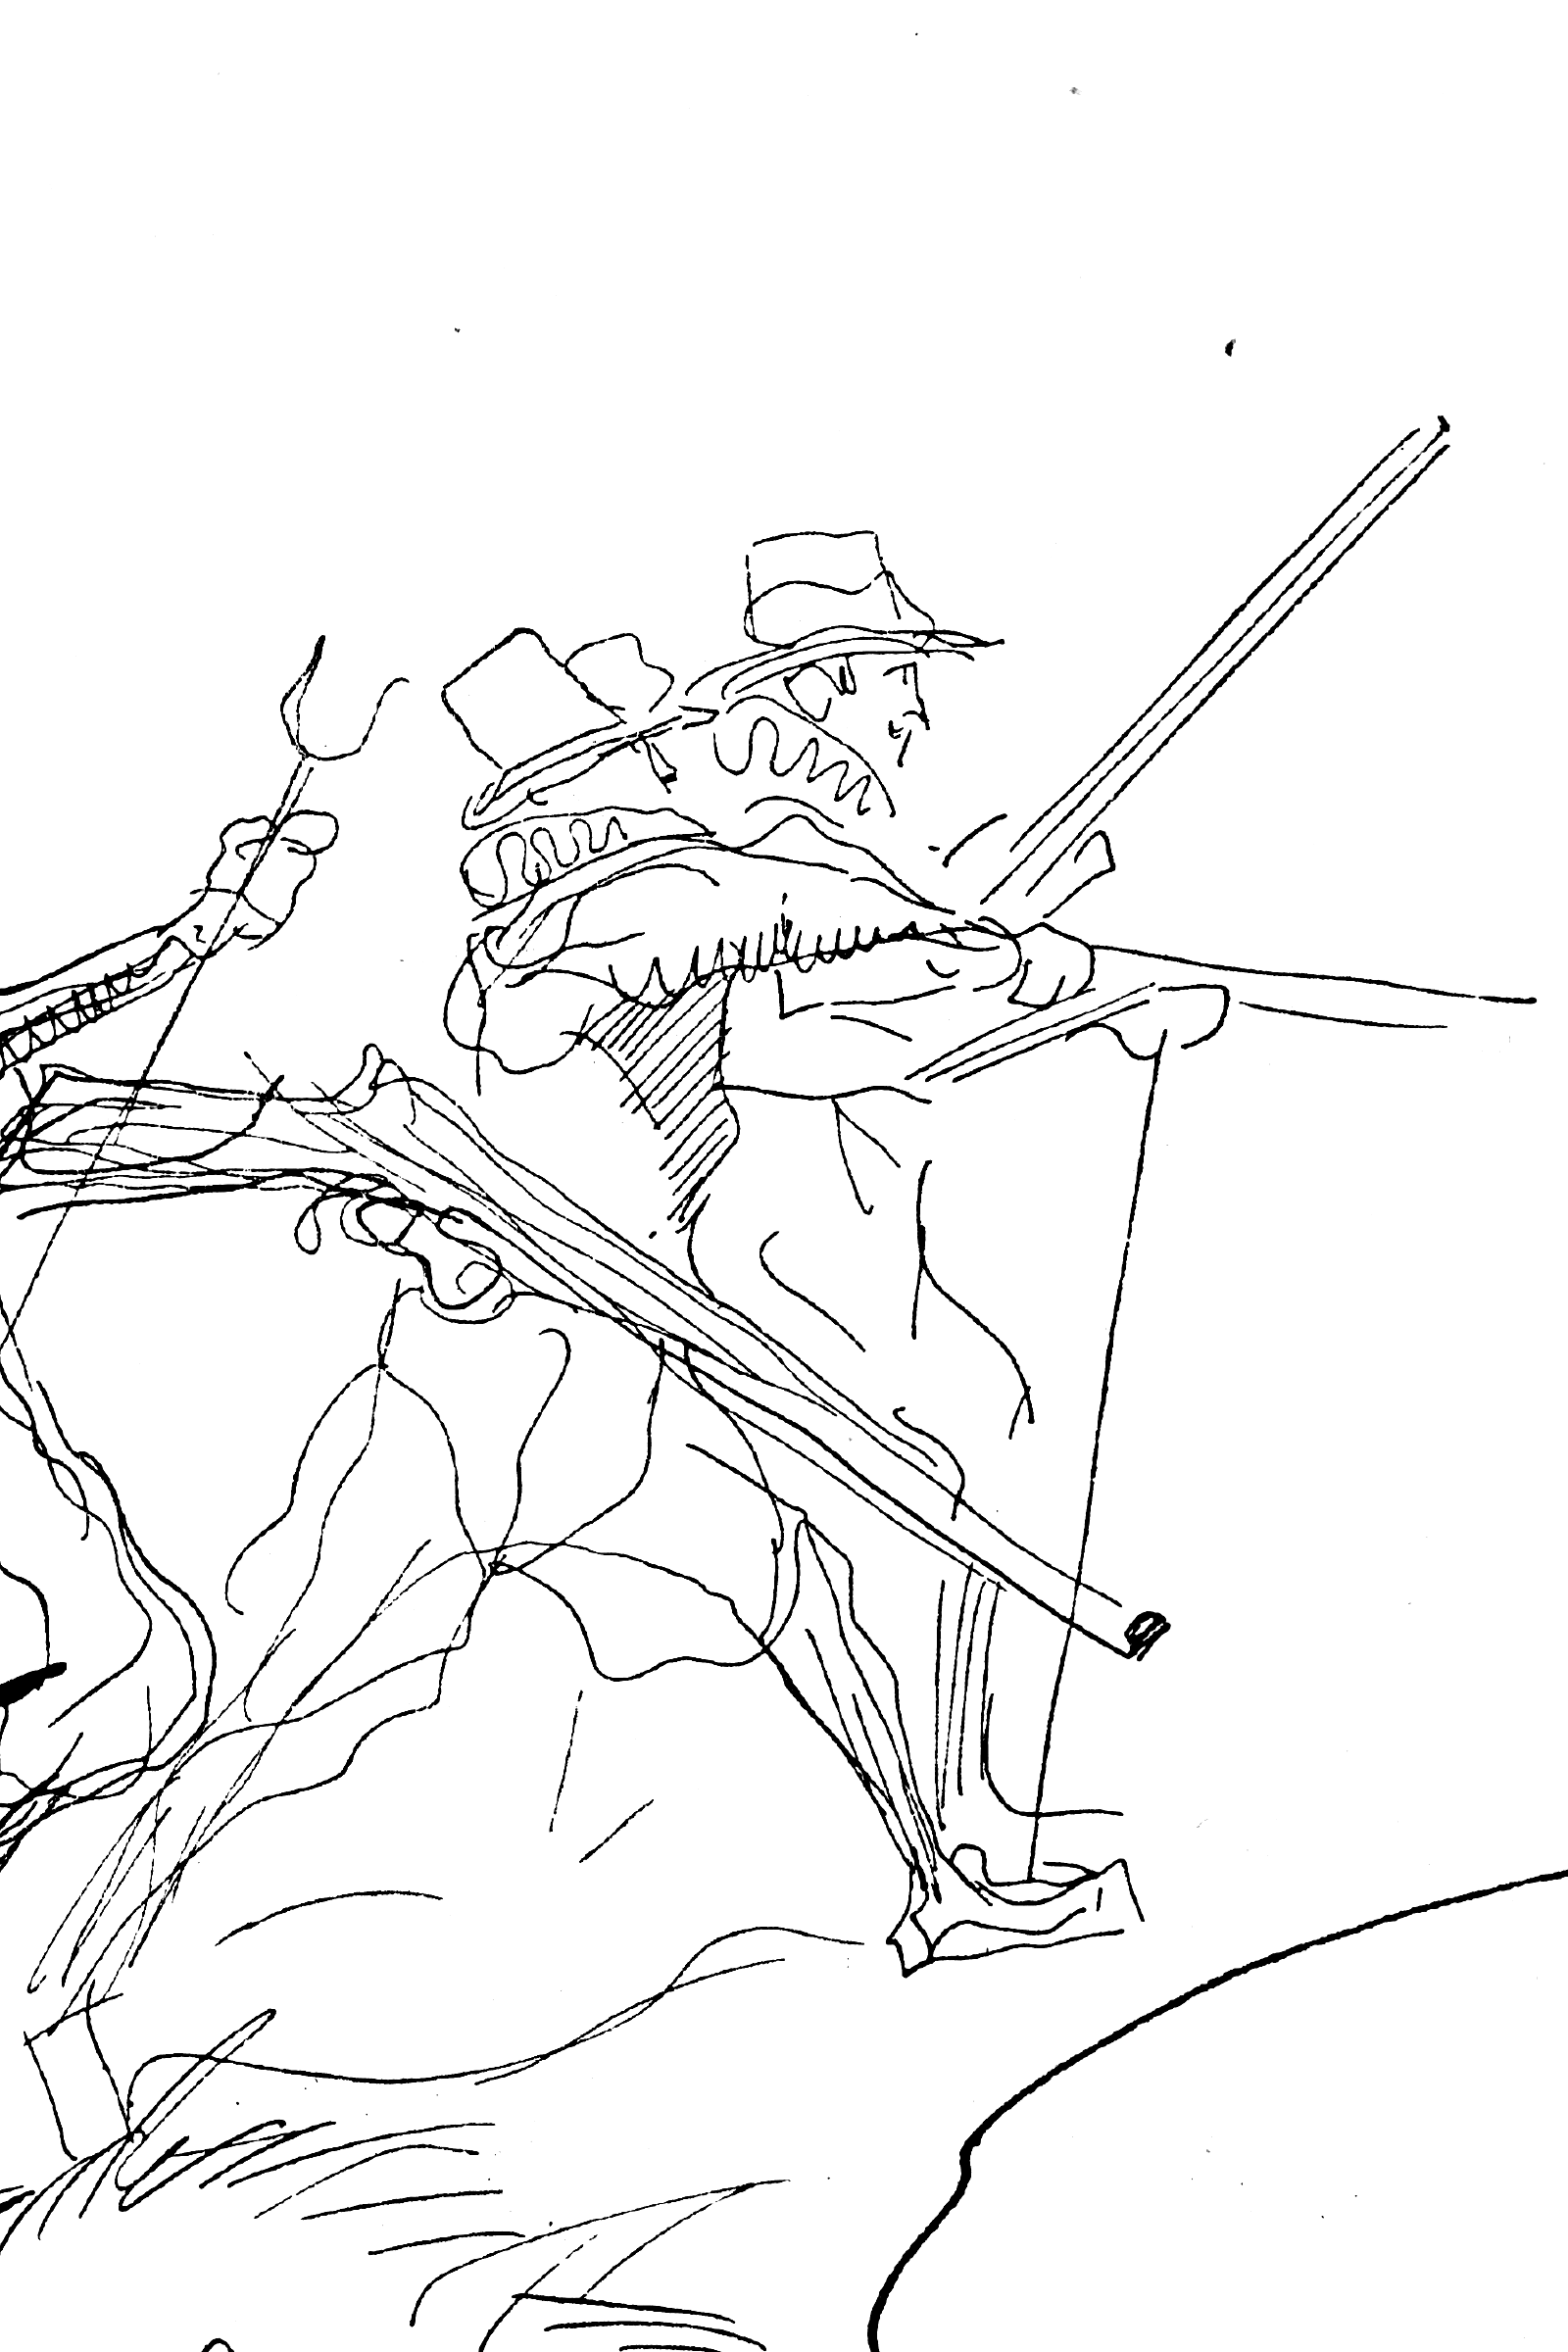 Heinrich Kley, scanned from 1911 book.
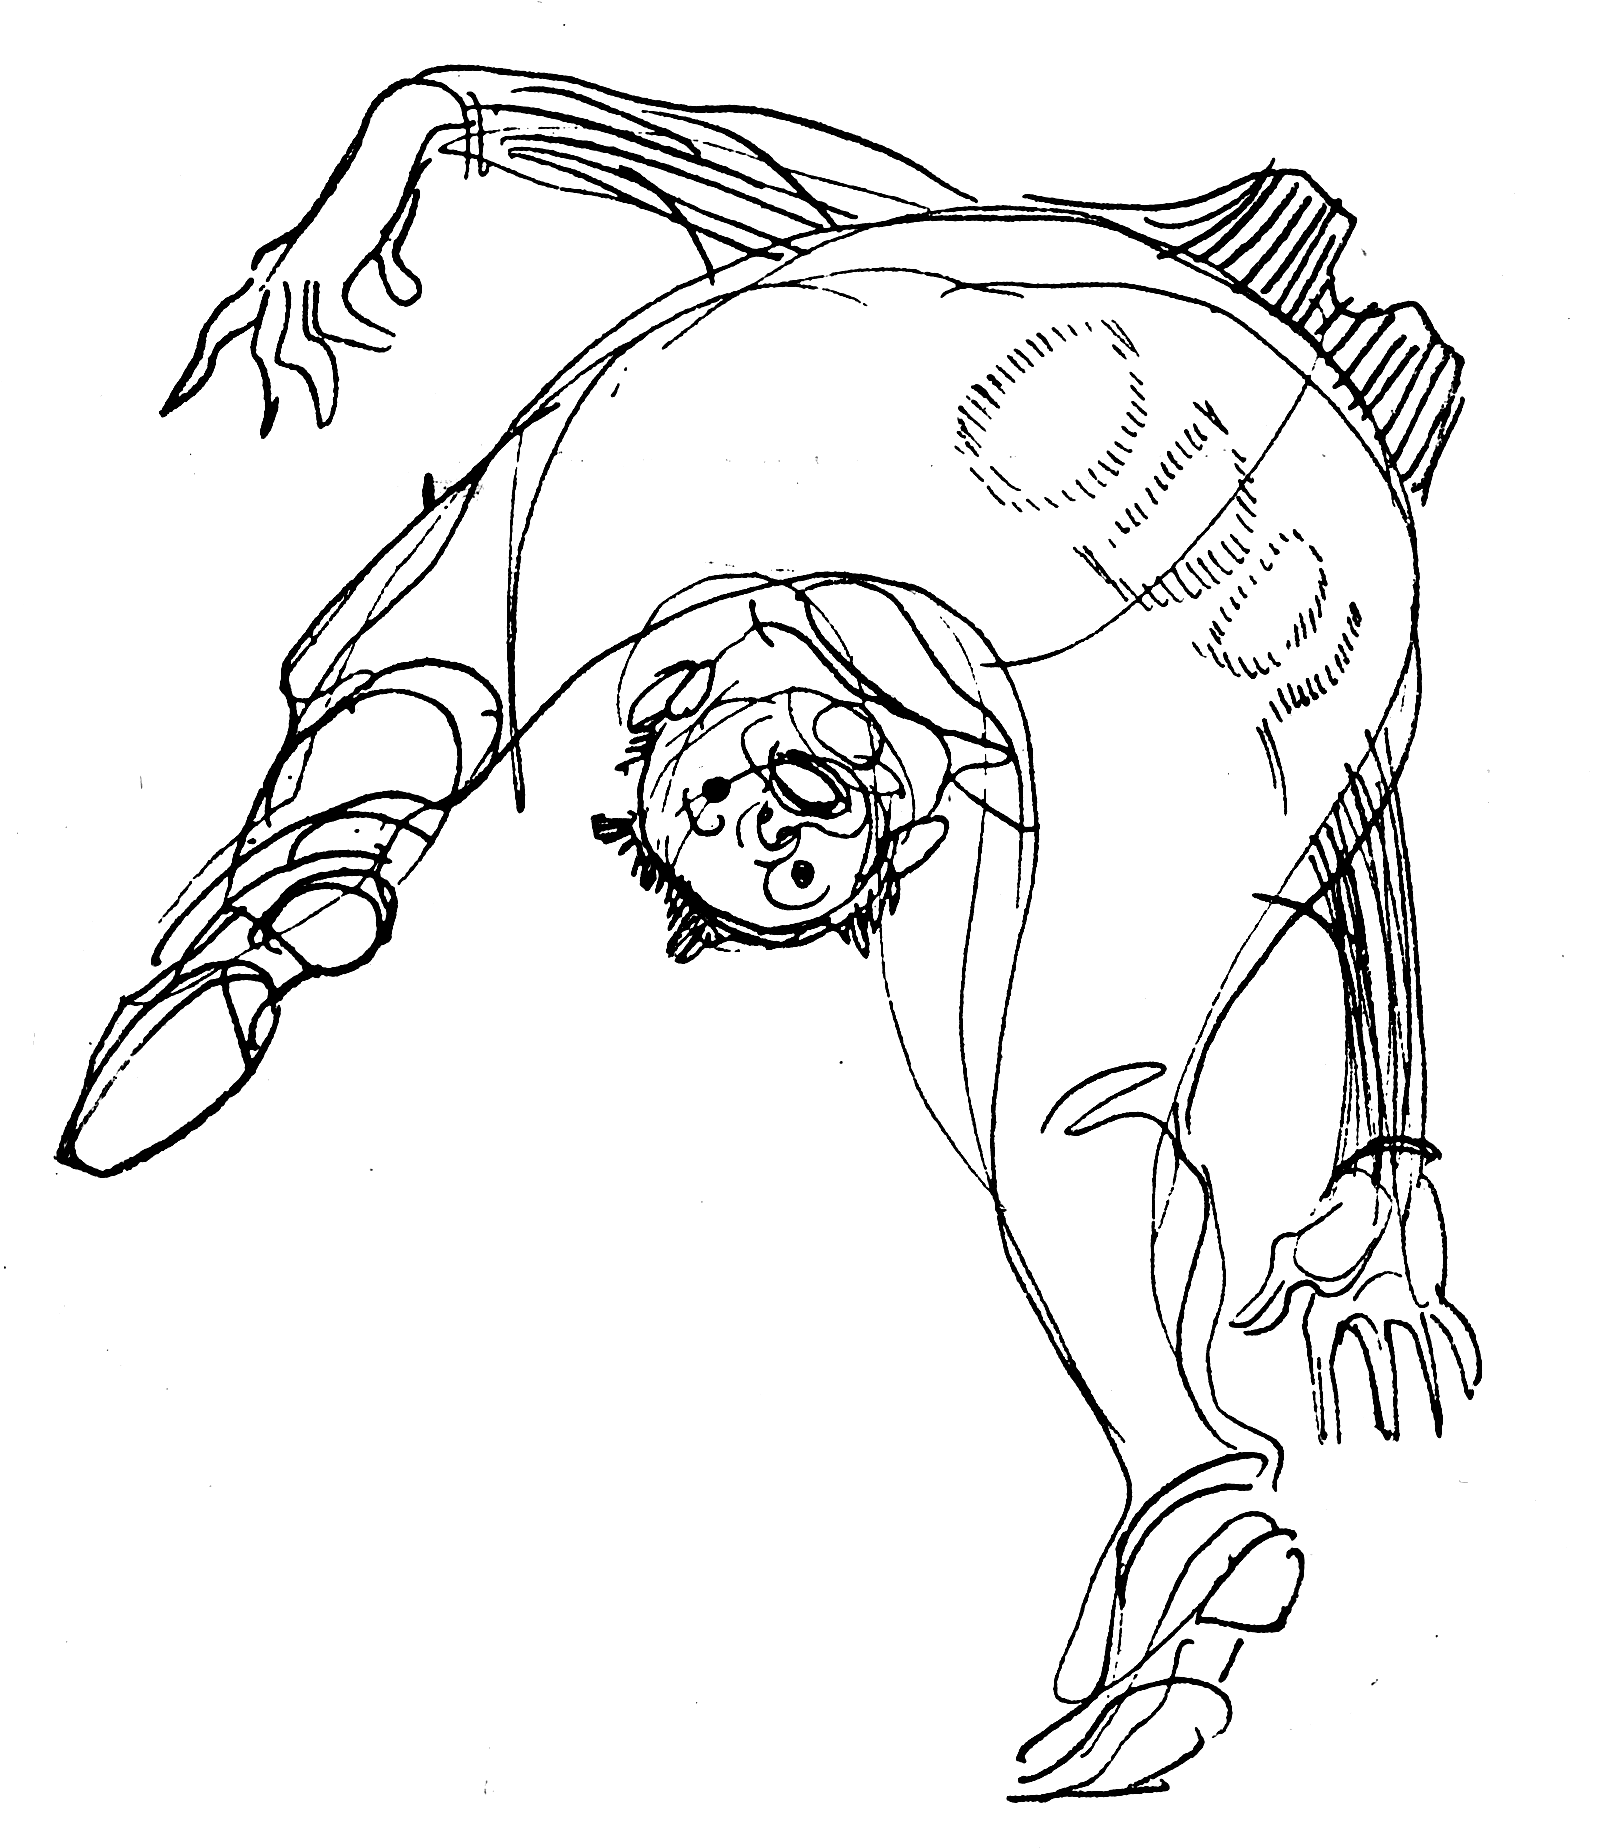 Heinrich Kley, scanned from 1911 book.
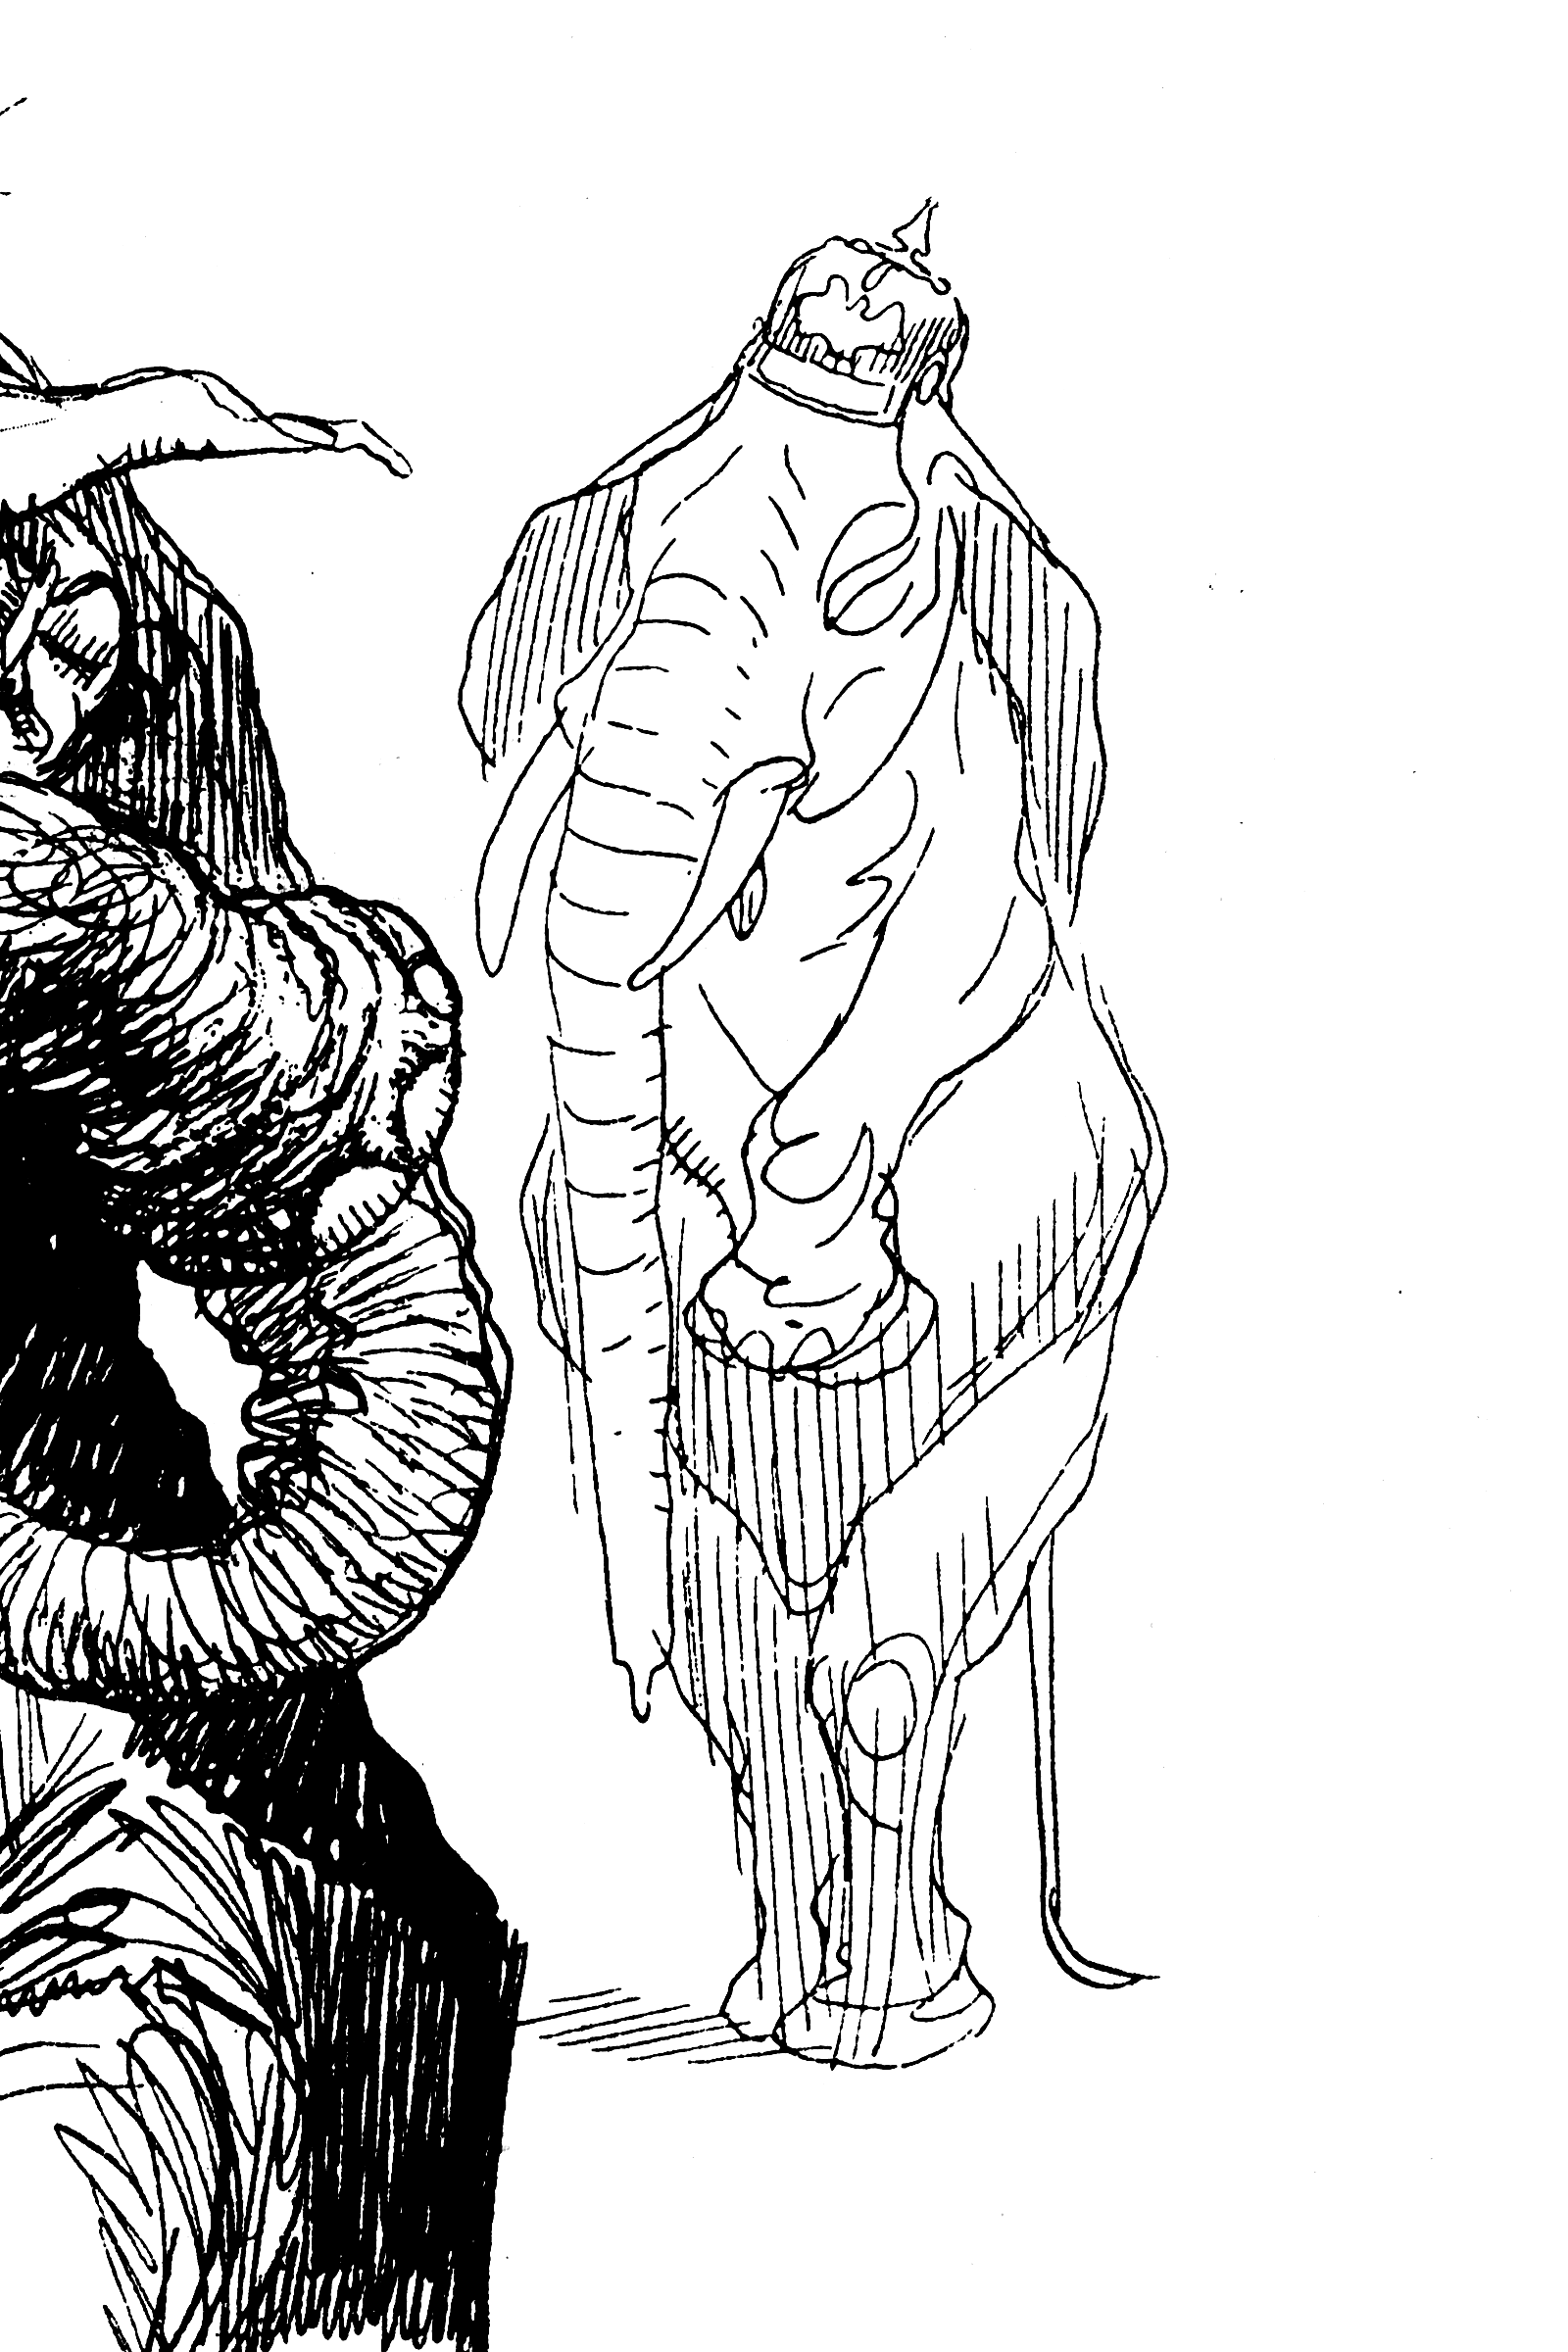 Heinrich Kley, scanned from 1911 book.
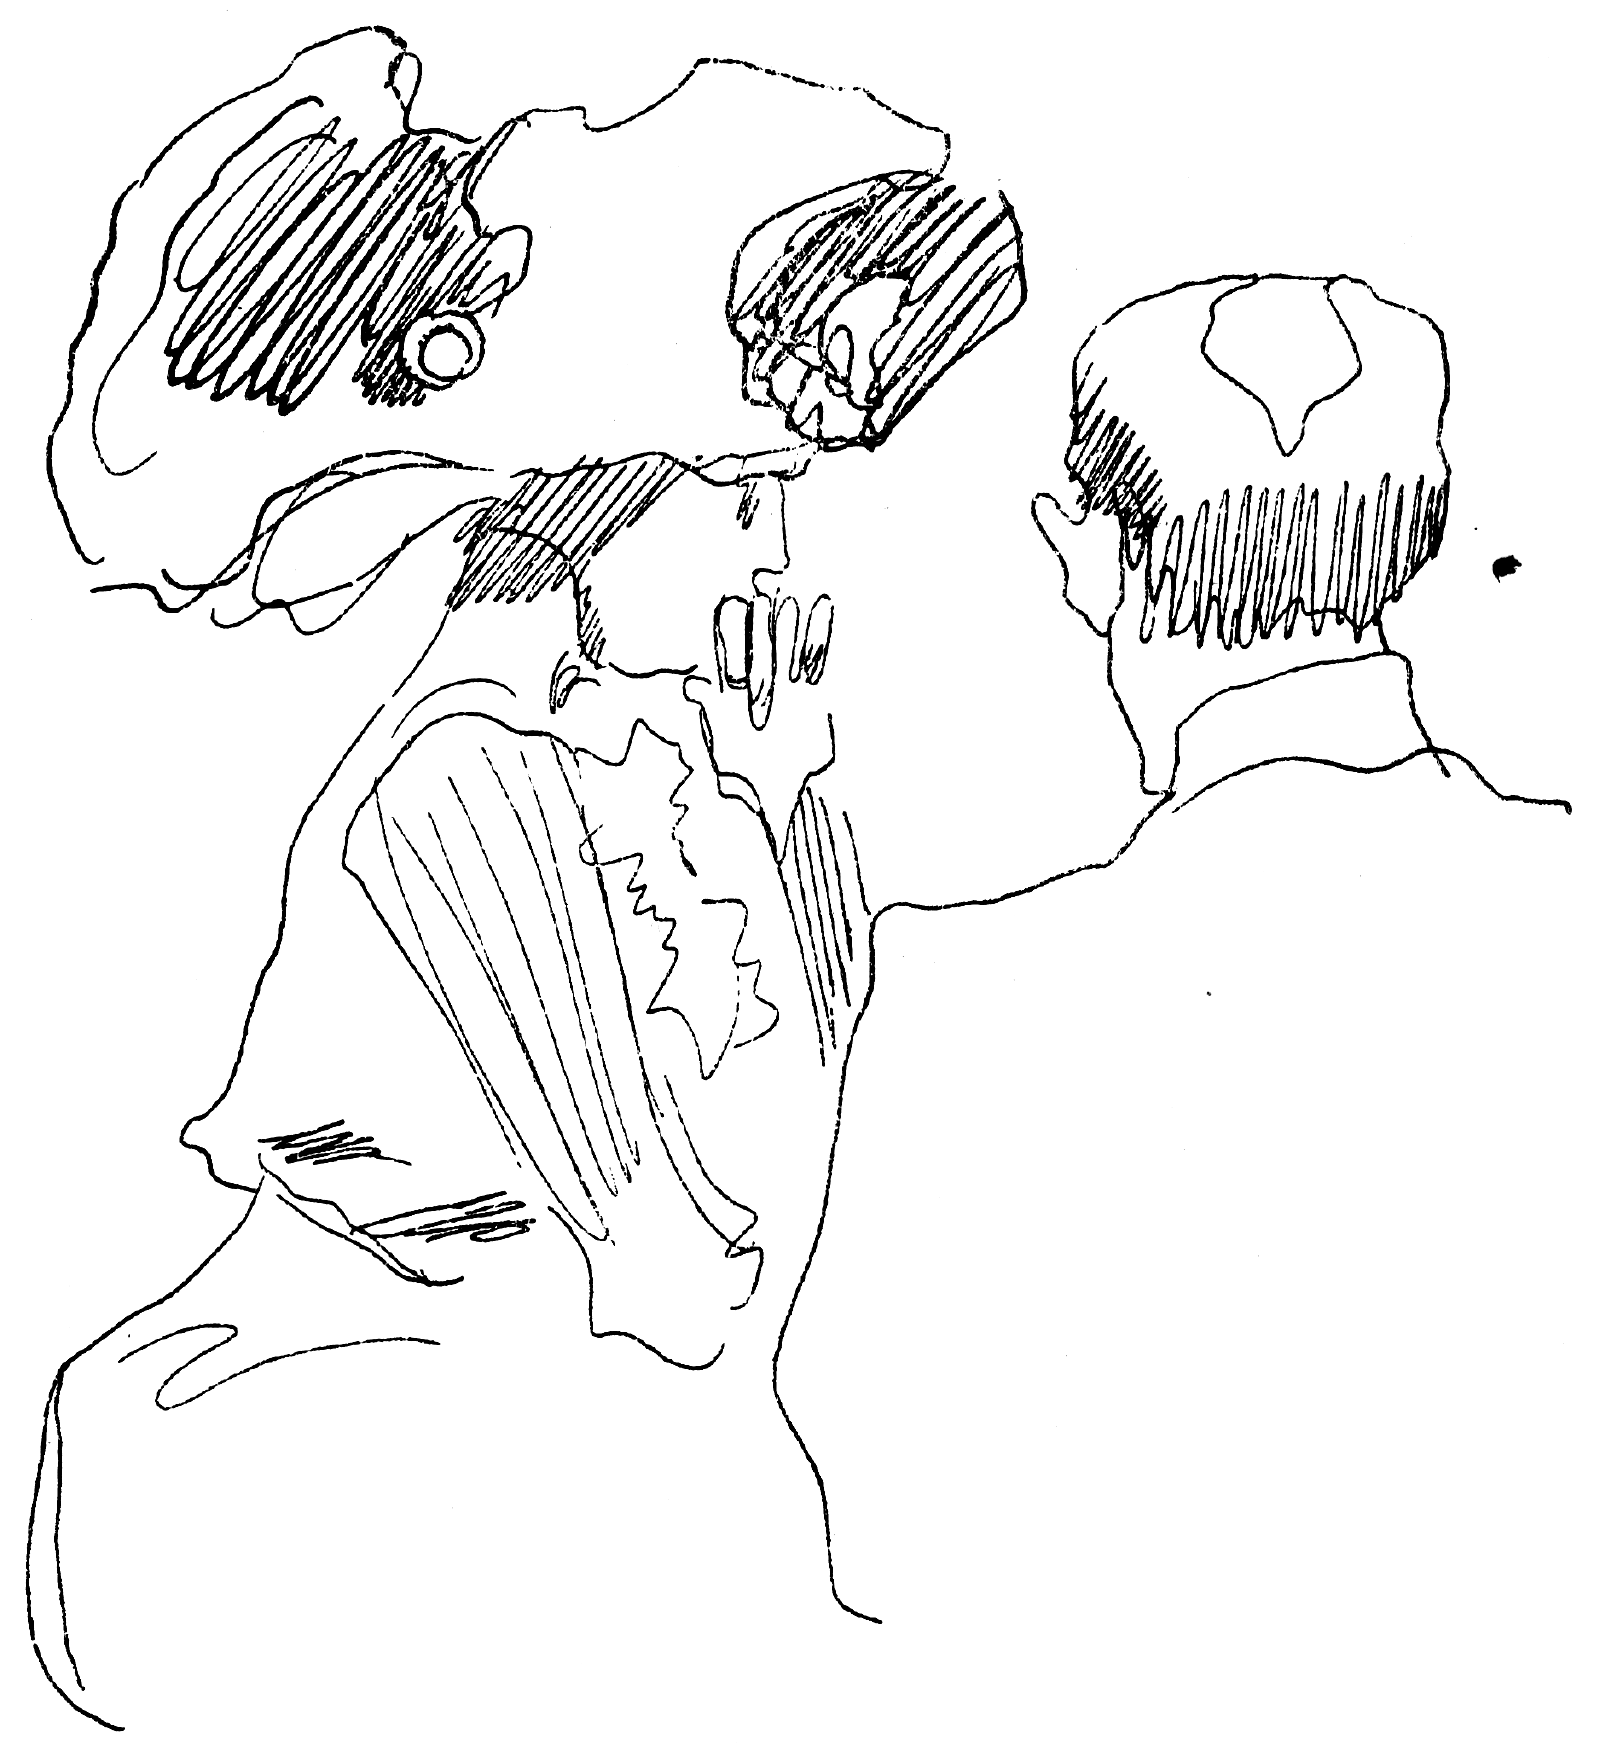 Heinrich Kley, scanned from 1911 book.
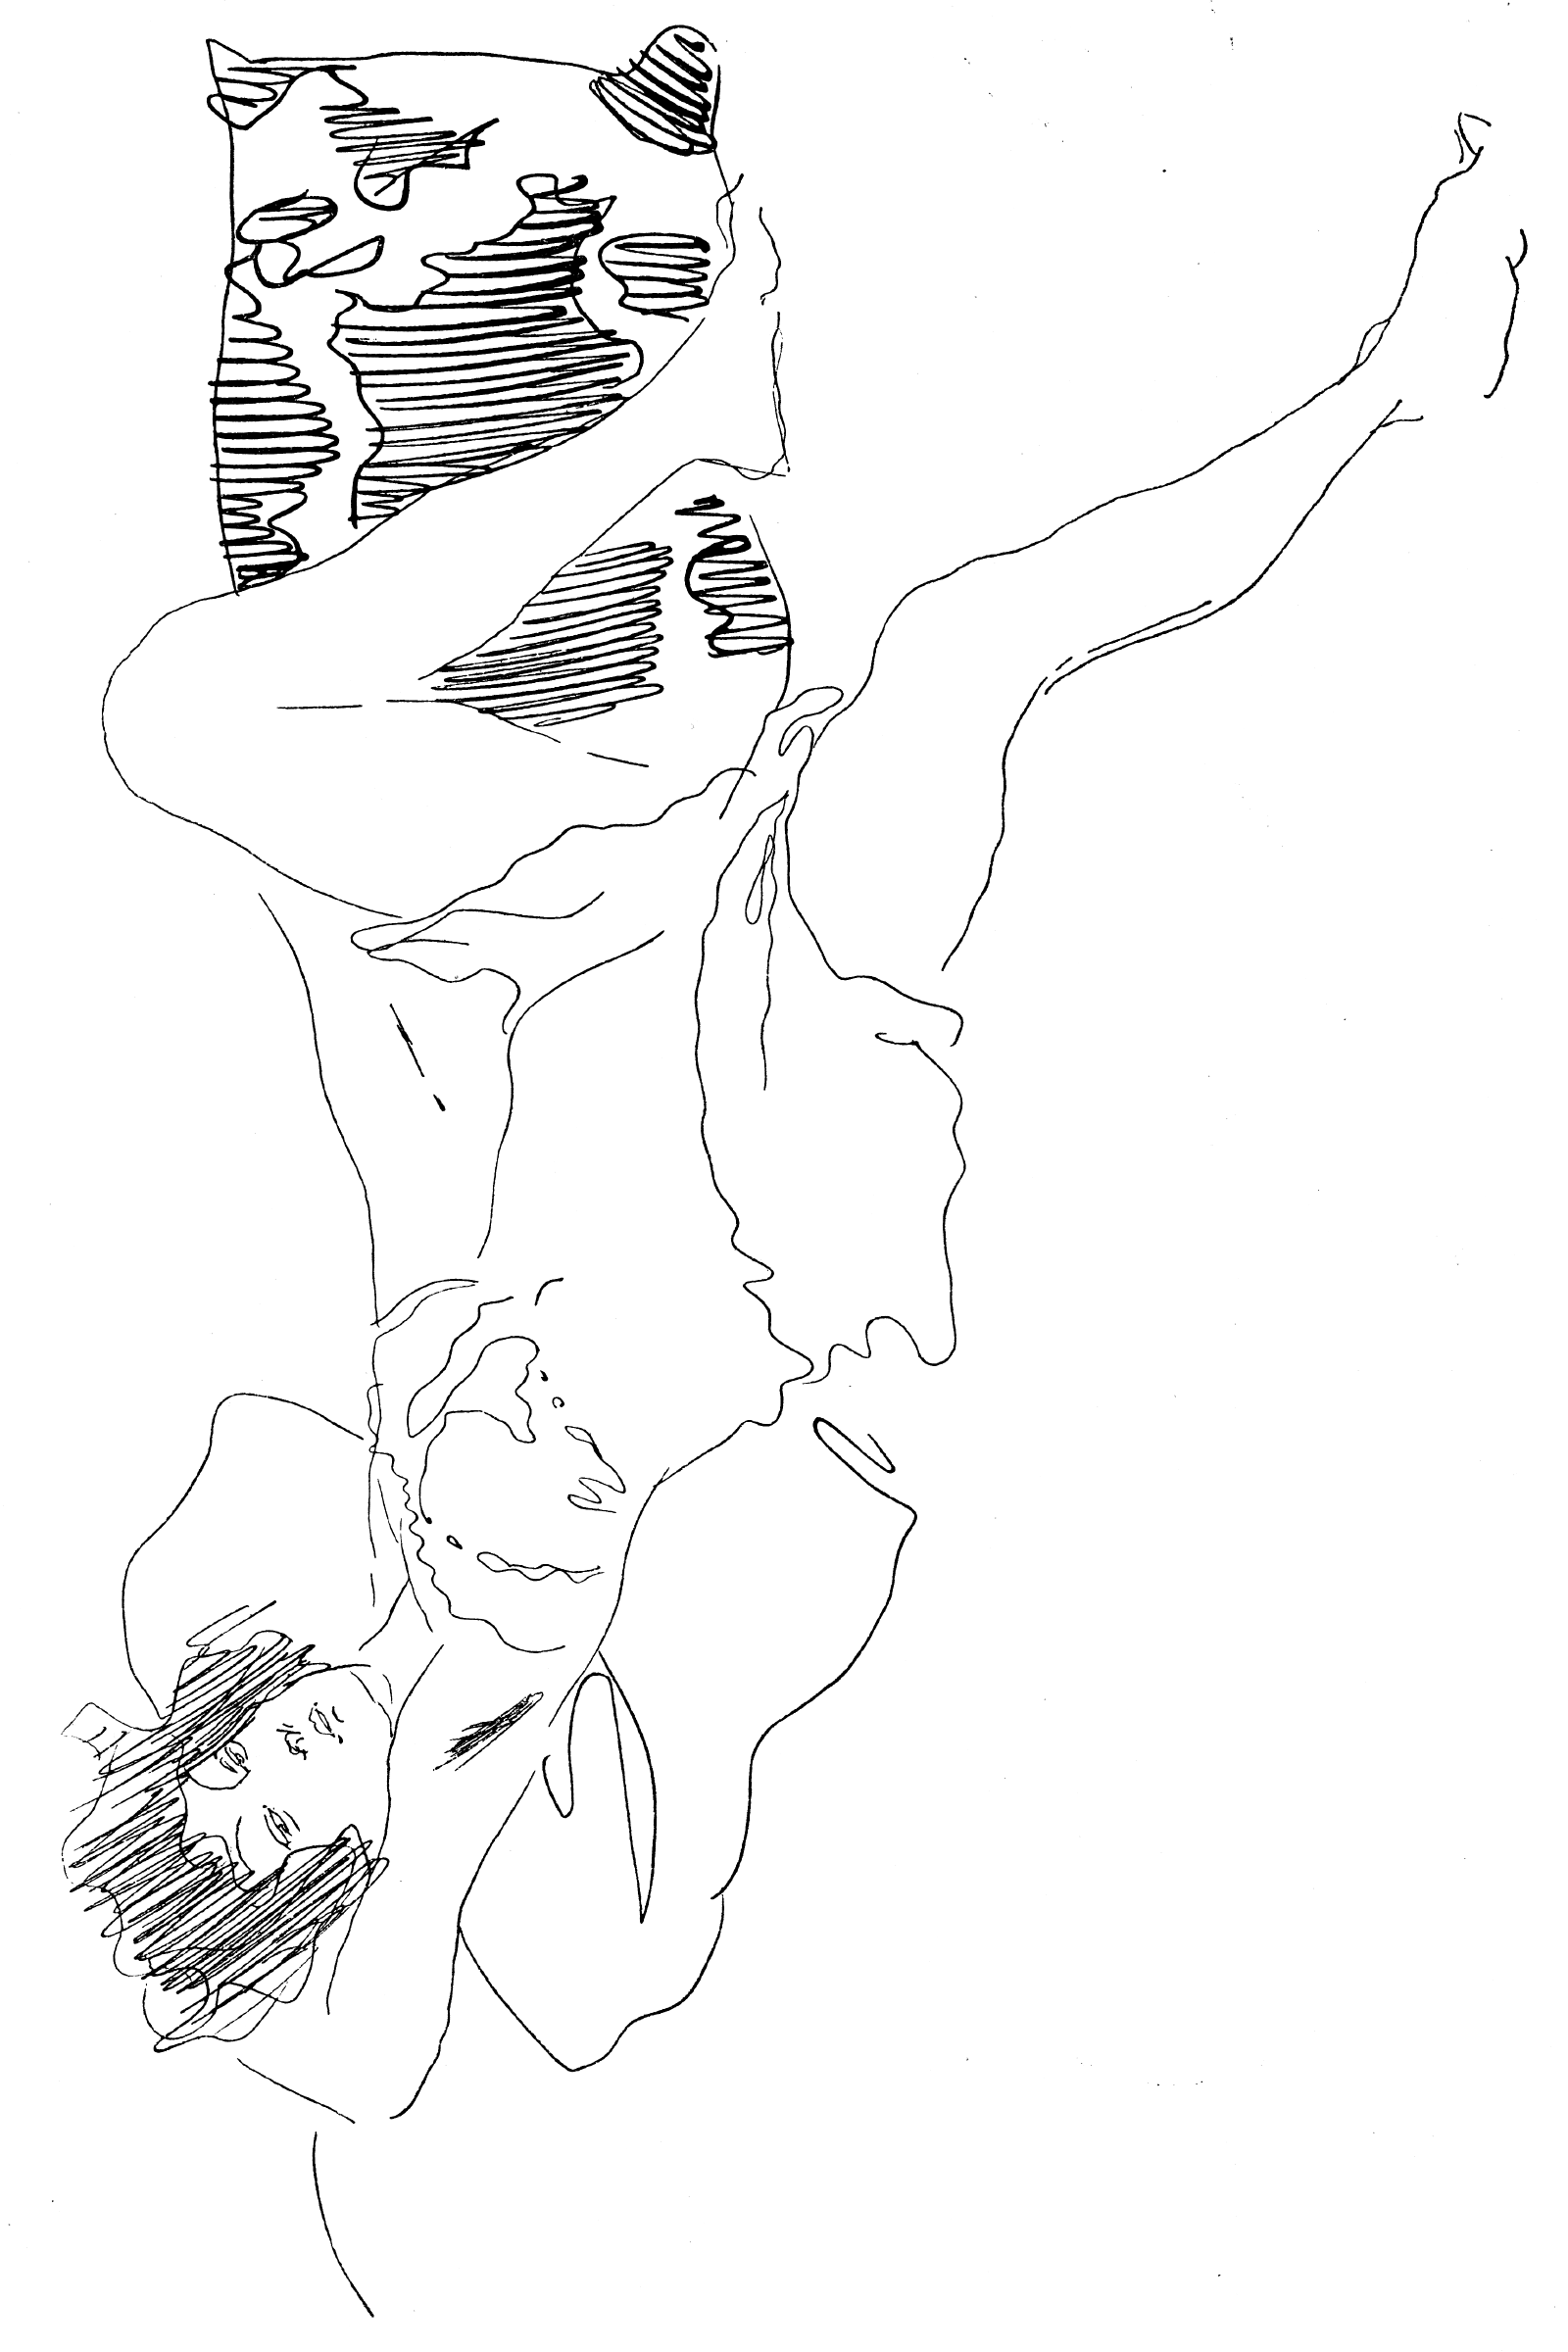 Heinrich Kley, scanned from 1911 book.
8. Parts
From here, we will look at more complex references: illustrations by Heinrich Kley. In practice, you will work with much more complex reference images than we have worked with so far, and in the following drawing exercise assignments, I’ll show different ways you can deal with that complexity.
Dexterity
Start with the following warm-up: drawing textures.Use long, straight lines to make a matrix of rectangles. Don’t make too many because we will fill them with textures. This was supposed to be a quick, short exercise, remember? Two by three one by one-inch rectangles will do.
Now, come up with textures to fill the squares with. The purpose is to get acquainted with your drawing tools. And a sketchbook with rectangles filled with textures also looks good.

Write down the date with your drawing so you can keep track. Don’t worry if there are days you can’t draw; you won’t get punished for skipping days! Life happens. Maybe tomorrow. Do his course, but feel free to take days off in between.
Memory Drawing
Now, browse the Heinrich Kley reference images at the end of this document. Choose one, and select only a tiny part to memorize; maybe only a face, part of the clothing, or a hand or foot. Find something you consider visually appealing, memorize it the way we did before, and draw it from memory.One way we can deal with complexity is to focus on parts, one at a time.
This exercise goes well with Forms II and Shapes II, doing Lines II to memorize details of parts. Doing these on the same reference image will help you understand the reference better.
You can do these in one session and turn it into something more than a warm-up, a complete study of a reference that will allow you to render it from imagination from any angle.
It is also important to note that you do not need to worry about mistakes. It is just a drawing, and you will make many more.
Your drawing also doesn’t have to be an accurate copy of the reference; it must look good, though. But for that, it doesn’t have to follow the reference. Follow your instincts! That is one of the cool things about memory drawing.
There will be more about filling in the blanks from imagination in the next assignment.
You don’t have to stick with the reference images in this course. Collect images online on your phone or cut them out of magazines. Feel free to draw other source material from memory if the included images don’t inspire you!
Start memorizing visuals during the day when you’re bored or waiting: images you prepared for that purpose on your phone or things you see around you.
Draw what you memorized that day later or even the next day when you have access to your drawing tools. Make it a short but intense fifteen-minute warm-up.
Make sure you relax and enjoy being creative after the warm-up memory drawing sessions. I like to draw from observation or imagination after that.
9. Imagination I
Today, I will introduce another way to deal with complexity: we’ll try to memorize something complex, in this case again an image by Heinrich Kley, but while drawing it from memory, fill in the blanks, areas you forgot, from imagination!
Dexterity
Use any of the warm-up exercises we used before, whichever you feel like doing the most. It is also about getting into the right mindset for having fun drawing.Memory Drawing
Again, warm up first, then do the memorization drawing exercise, but this time, don’t bother with the second stage, where you “fix the mistakes.” Instead, have fun filling in the blanks from your imagination.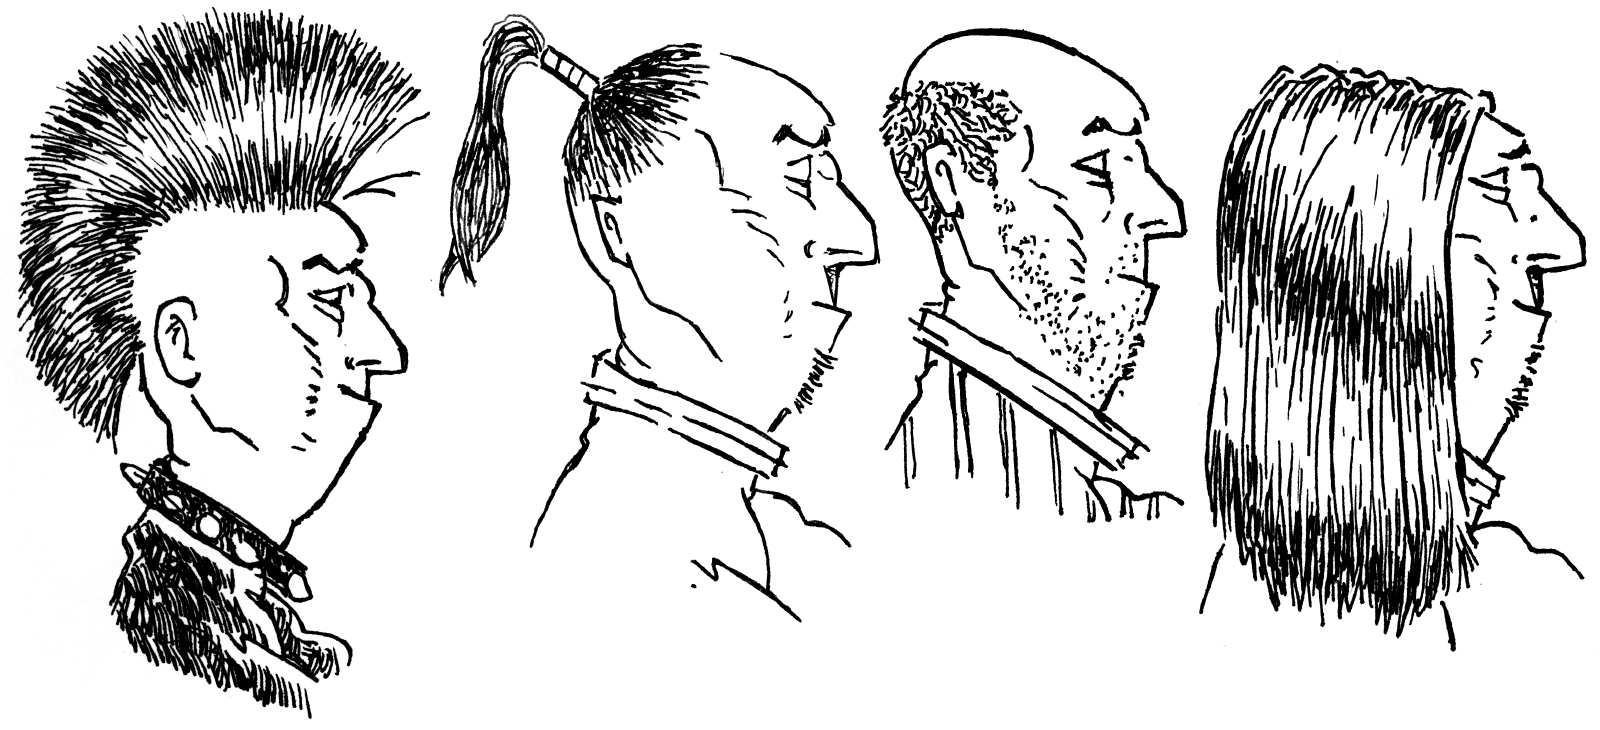 Have fun changing something from imagination.
You can even draw the whole thing from imagination, like in a cartoon style. This can be a great way to wind down after a full day of serious drawing: goof off and draw cartoon variants of things you’ve drawn before, from memory and imagination.
You will find that cartoon styles can be more pleasant to look at as they are simplified and not as overworked. And if you consciously change shapes and proportions, it might be easier and more fun to draw than when you go for deadly precision. The goal, after all, is not to make an accurate copy but to make an illustration visually pleasing! You can deviate from reference; you don’t have to copy it slavishly.
INTERLUDE: Balance, Yin, and Yang
Balance is essential to prevent burning out. Lots of things come with two sides that balance each other out. Choosing a compromise in the middle isn’t the same.
For example, it can be great to split a holiday into going to calm, soothing, quiet places in the countryside for maximum relaxation and to balance that out with visiting a city with lots of activity and culture. Having something in the middle, like a mid-sized town, would be different. The extremes both have value and can balance each other out.
Many things come as a balance of extremes: sleep versus being awake, resting versus working out, work versus leisure, day versus night, eat versus drink.
Look for balance in your art process. Draw, but also be active and work out. Work on paid commissions, but also work on your private projects. Make studies versus finished pieces.
Balancing extremes is much more powerful than taking a middle ground where they are mixed, having none of the advantages of the extremes.
Try to do that with the exercises in this course: practice hard for 15 minutes, but then have fun drawing from observation or even imagination. Or balance it out with a healthy workout or walk, where you can even memorize visuals you see around you. Or balance the solitude of drawing out with charging up socially by being with friends and family.
You need the extremes; don’t mix them. Keeping a balance between extremes will prevent you from burning out.
10. Loose Versus Tight
Dexterity
Use any of the warm-up exercises we used before, whichever you feel like doing the most. It is also about getting into the right mindset for having fun drawing. Warm up as you feel is necessary.Memory Drawing
Today, I want you to notice how you have to get certain things exactly right or else they won’t look good, hands and female faces being primary examples because we’ve seen them so often and know how they look, and some things you can be more loose about, like trees, clouds because they can have arbitrary shapes, and dragon, because who knows what THEY look like.Choose a Heinrich Kley illustration from the back to try it on. For this exercise, look for images with faces that must be drawn accurately and contrast things like hair and clothes that are best drawn loosely.
In these memory drawings, play with trying to get various parts exactly right versus drawing them more loosely, and notice the effect it has; see how some things look better when drawn accurately and other things when drawn loosely.
Don’t be tricked into thinking loosely-drawn lines are inaccurate lines! When looking at a master drawing, it might look like the artist carelessly threw the lines on the paper, but they carefully installed each line with great care. You will notice this as you try to draw as loosely and as well as Heinrich Kley. The lines have been drawn rapidly but with conviction and accuracy. These are not the insecure, imprecise lines of a beginner.
A secret trick: A drawing can look good if one part (a face, say) is drawn very precisely and another part (clothes, say) very loosely to suggest the material of the clothes. It’s a yin and yang thing again: your brain can, if this is done well, be tricked into believing it is masterfully yet loosely rendered, making it look more impressive.
And it is a fun tool in your tool chest.
11. Rotate
Dexterity
Use any of the warm-up exercises we used before, whichever you feel like doing the most. It is also about getting into the right mindset for having fun drawing. Warm up as you feel is necessary.Memory Drawing
Today, you will draw things from memory but rotate them in your imagination. Try to imagine what these look like from other angles. Consider balance, but also have fun with it! We don’t know what it looks like from another angle as some of that information is missing from the images, so we’ll have to ensure the results look believable and cool and do so by using our imagination and memory of things we’ve seen in the past. It is helpful to start by doing the Forms II exercise on the reference first to get to know the underlying forms. You can then rotate the underlying forms (in your head), discover the shapes and add in the detail.12. Memorization
Dexterity
Use any of the warm-up exercises we used before, whichever you feel like doing the most. It is also about getting into the right mindset for having fun drawing. Warm up as you feel is necessary.Memory Drawing
For the coming four days, we will use memory drawing to commit a piece of anatomy to long-term memory. See the plate with the two arm anatomy illustrations at the end of this assignment.You initially thought memory drawing was about memorizing references or not? Well, if you’ve come this far, I hope you’ve noticed that the benefits of memory drawing are far more significant than just the mundane remembering of one thing. I hope you see that you have become better at things you haven’t practiced drawing yet!
On the first day, memorize this bit of anatomy, then draw it from memory, correct it with reference, and draw from memory again. On the other three days, draw from memory immediately, then compare it with the reference to notice where you were off, and draw from memory again.
You should be able to draw this piece of anatomy by heart, even weeks from now.
When you do a memory drawing of a subject just once, the image is in your short-term memory, but your ability to visualize will have improved. When you draw a few times over days, then weeks is when you commit the information to long-term memory.
This way of memory drawing is reminiscent of test-based learning: you do a test to find the hiatuses in your knowledge. It is important not to cheat because if you cheat, the information is in your short-term memory. Find out what information is missing in your brain instead. This requires a mental shift: don’t feel bad about not knowing details! You will study them later. But first, you need to find out what you don’t know in the first place.
Feel good about leaving things blank: first, you didn’t know, now you know you didn’t. Then, focus on what you didn’t know and find ways to remember this information efficiently. Concentrate on internalizing the information again. Then, do the test again and repeat it tomorrow, the day after, and the week after.
Memory drawing is predominantly not about memorizing references. If you don’t believe me, try drawing something you haven’t practiced like this before. Notice how you’re now able to pull details out of thin air! It’s all there in your brain; you need to learn how to access it. Memory drawing did this.
Although this course is not about memorizing a specific reference, it can be used for that. It can be helpful to memorize anatomy or character design.
We’re nearly at a place where you will spread out your wings! I gave you the tools to do memory drawing exercises and showed you how they were helpful. Now, I want you to start collecting the images you want to study.
There are no rules! You can collect art by artists; don’t pass your copies off as your own, and don’t infringe on copyrights. Private copies for studying in your private sketchbook are acceptable.
Collect photos online and take pictures with your mobile during the day. Get into the habit of collecting striking images so you have a library of images to do memory drawing exercises from. I won’t always be there to provide you with reference images! You may prefer to go in a different direction visually.
A unique form of reference collecting is memorizing something you see during the day and drawing it from memory the next day or later in the day. You’ll find that you are more free to augment what you memorized with imagined details as it was recorded in your mind much earlier. And this is a form of drawing you can do when you don’t have drawing tools with you! Close your eyes and draw it in your mind while standing before it; open your eyes, notice things you got wrong, and try again. People won’t see that you’re drawing in your mind. Then, draw it on paper the next day.
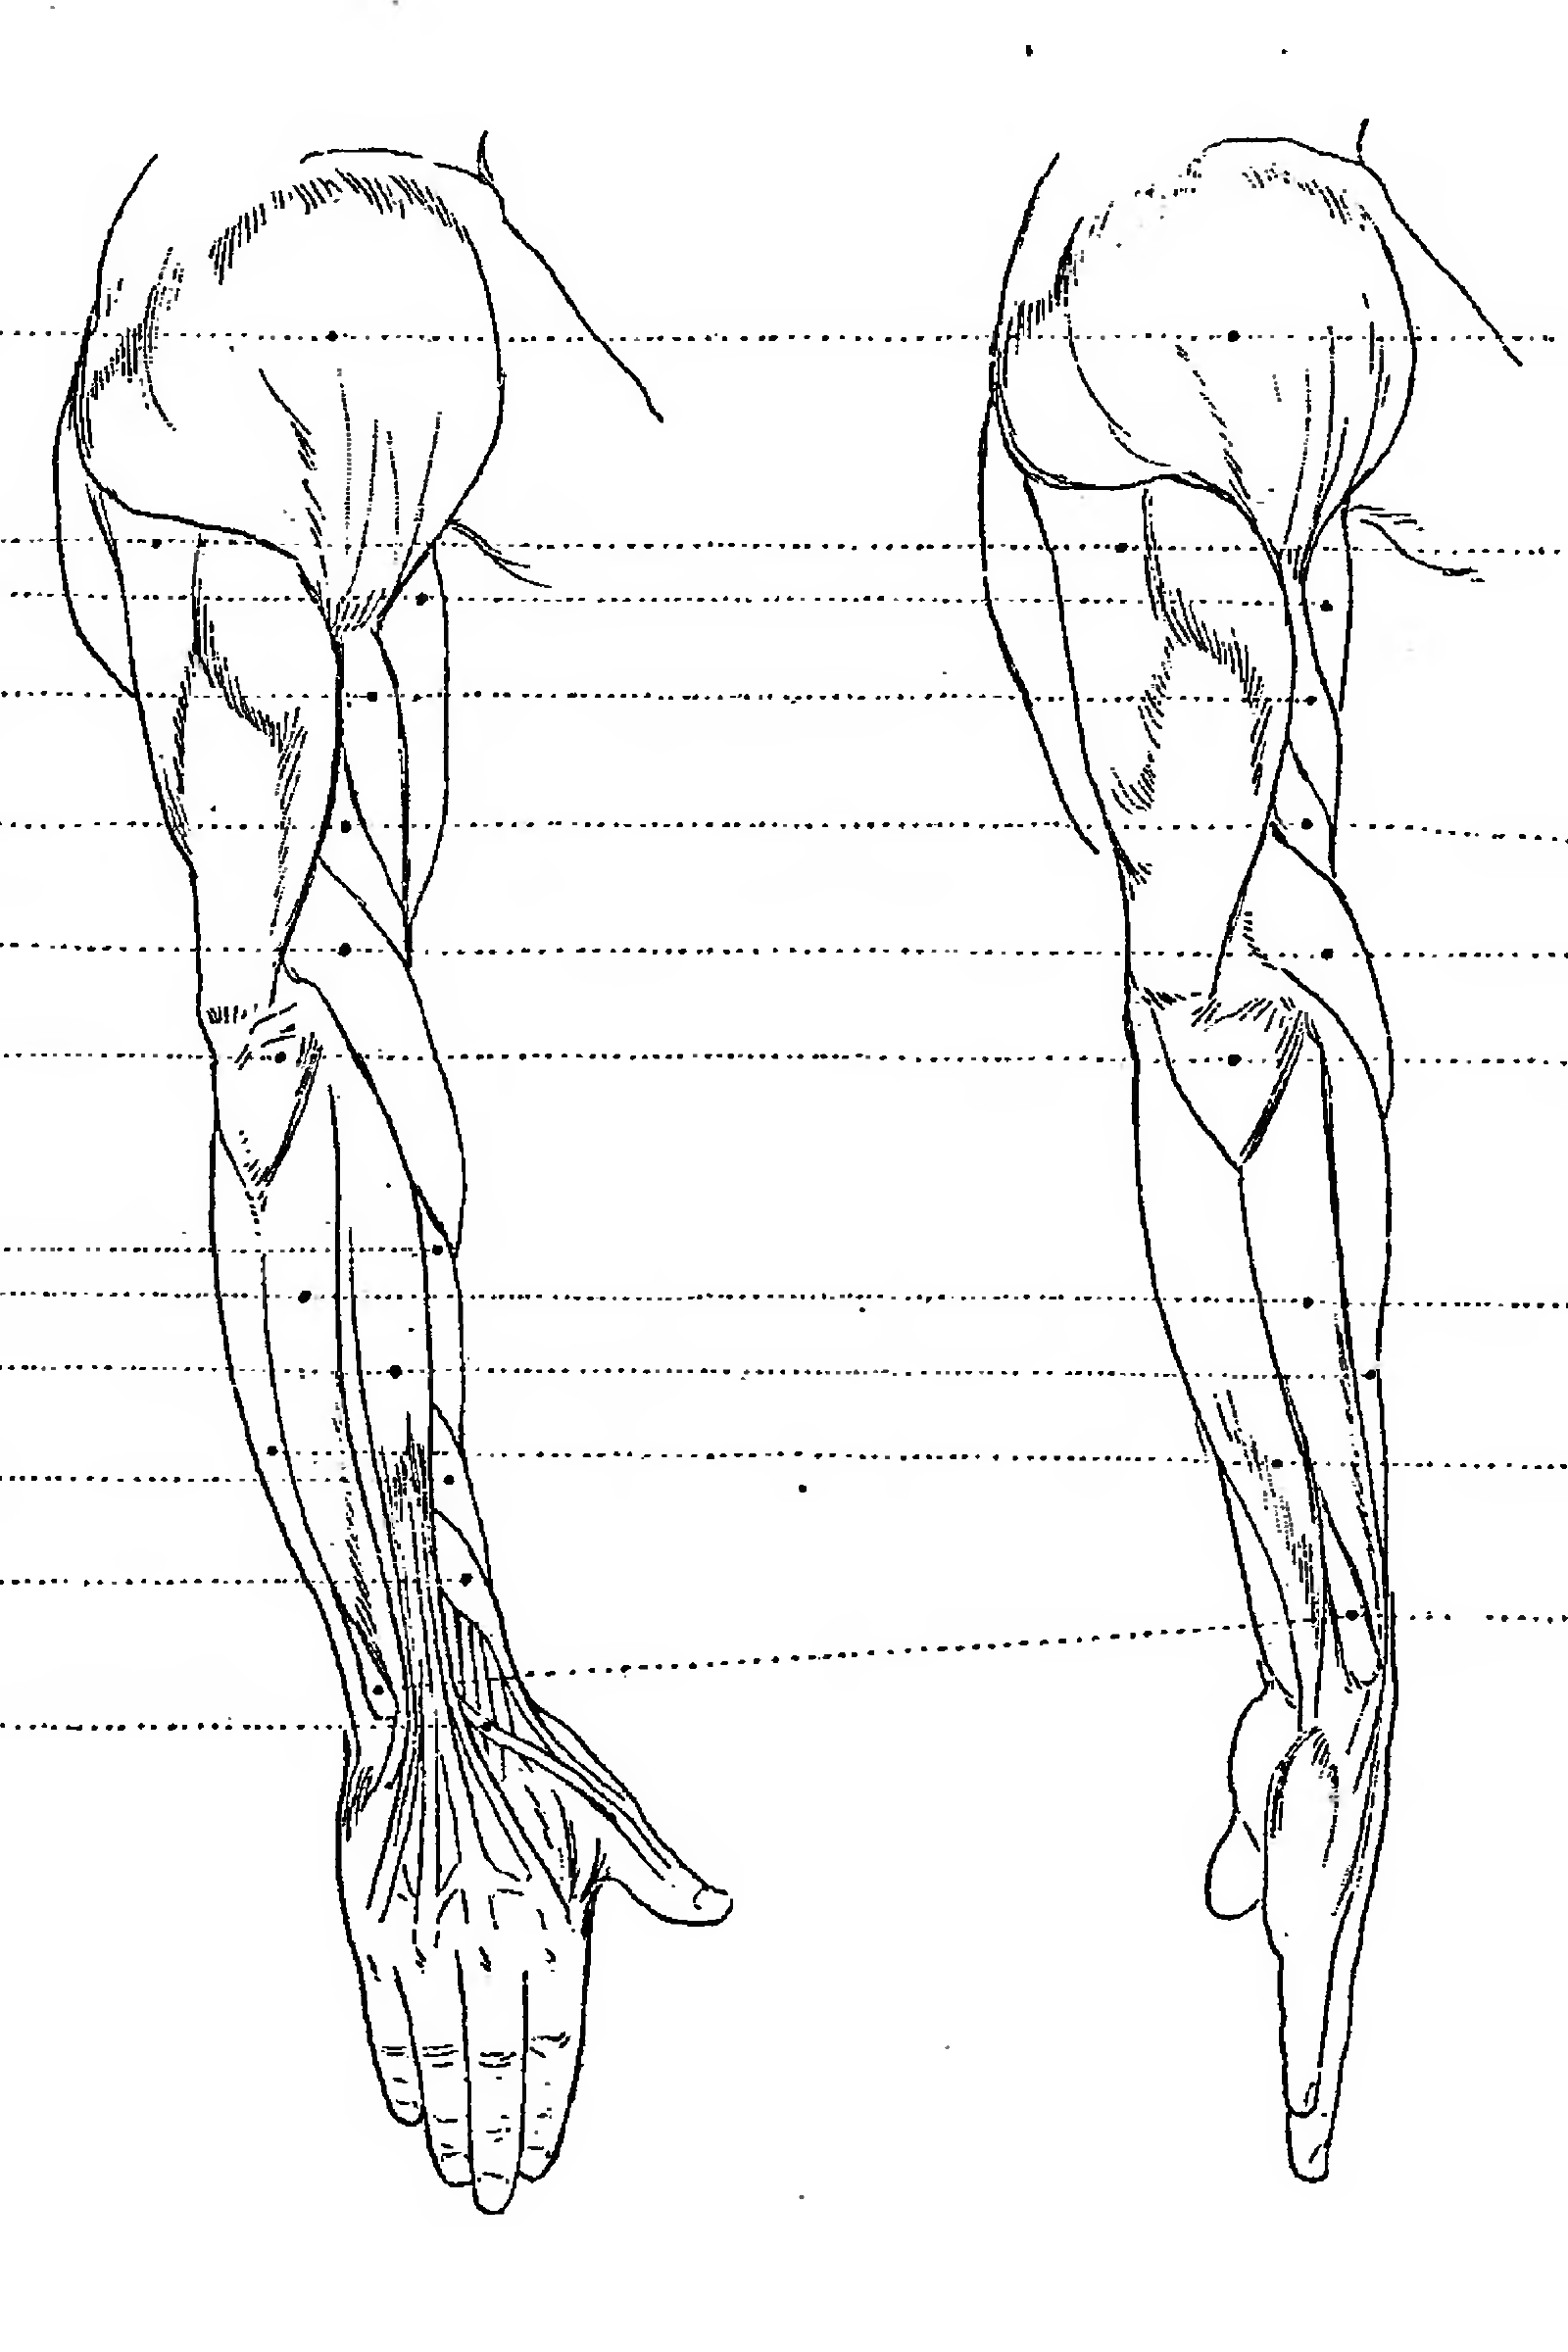 Paul Richer Anatomy Plate, 1890, source: Wikimedia Commons
13. Imagination II
Dexterity
Use any of the warm-up exercises we used before, whichever you feel like doing the most. It is also about getting into the right mindset for having fun drawing. Warm up as you feel is necessary.Full Imagination
I left this chapter until last because drawing confidently from imagination is often the ultimate holy grail of many artists.You now have the tools if you did the warm-ups in this workbook.
In this workbook, we studied reference images by first studying shapes to get a feel for proportions, and then we studied forms to start understanding the underlying structure. Then, we rendered details, either from reference or imagination.
The routine for drawing from imagination is different; here, we work from form first, discover beautiful shapes, and then add detail.
Try it out, and have fun delving into your visual library!
Freedom At Last!
Here we come at the end, where you fly off on your own, using the reference images you collected for the exercises.
Warm up as you feel is necessary. Browse through your sketchbook to get inspired to draw. Choose a reference you collected before to draw from memory or draw something you memorized on the spot yesterday from memory.
Apply the lessons from this course. Also, keep drawing from observation and imagination, play with proportions and style, and move between abstract, realism, and cartoon styles.
Celebrate when you finish another beautiful page! Keep noticing how sketchbook pages can look beautiful in all their glory.
Collect more reference images and memorize something during the day. But most importantly, have fun with it, and ensure you enjoy the results any way you can!
Afterword
Betty Edward’s book “Drawing on the Right Side of the Brain” has interesting information. In the book, she mentions that it is best to clear your head of words while drawing. When you have complete silence in your head, you can sense a silent part of your brain being excited about a line.
This was a striking bit of information because it is accurate and points to something usually not discussed: what happens in the artist’s mind as they draw.
And it worked! When you clear your mind of words, you start to sense if a line is right; you can feel a part of your brain becoming excited after you place the line. Having a loud inner monologue drowns out that whisper in your mind.
We secretly strive to be able to make these magical pieces of art our predecessors created, and we look at their art for hints as to how they did it. And indeed, the art is there in its full splendor, seemingly giving away all its secrets to the artist willing to try to copy it. But one crucial part is missing: what goes on in the head of the artist as they work?
I suspect that masters don’t even know most of the time. We often can’t ask them anymore, and we can’t ask them while they are creating because the interruption would break the mental spell.
Kim Jung Gi had practiced drawing from memory a lot, partly because he often didn’t have his drawing tools with him in the army. So he’d memorize something during the day and then draw it later. Suspecting this significantly impacted his ability to draw fantastic worlds seemingly from imagination, I tried drawing from memory. At first, I didn’t see the point; why draw from memory when you can also draw from observation? However, after just a few days of doing the memory drawing exercise, I noticed a significant improvement in my ability. I tried drawing a rabbit, something I hadn’t practiced in any way, but it came out surprisingly well. That is when I suspected something was going on.
I am not aware of any scientific research that has been done in this area, but it would be fertile ground for study. There is something here, as you probably discovered after doing the memory drawing exercises yourself.
If you did the exercises, you likely noticed an improvement in your ability to visualize images before you draw them. This is all mental power.
I struggled to convince people on social media to try this exercise. Form studies are the most popular posts by far. People find my website by searching for form studies, of which I have a few. They don’t search for memory drawing at all.
I understand why: you want to believe you can draw anything if you can deconstruct a subject into three-dimensional forms. And this is true, but there are better paths to mastery. Rembrandt didn’t do form studies. I suspect Kim Jung Gi didn’t, either. You see him drawing form often, but I suspect he was trying to tell us that was what he saw in his mind as he drew—again, a mental thing happening in the artist’s brain.
At any length, if you did this course, even if drawing from memory wasn’t a spectacular success for you, then the worst that came out of it was improved hand dexterity, fun drawing, pleasing art results, and a chance for you to study Heinrich Kley’s work more closely. That is not a bad worst case.
If this exercise does as much for you as it did for me, prepare to experience the best-case scenario, experience immense improvement of abilities, and have your mind blown.
This is an N=1 dataset, and I might be seeing a causal relationship that is not there, and memory drawing might not work as well for others. It might not work for people with Aphantasia (an inability to visualize), but it might also work better for them. Who knows. When I was presenting my memory drawing exercises on Instagram, someone with Aphantasia contacted me. I asked if they could memorize the drawing by memorizing the angles of the lines that made up the shapes. The illustration was by Bridgman, a series of shapes that formed a leg. To their surprise, they did well, drawing the leg from memory. This is again an N=1 dataset: one artist, one drawing.
I wish I were younger; I would start researching it myself. I suspect that scientists who would devote their lives to studying the effects of memory drawing would discover fascinating results. It’s not a subtle effect, at least not with me.
But you, my reader, don’t have to wait for science to prove it! You can quickly try it for yourself! There is something here! You should notice a marked improvement in a short time, days, or weeks, not years. You only spend a little time if it doesn’t work for you.
I hope that memory drawing brought you as much skill improvement as it did for me, that your drawing results were at least as pleasing as mine, and that you, like me, will continue to find joy in drawing from memory. You can make the reference image as complex as you want, and you can keep challenging yourself with just this one drawing exercise for the rest of your life.
On that note, I’d love to learn whether memory drawing worked for you and how you experienced the exercise.
Heinrich Kley Illustrations
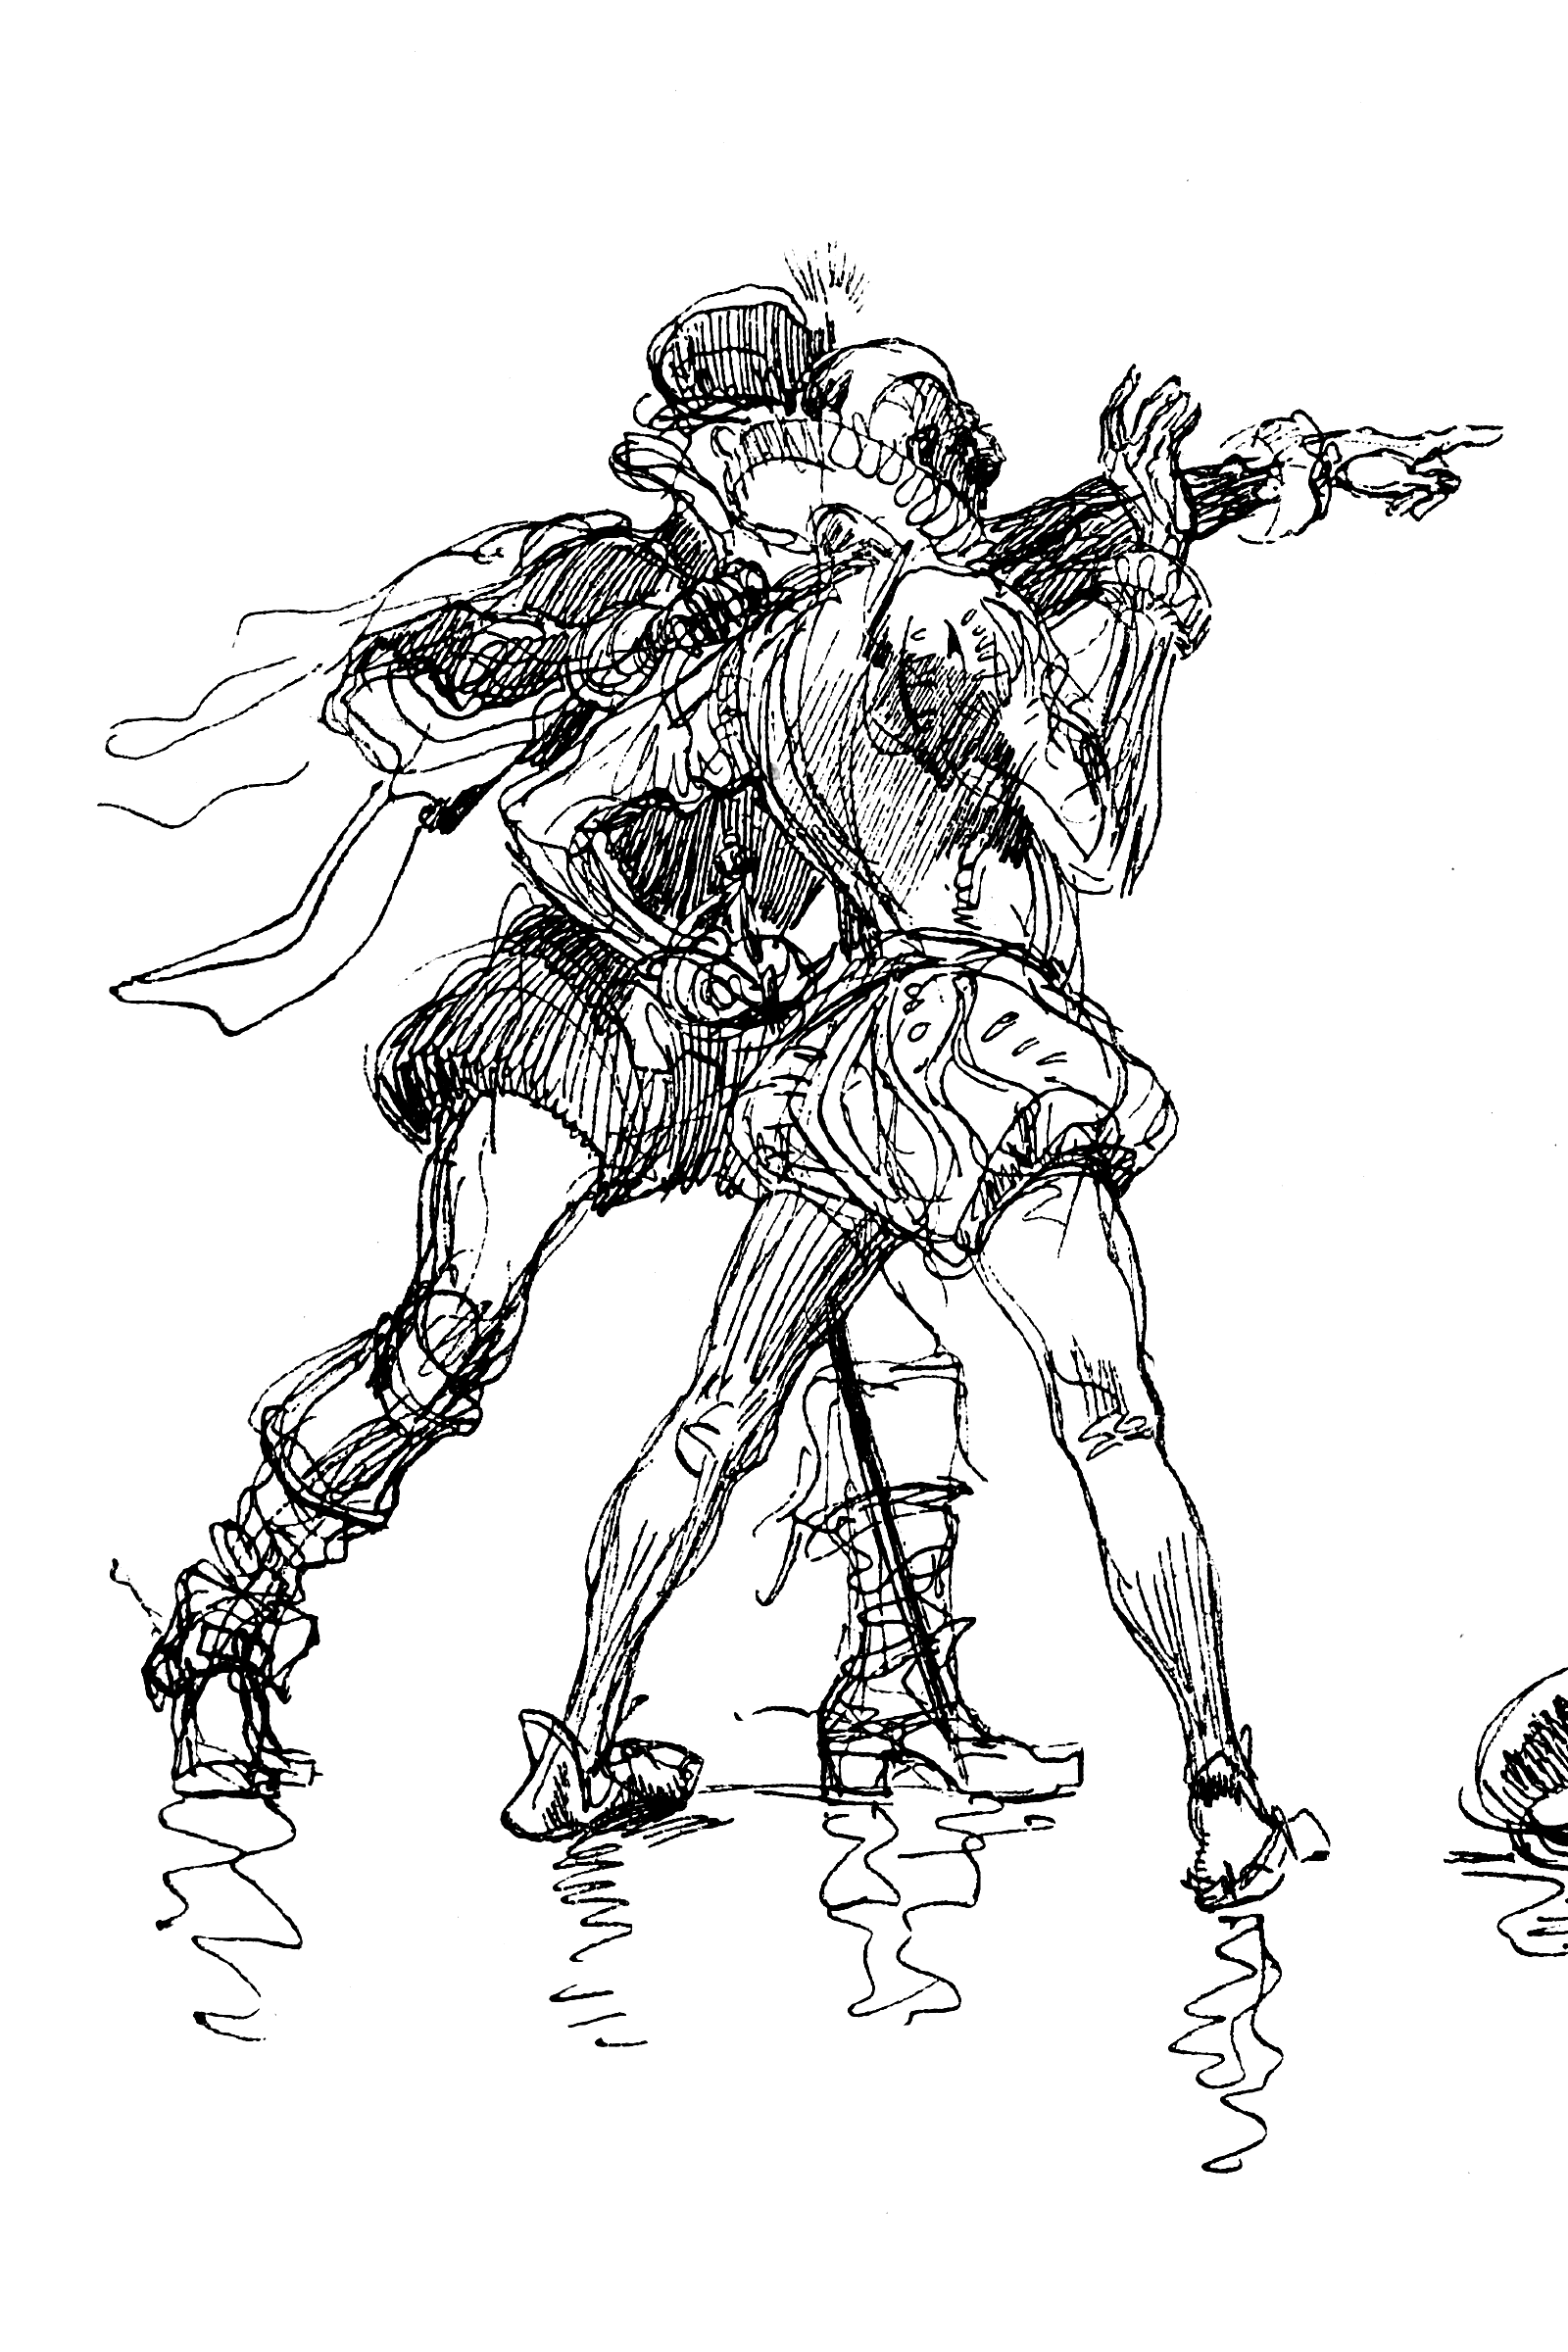 Heinrich Kley, scanned from 1911 book.
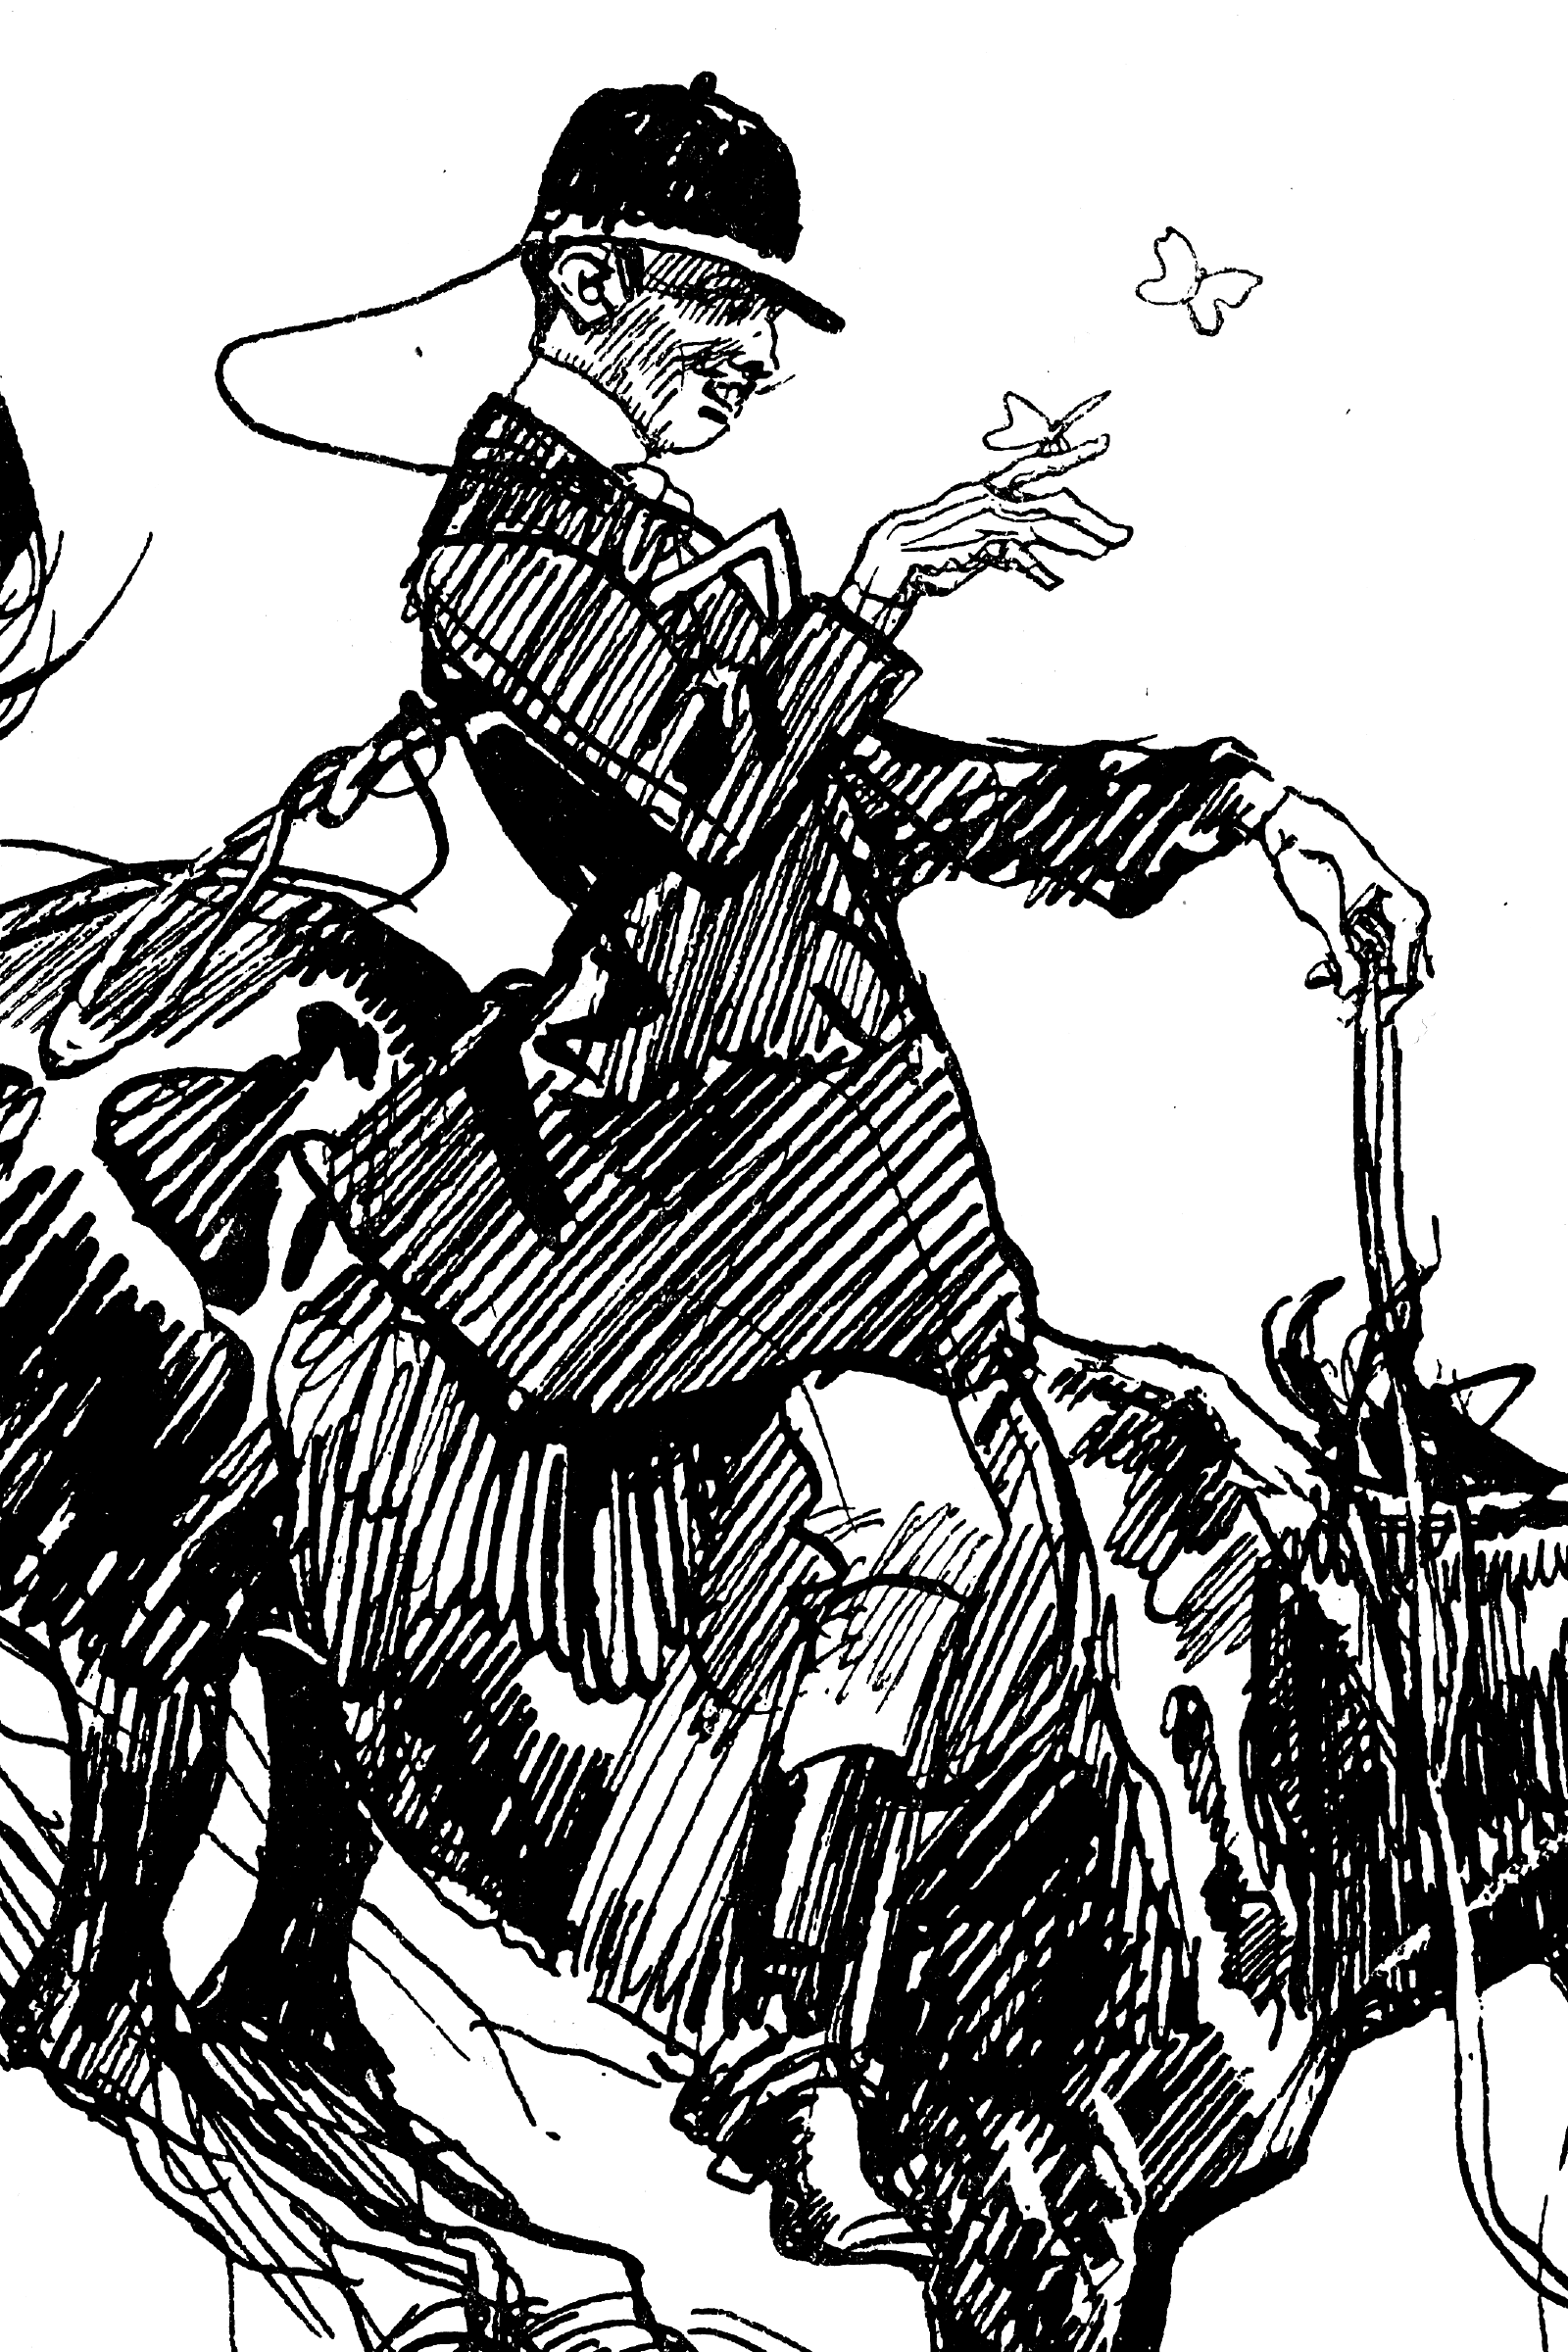 Heinrich Kley, scanned from 1911 book.
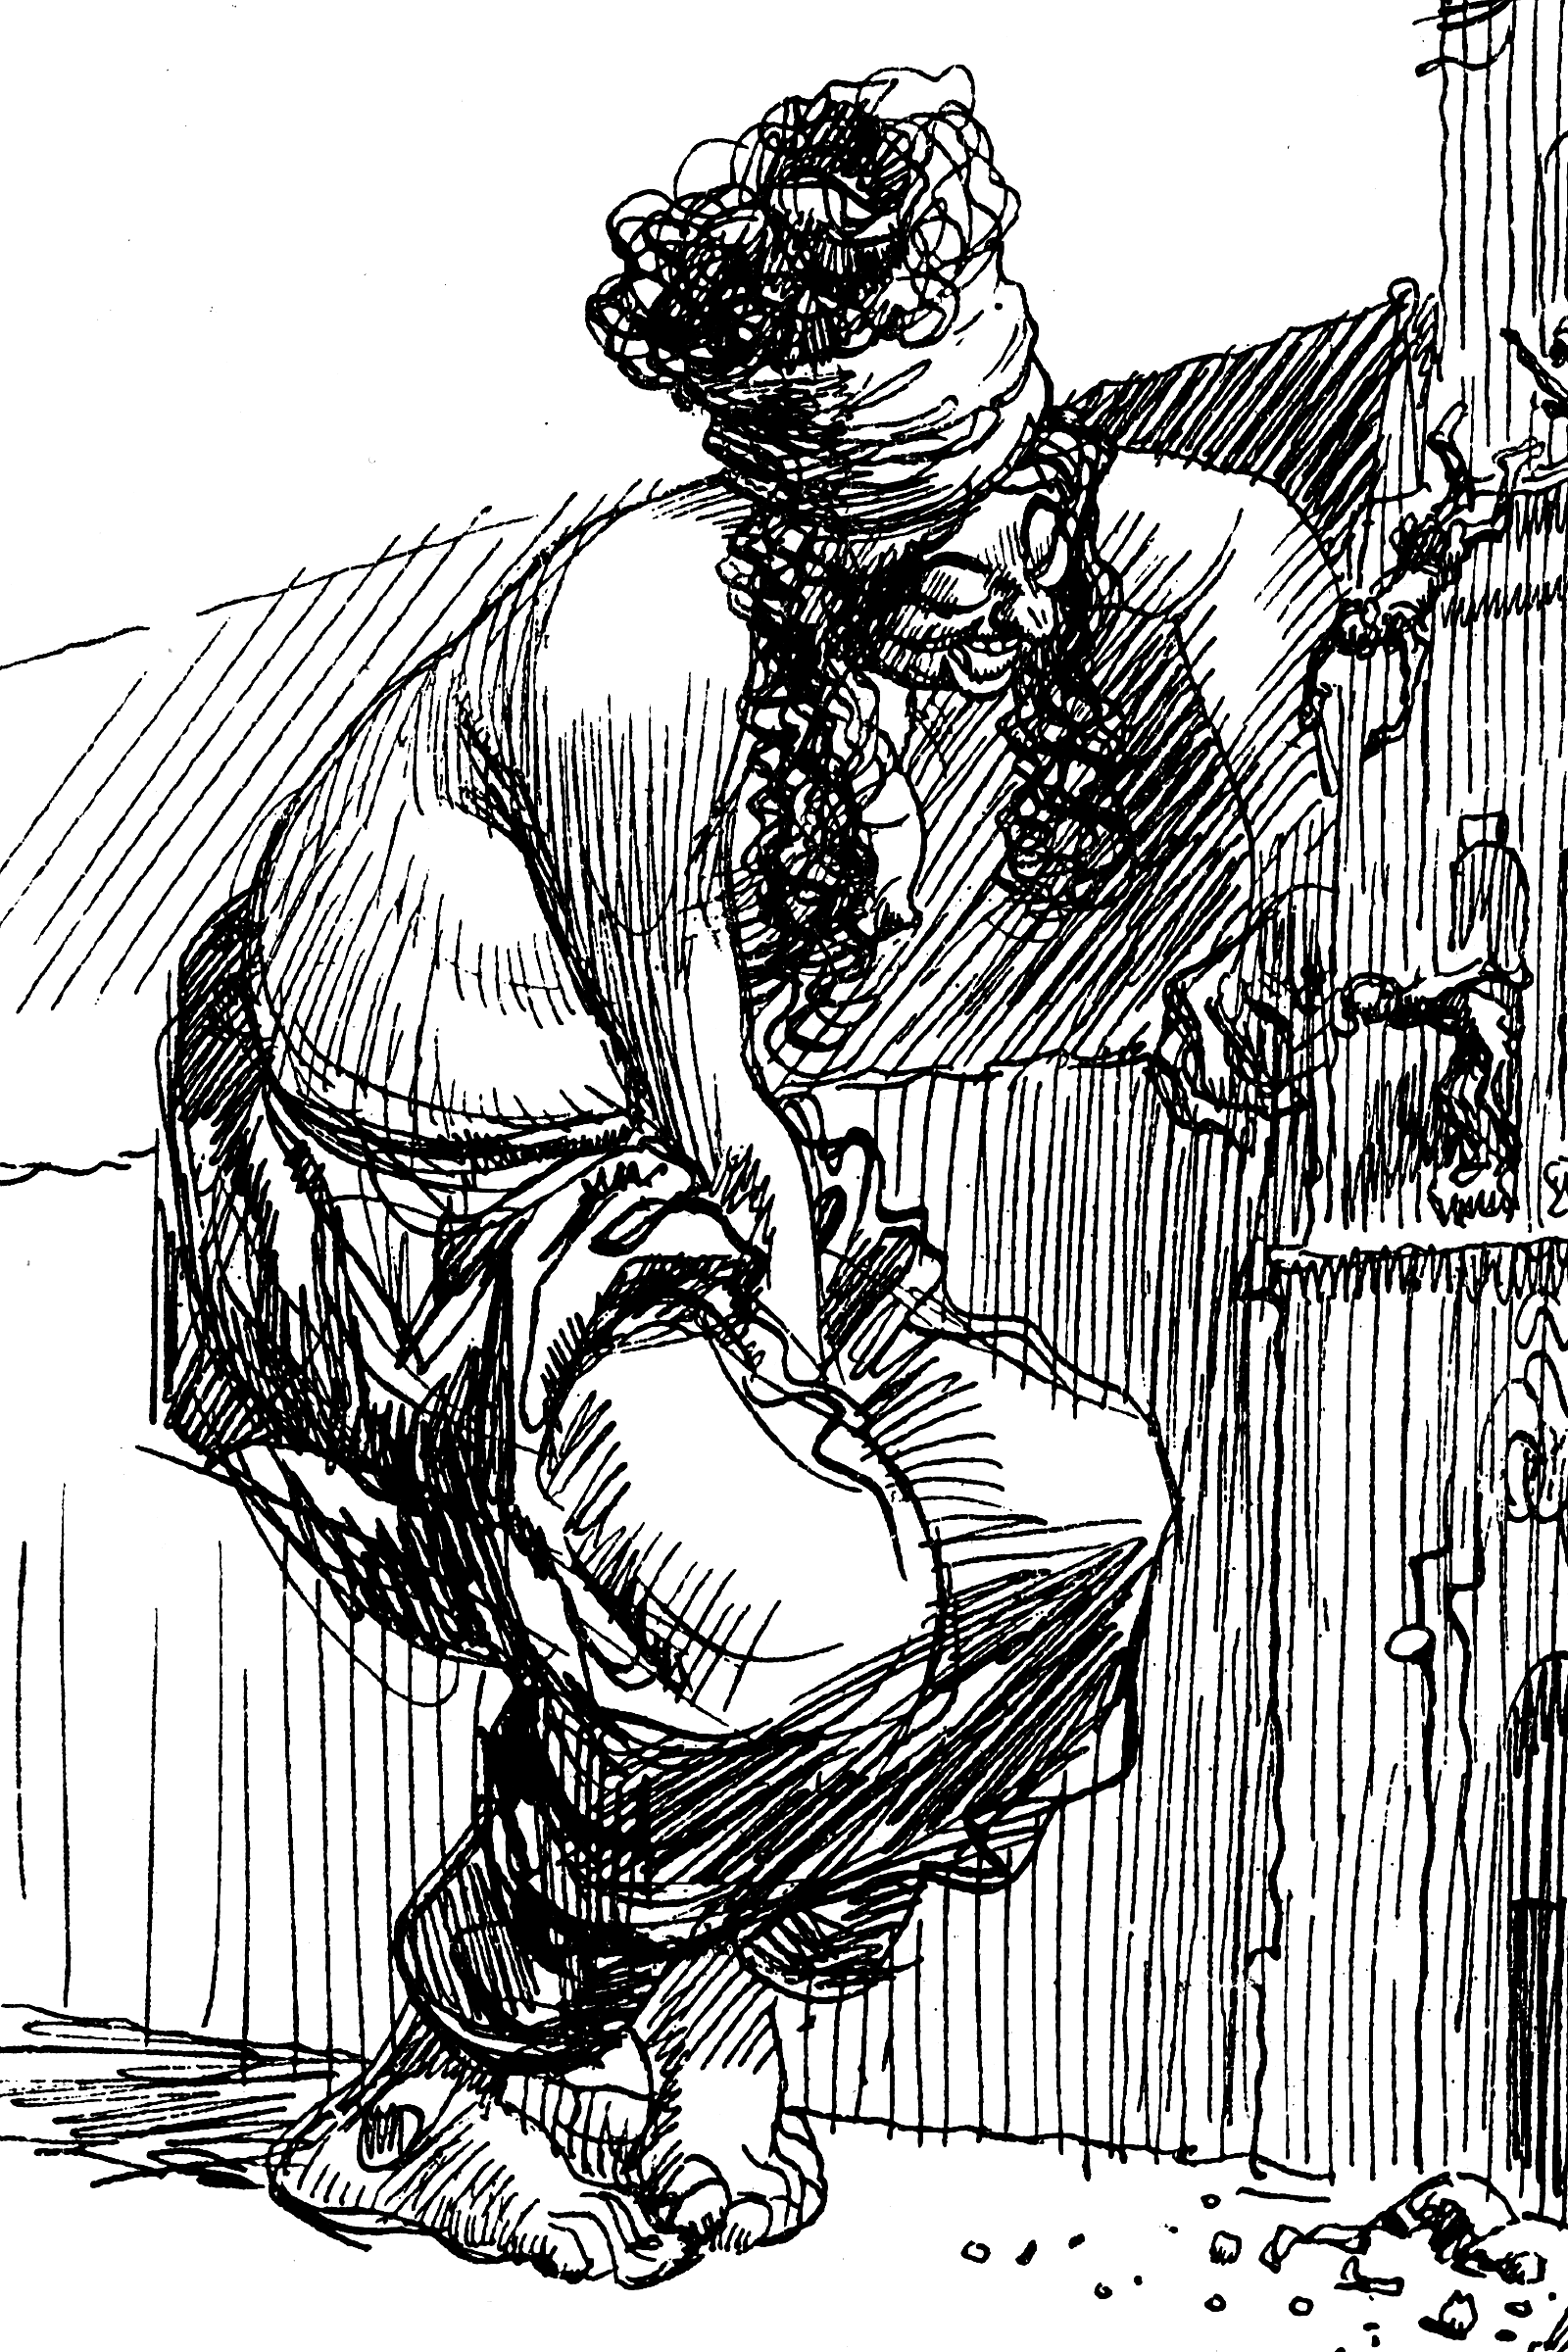 Heinrich Kley, scanned from 1911 book.
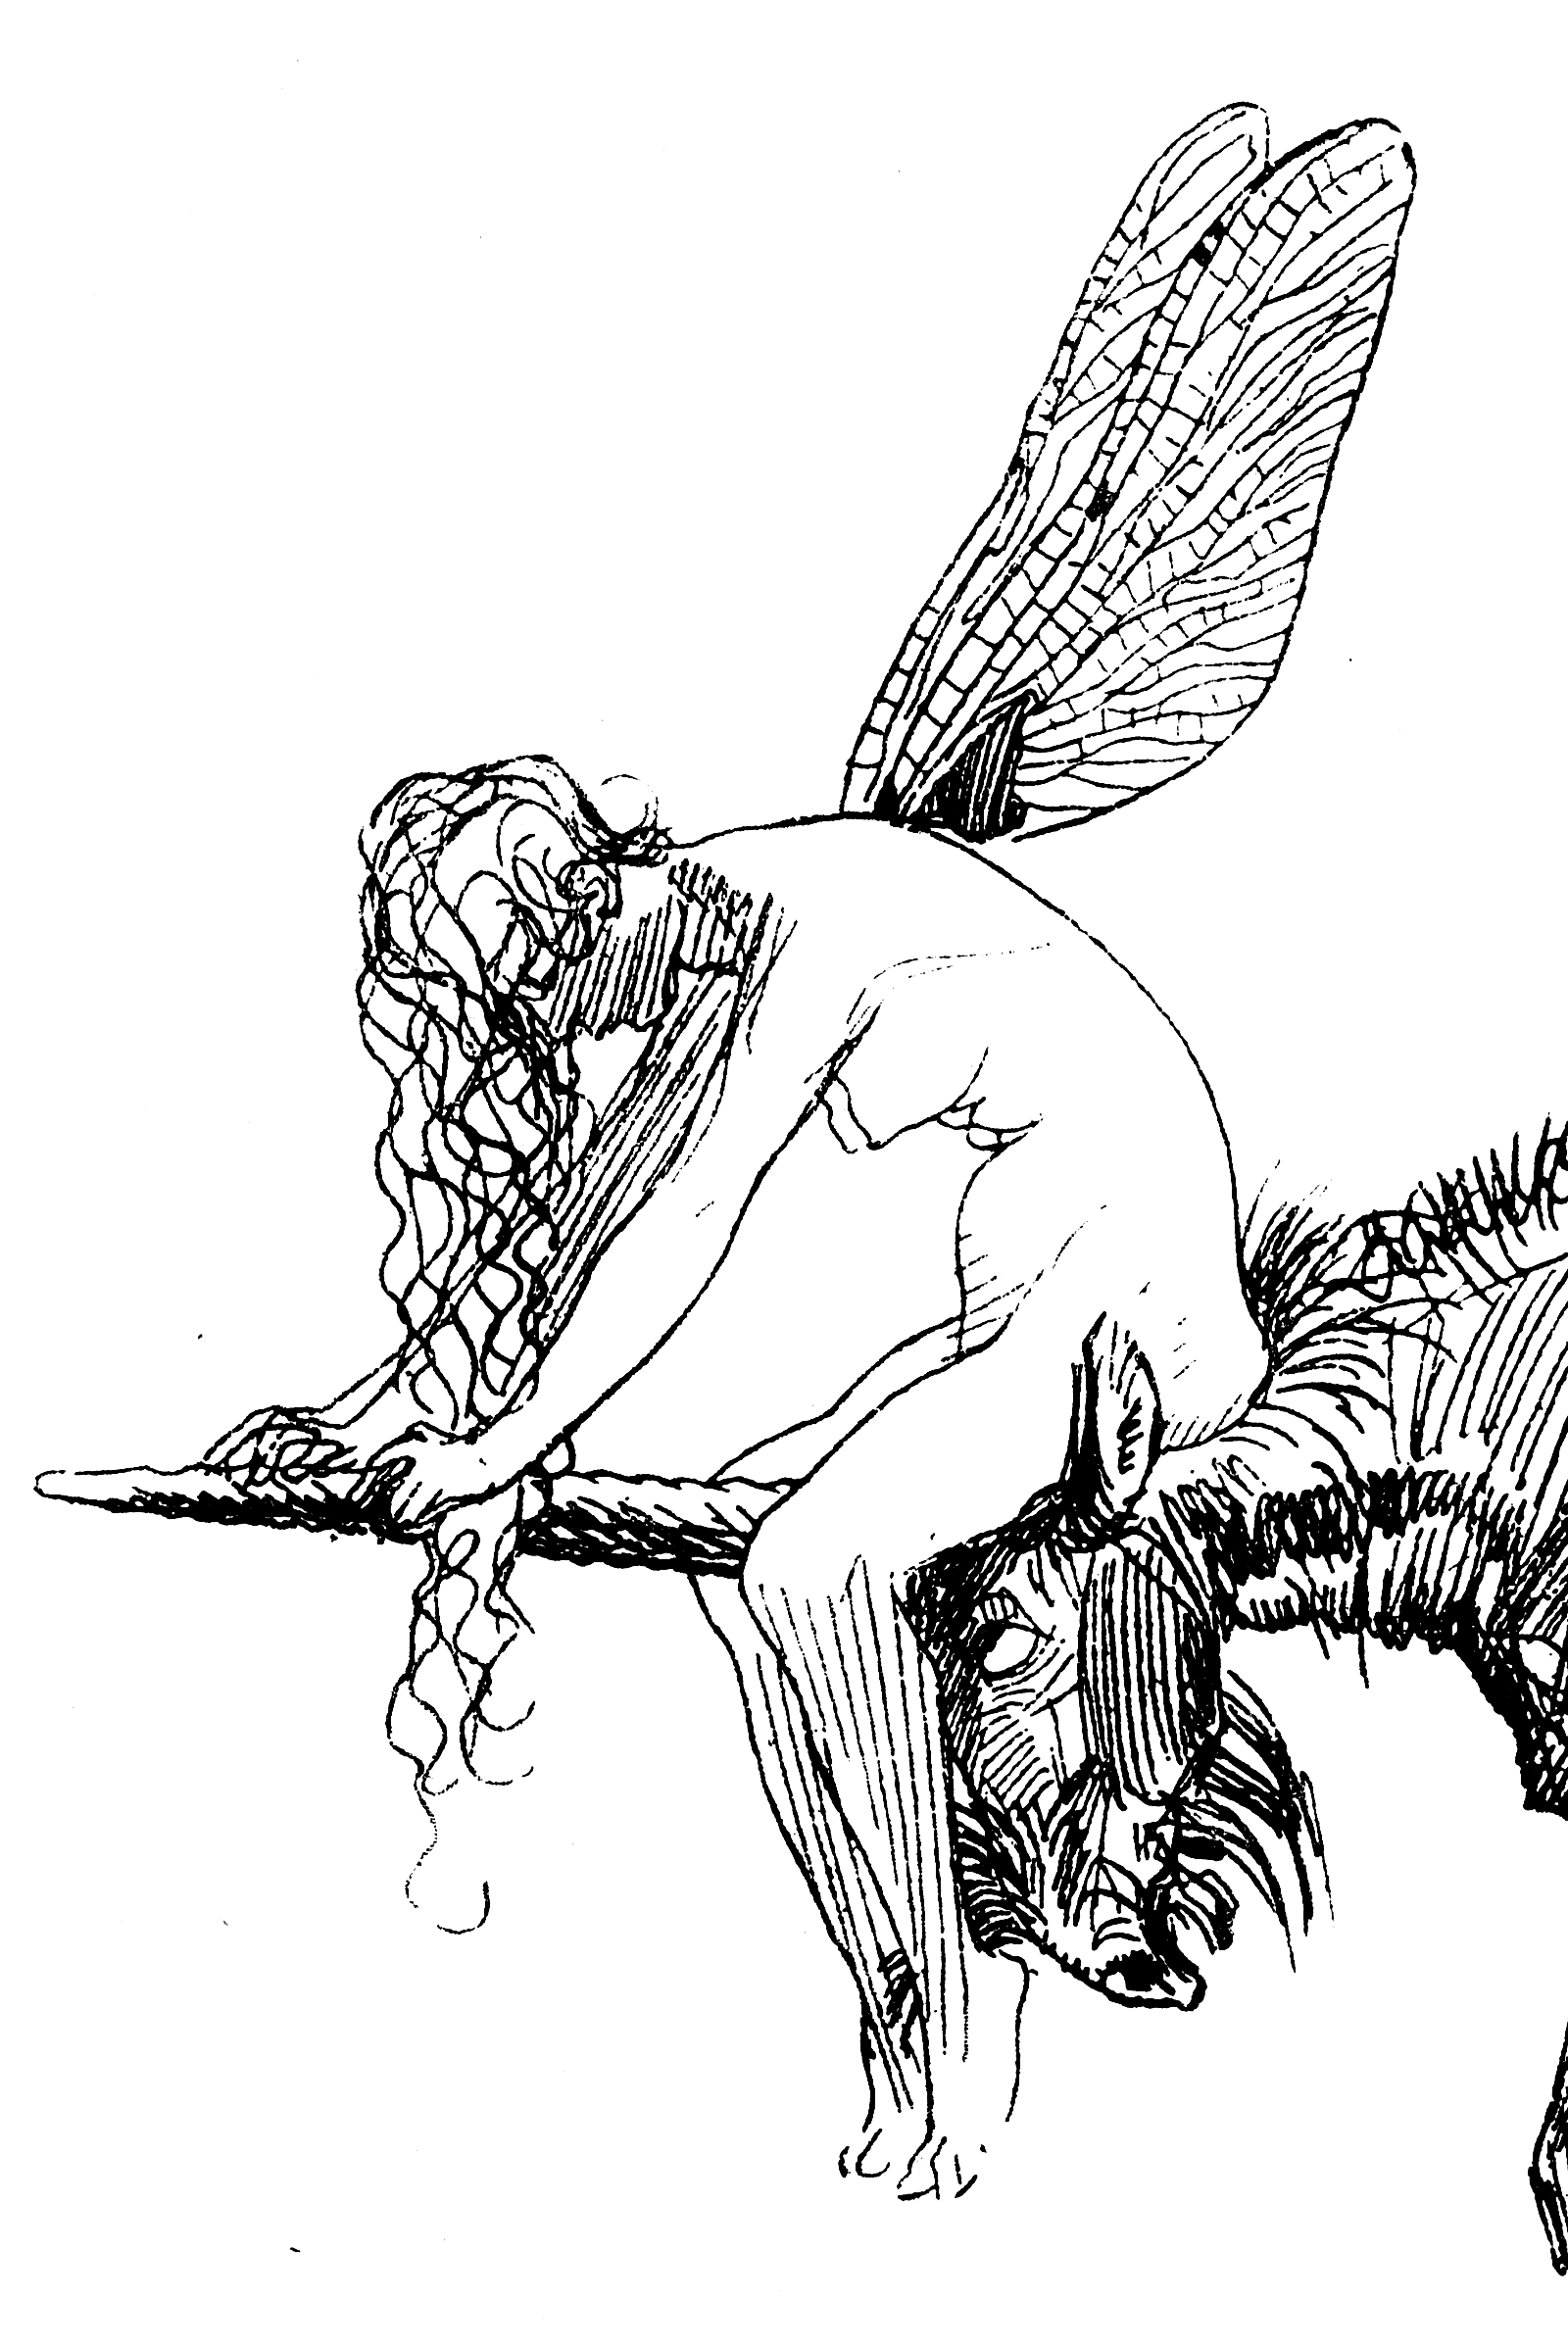 Heinrich Kley, scanned from 1911 book.
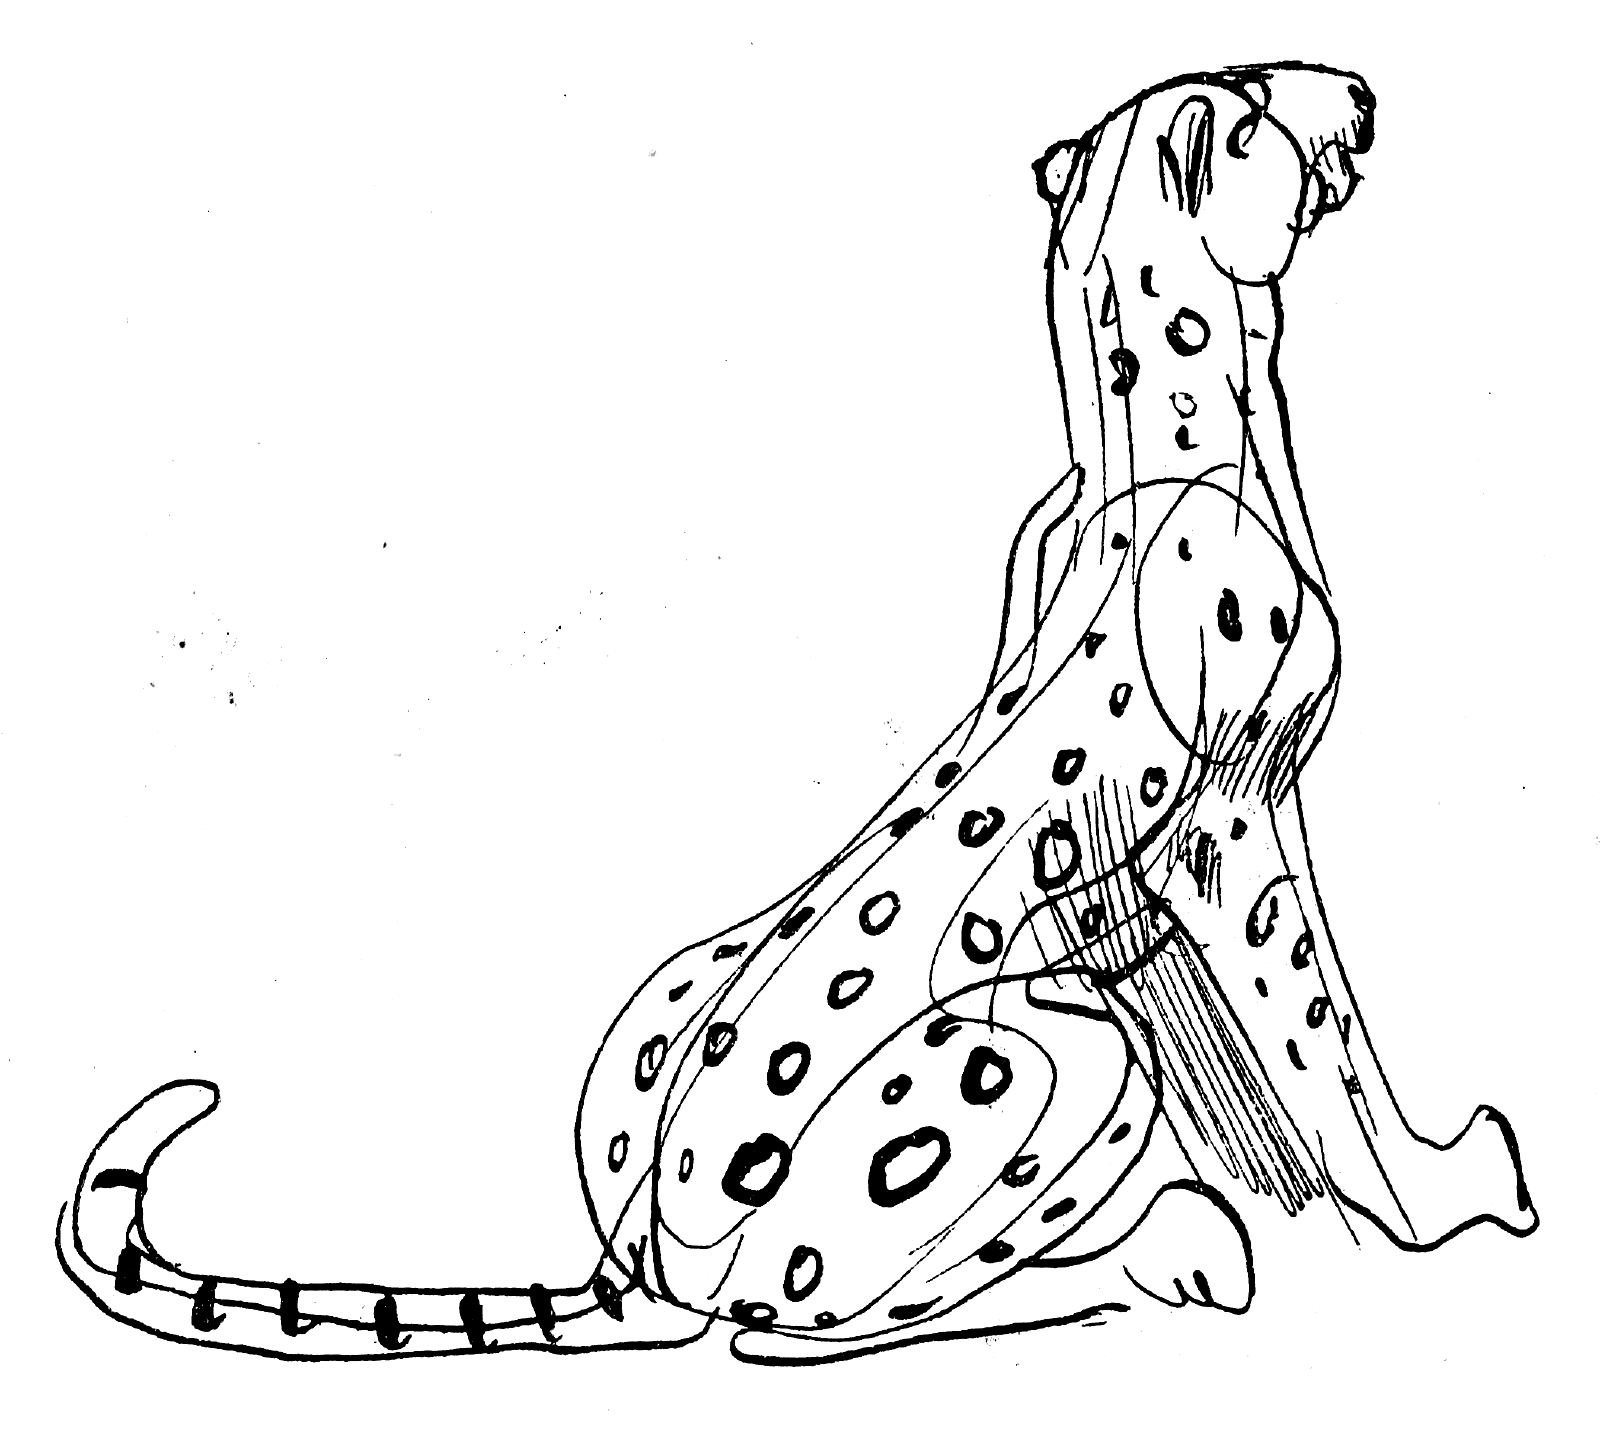 Heinrich Kley, scanned from 1911 book.
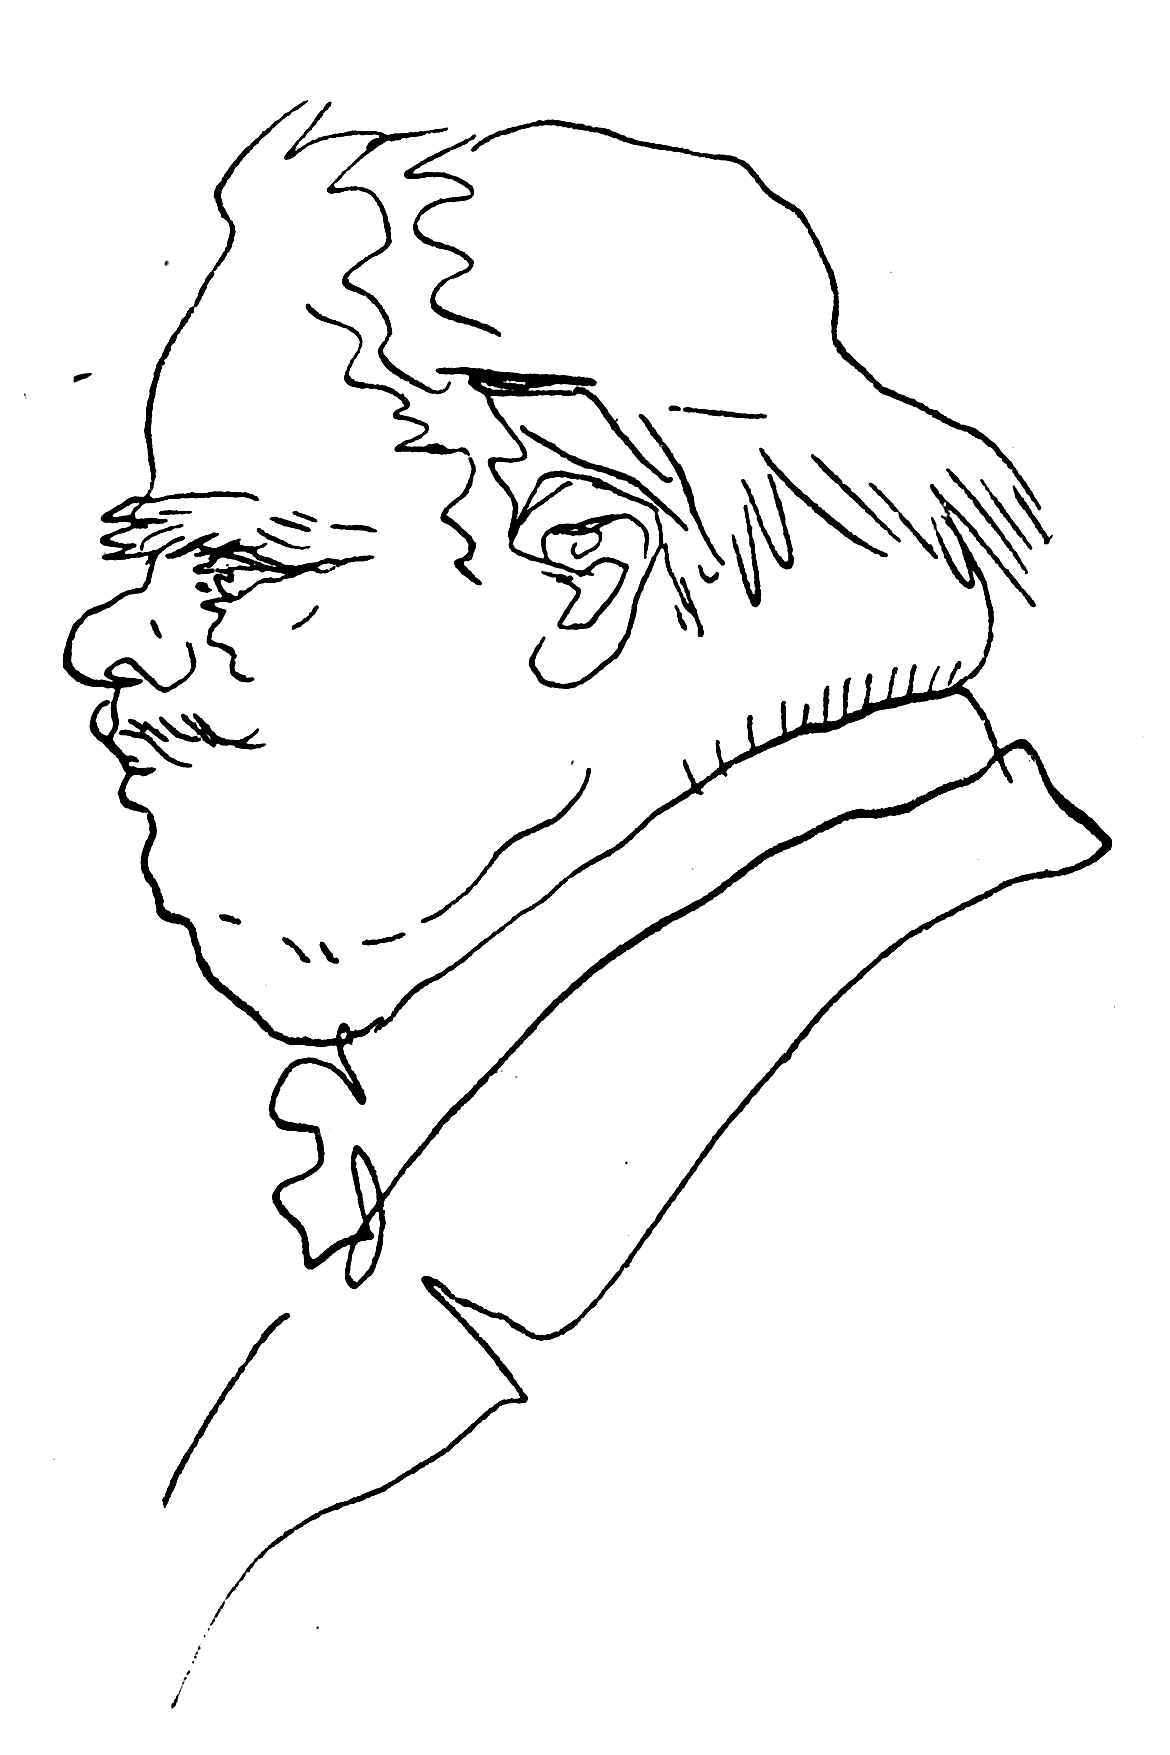 Heinrich Kley, scanned from 1911 book.
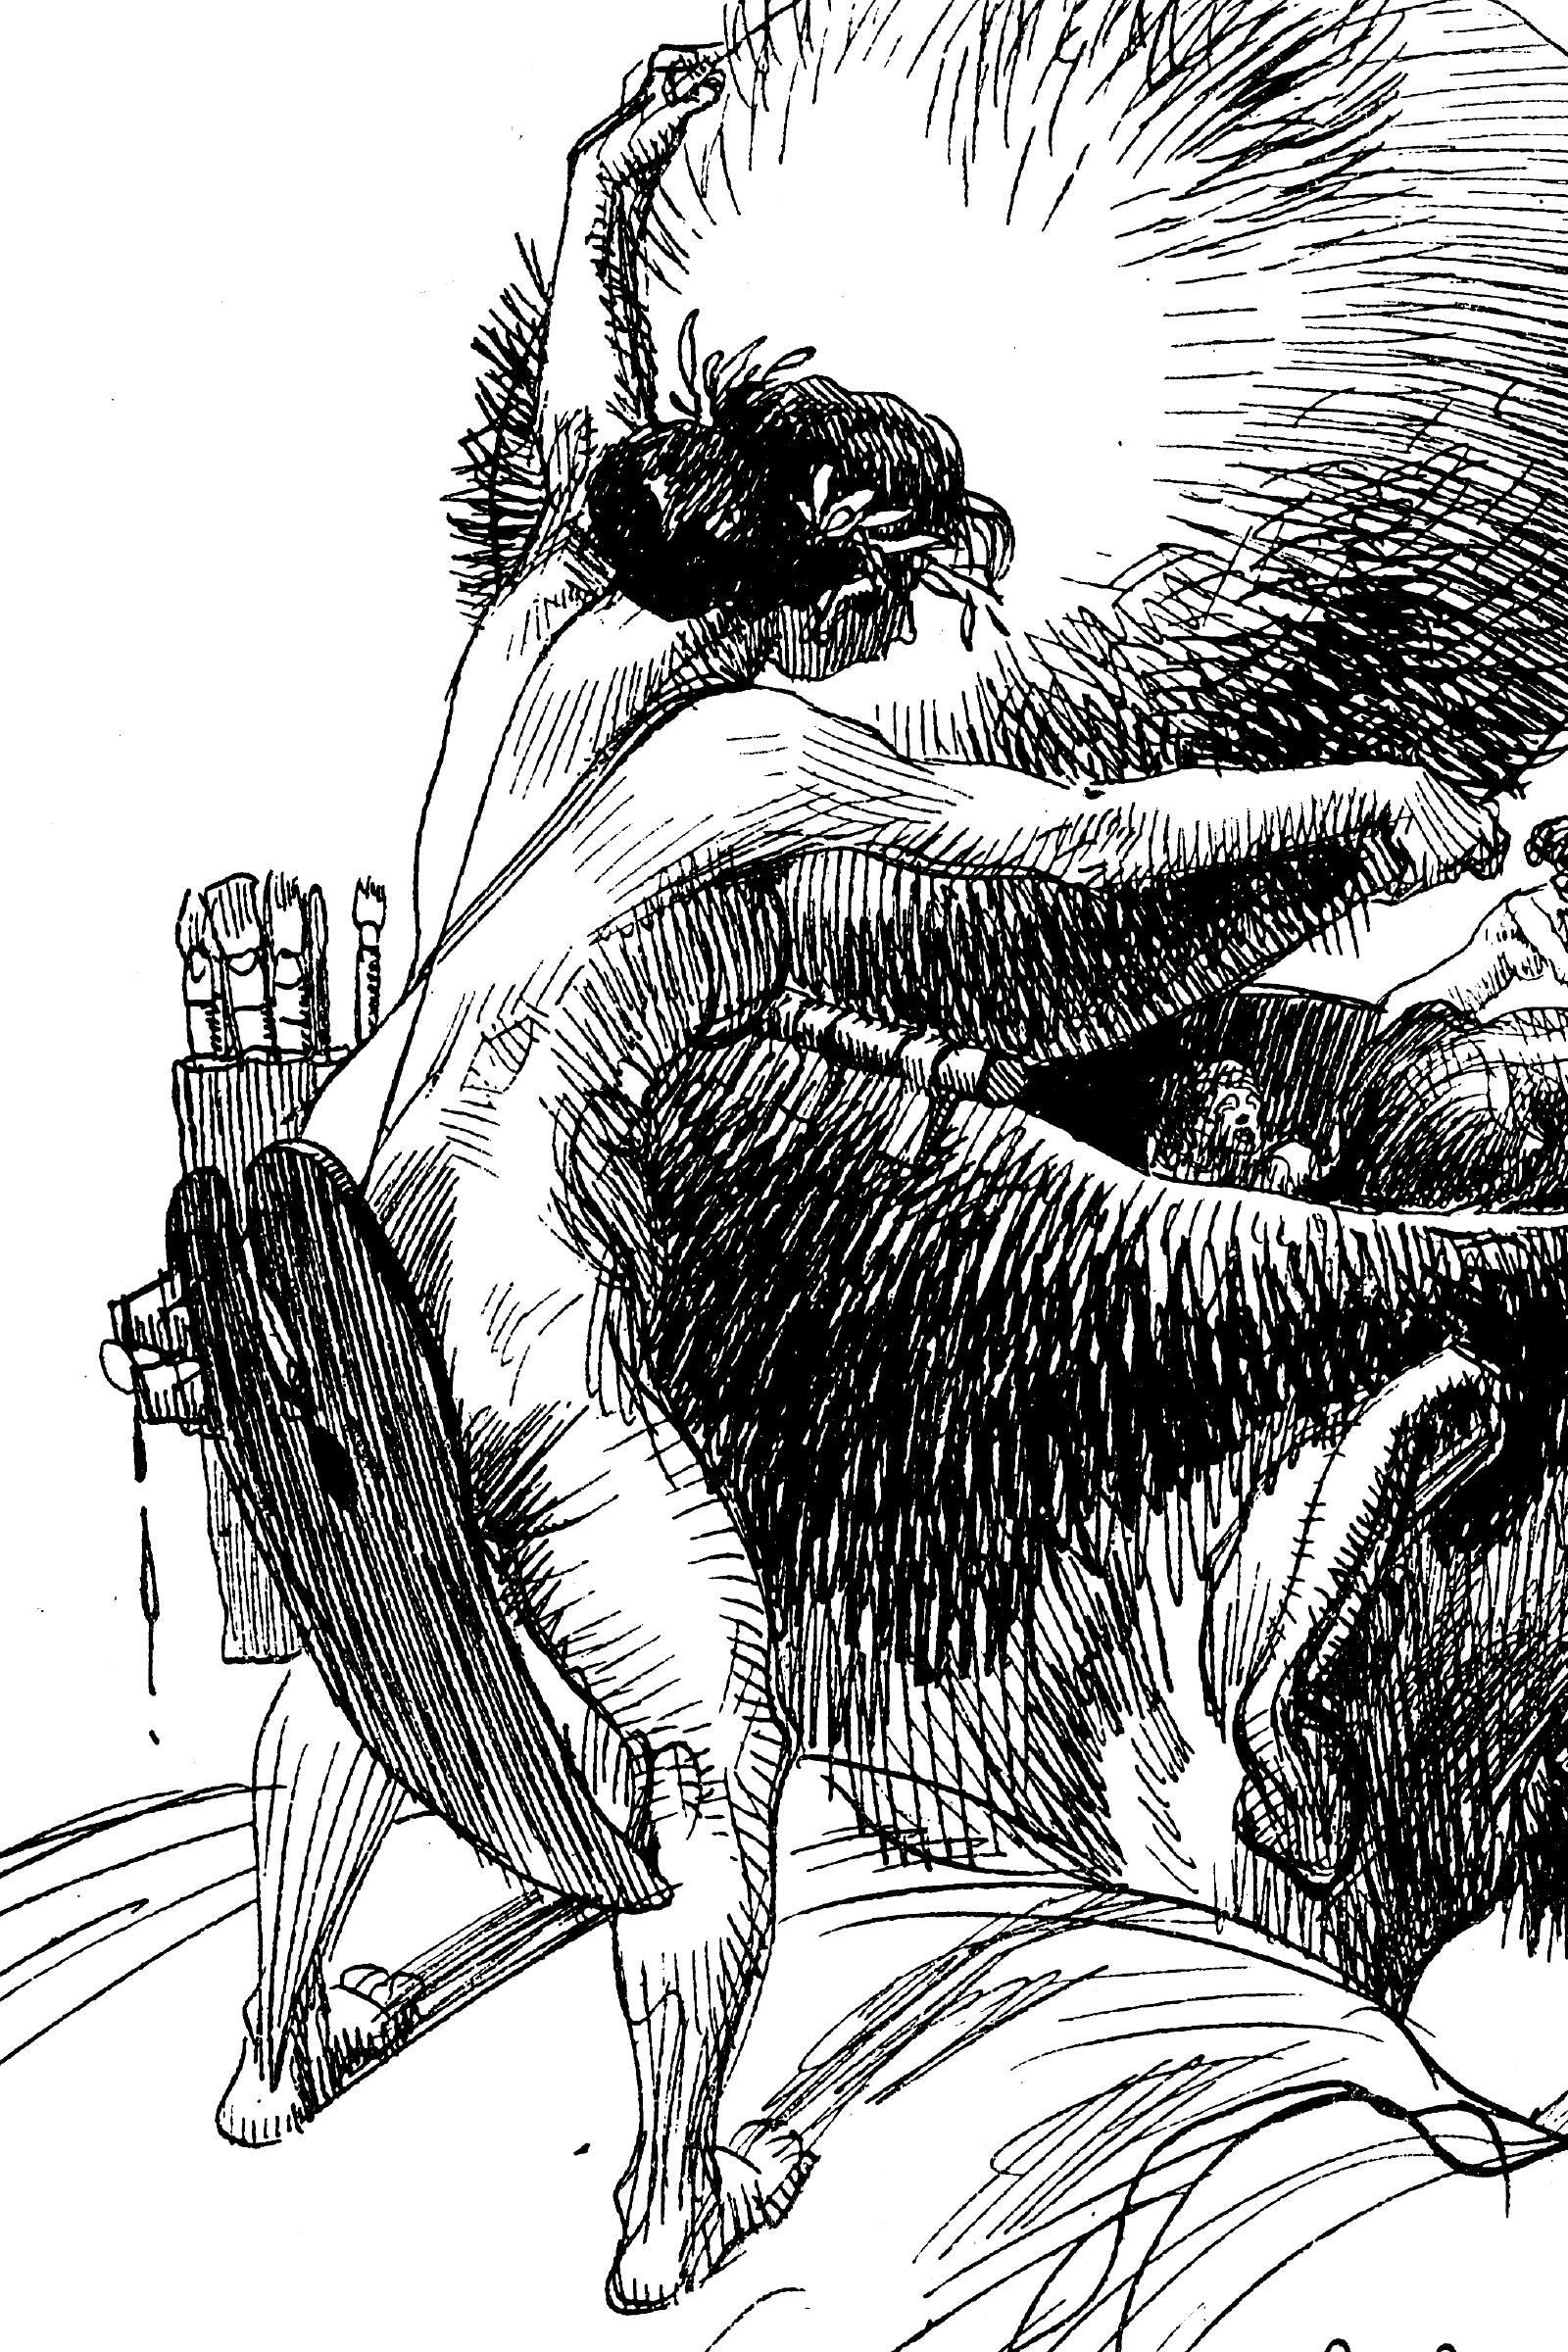 Heinrich Kley, scanned from 1911 book.
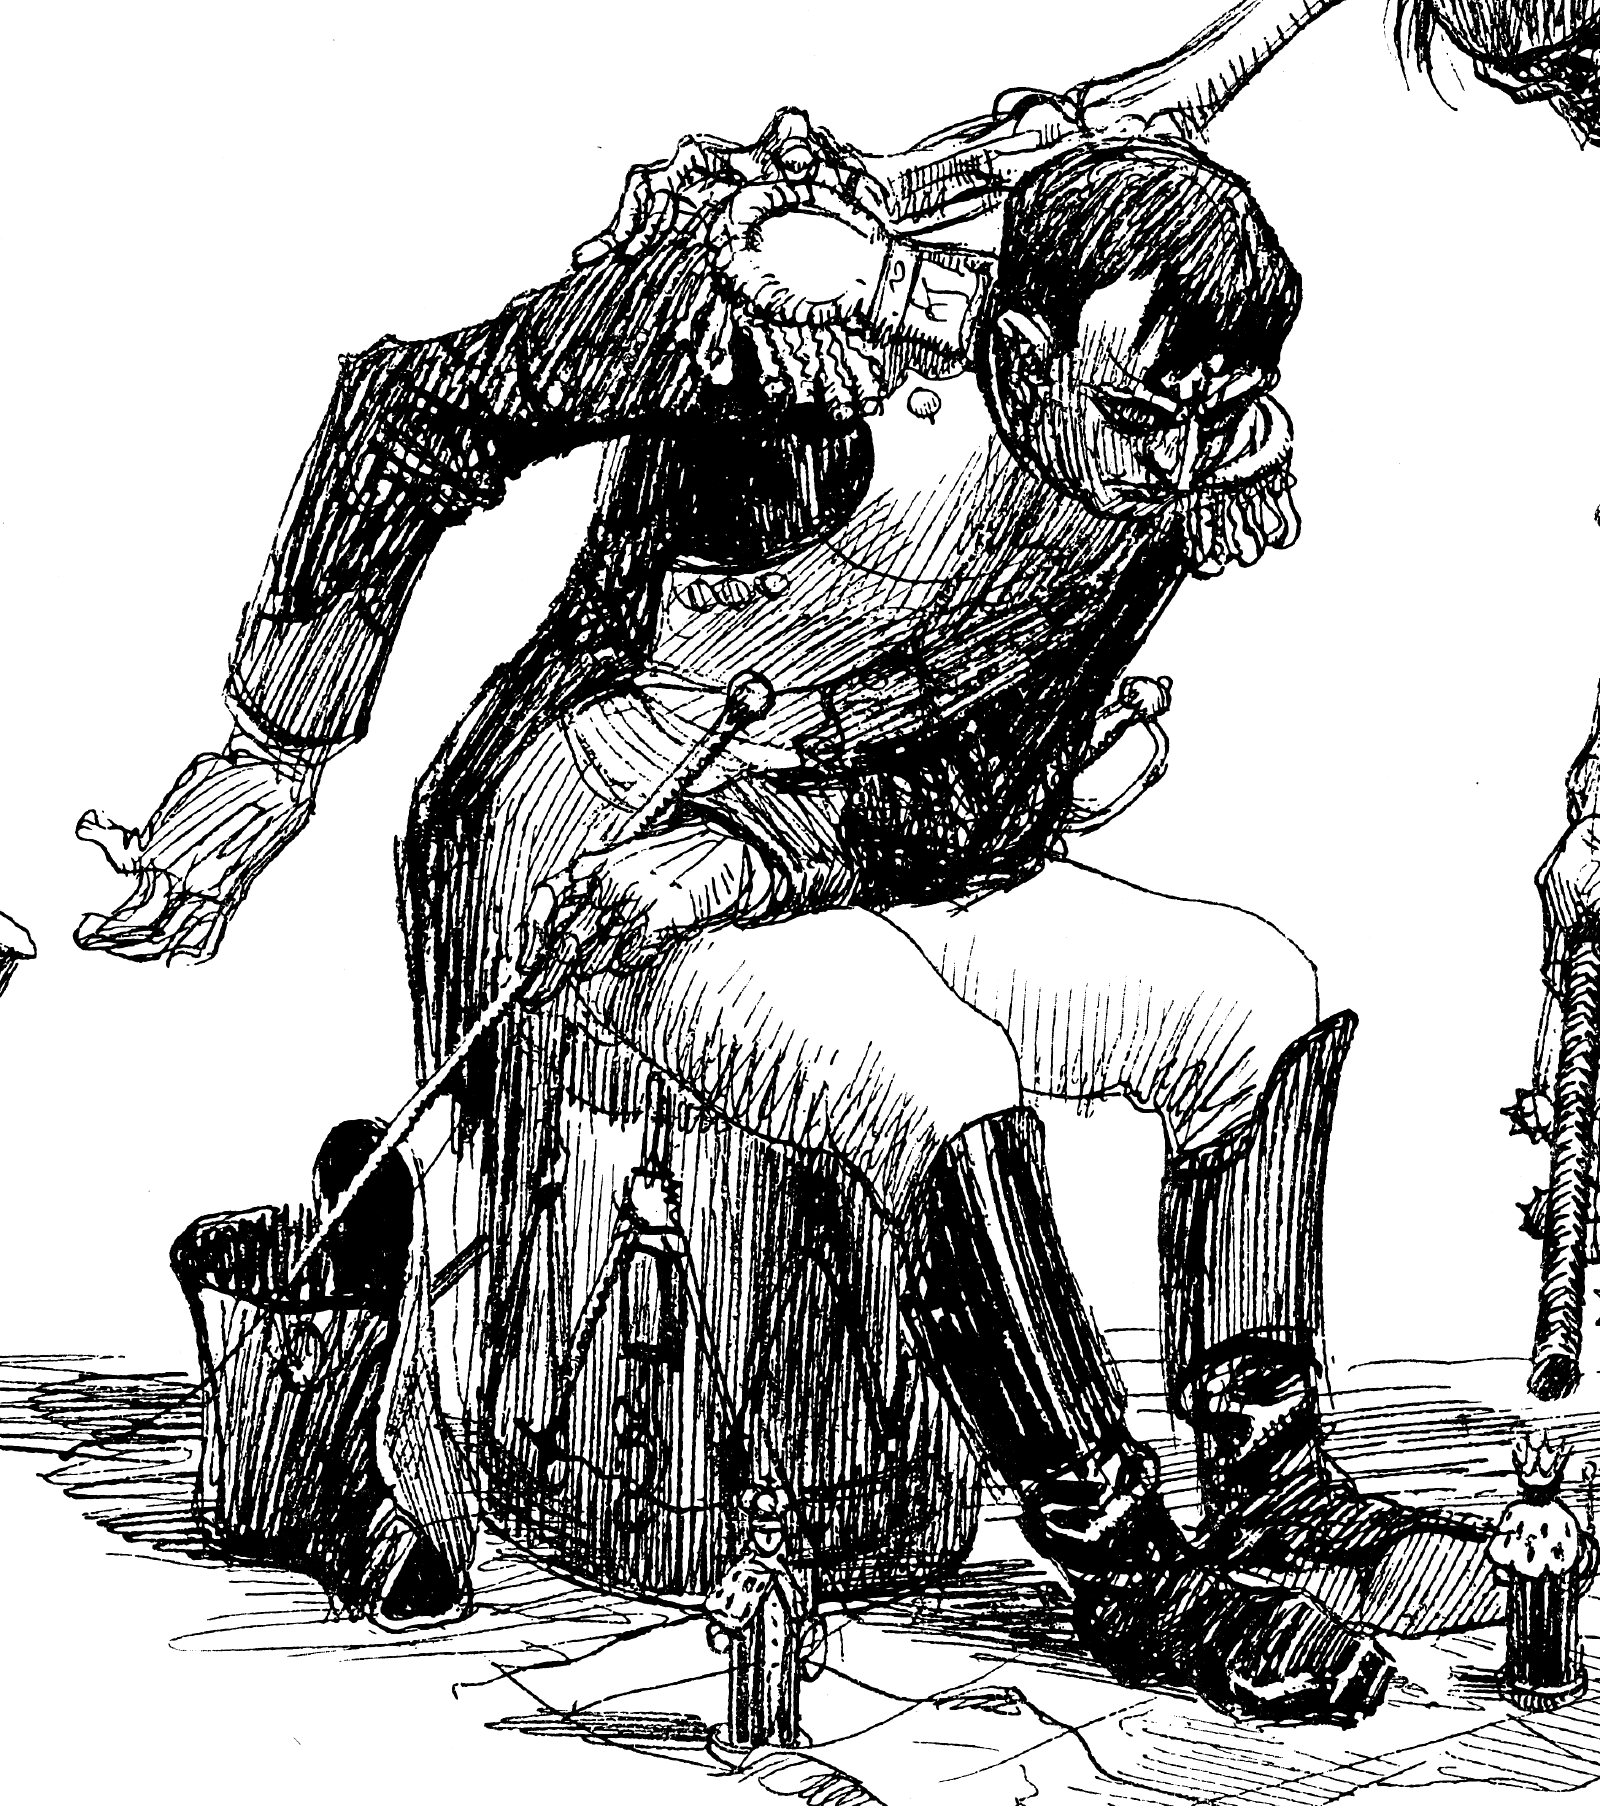 Heinrich Kley, scanned from 1911 book.
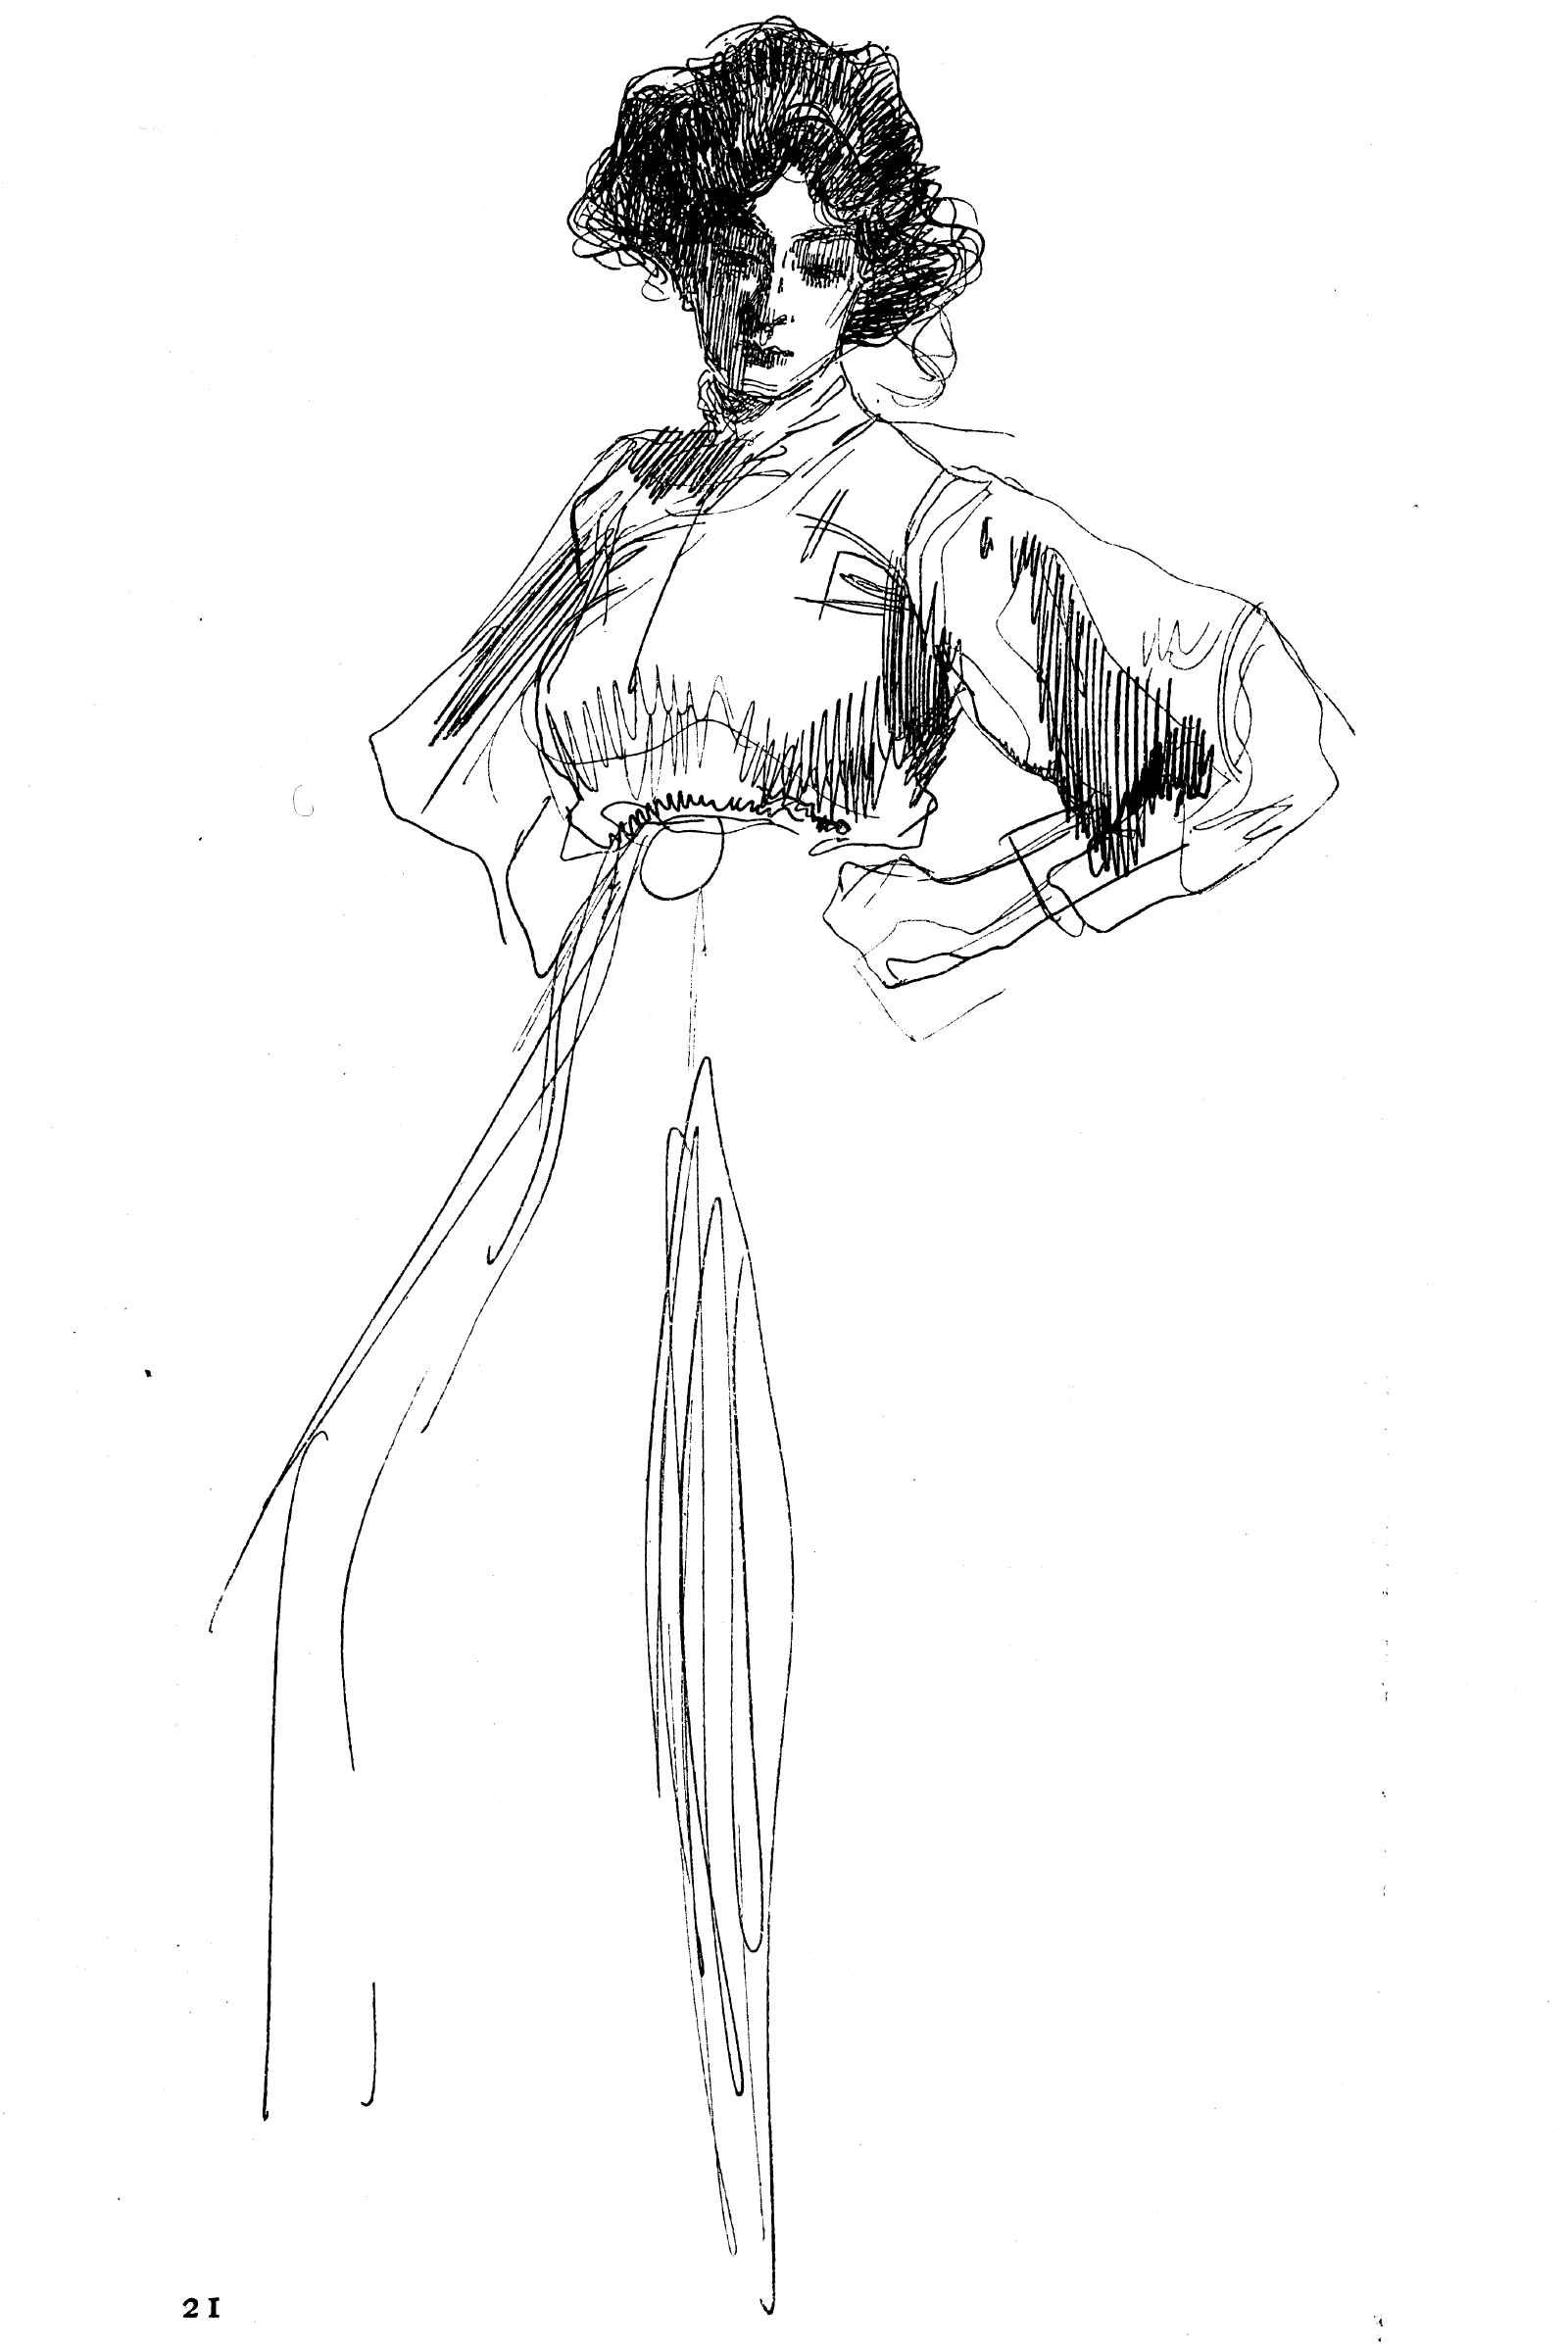 Heinrich Kley, scanned from 1911 book.
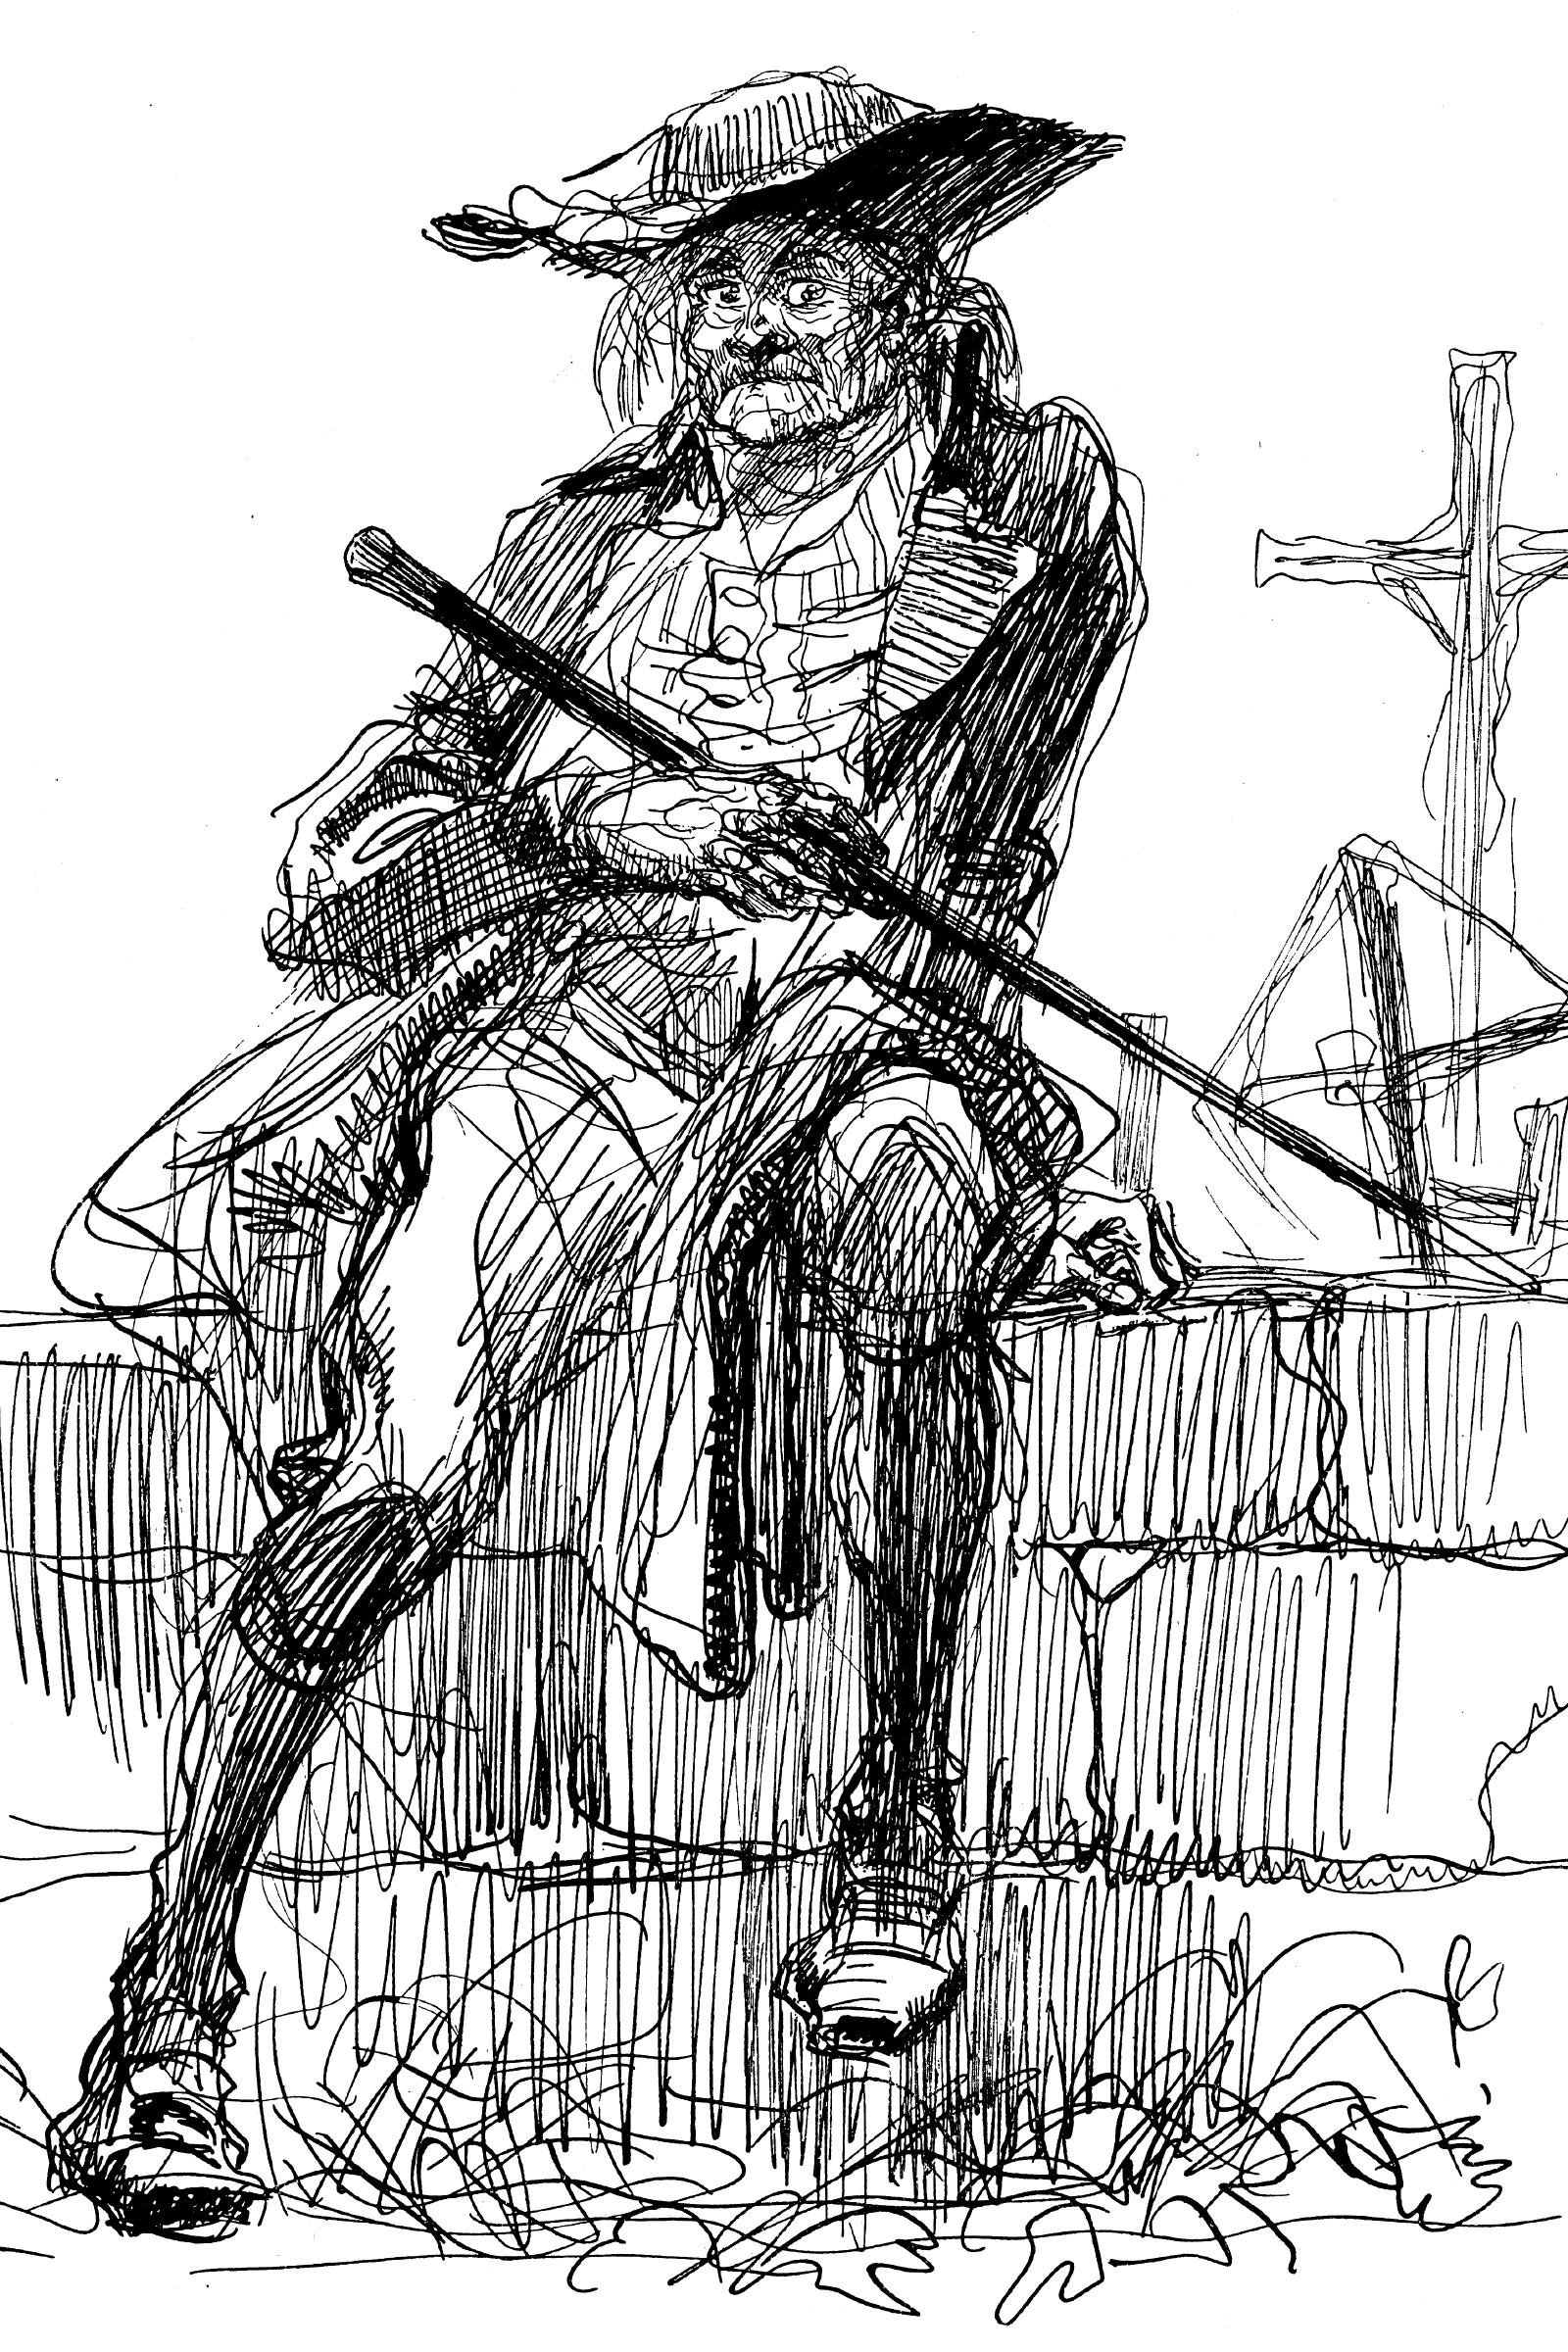 Heinrich Kley, scanned from 1911 book.
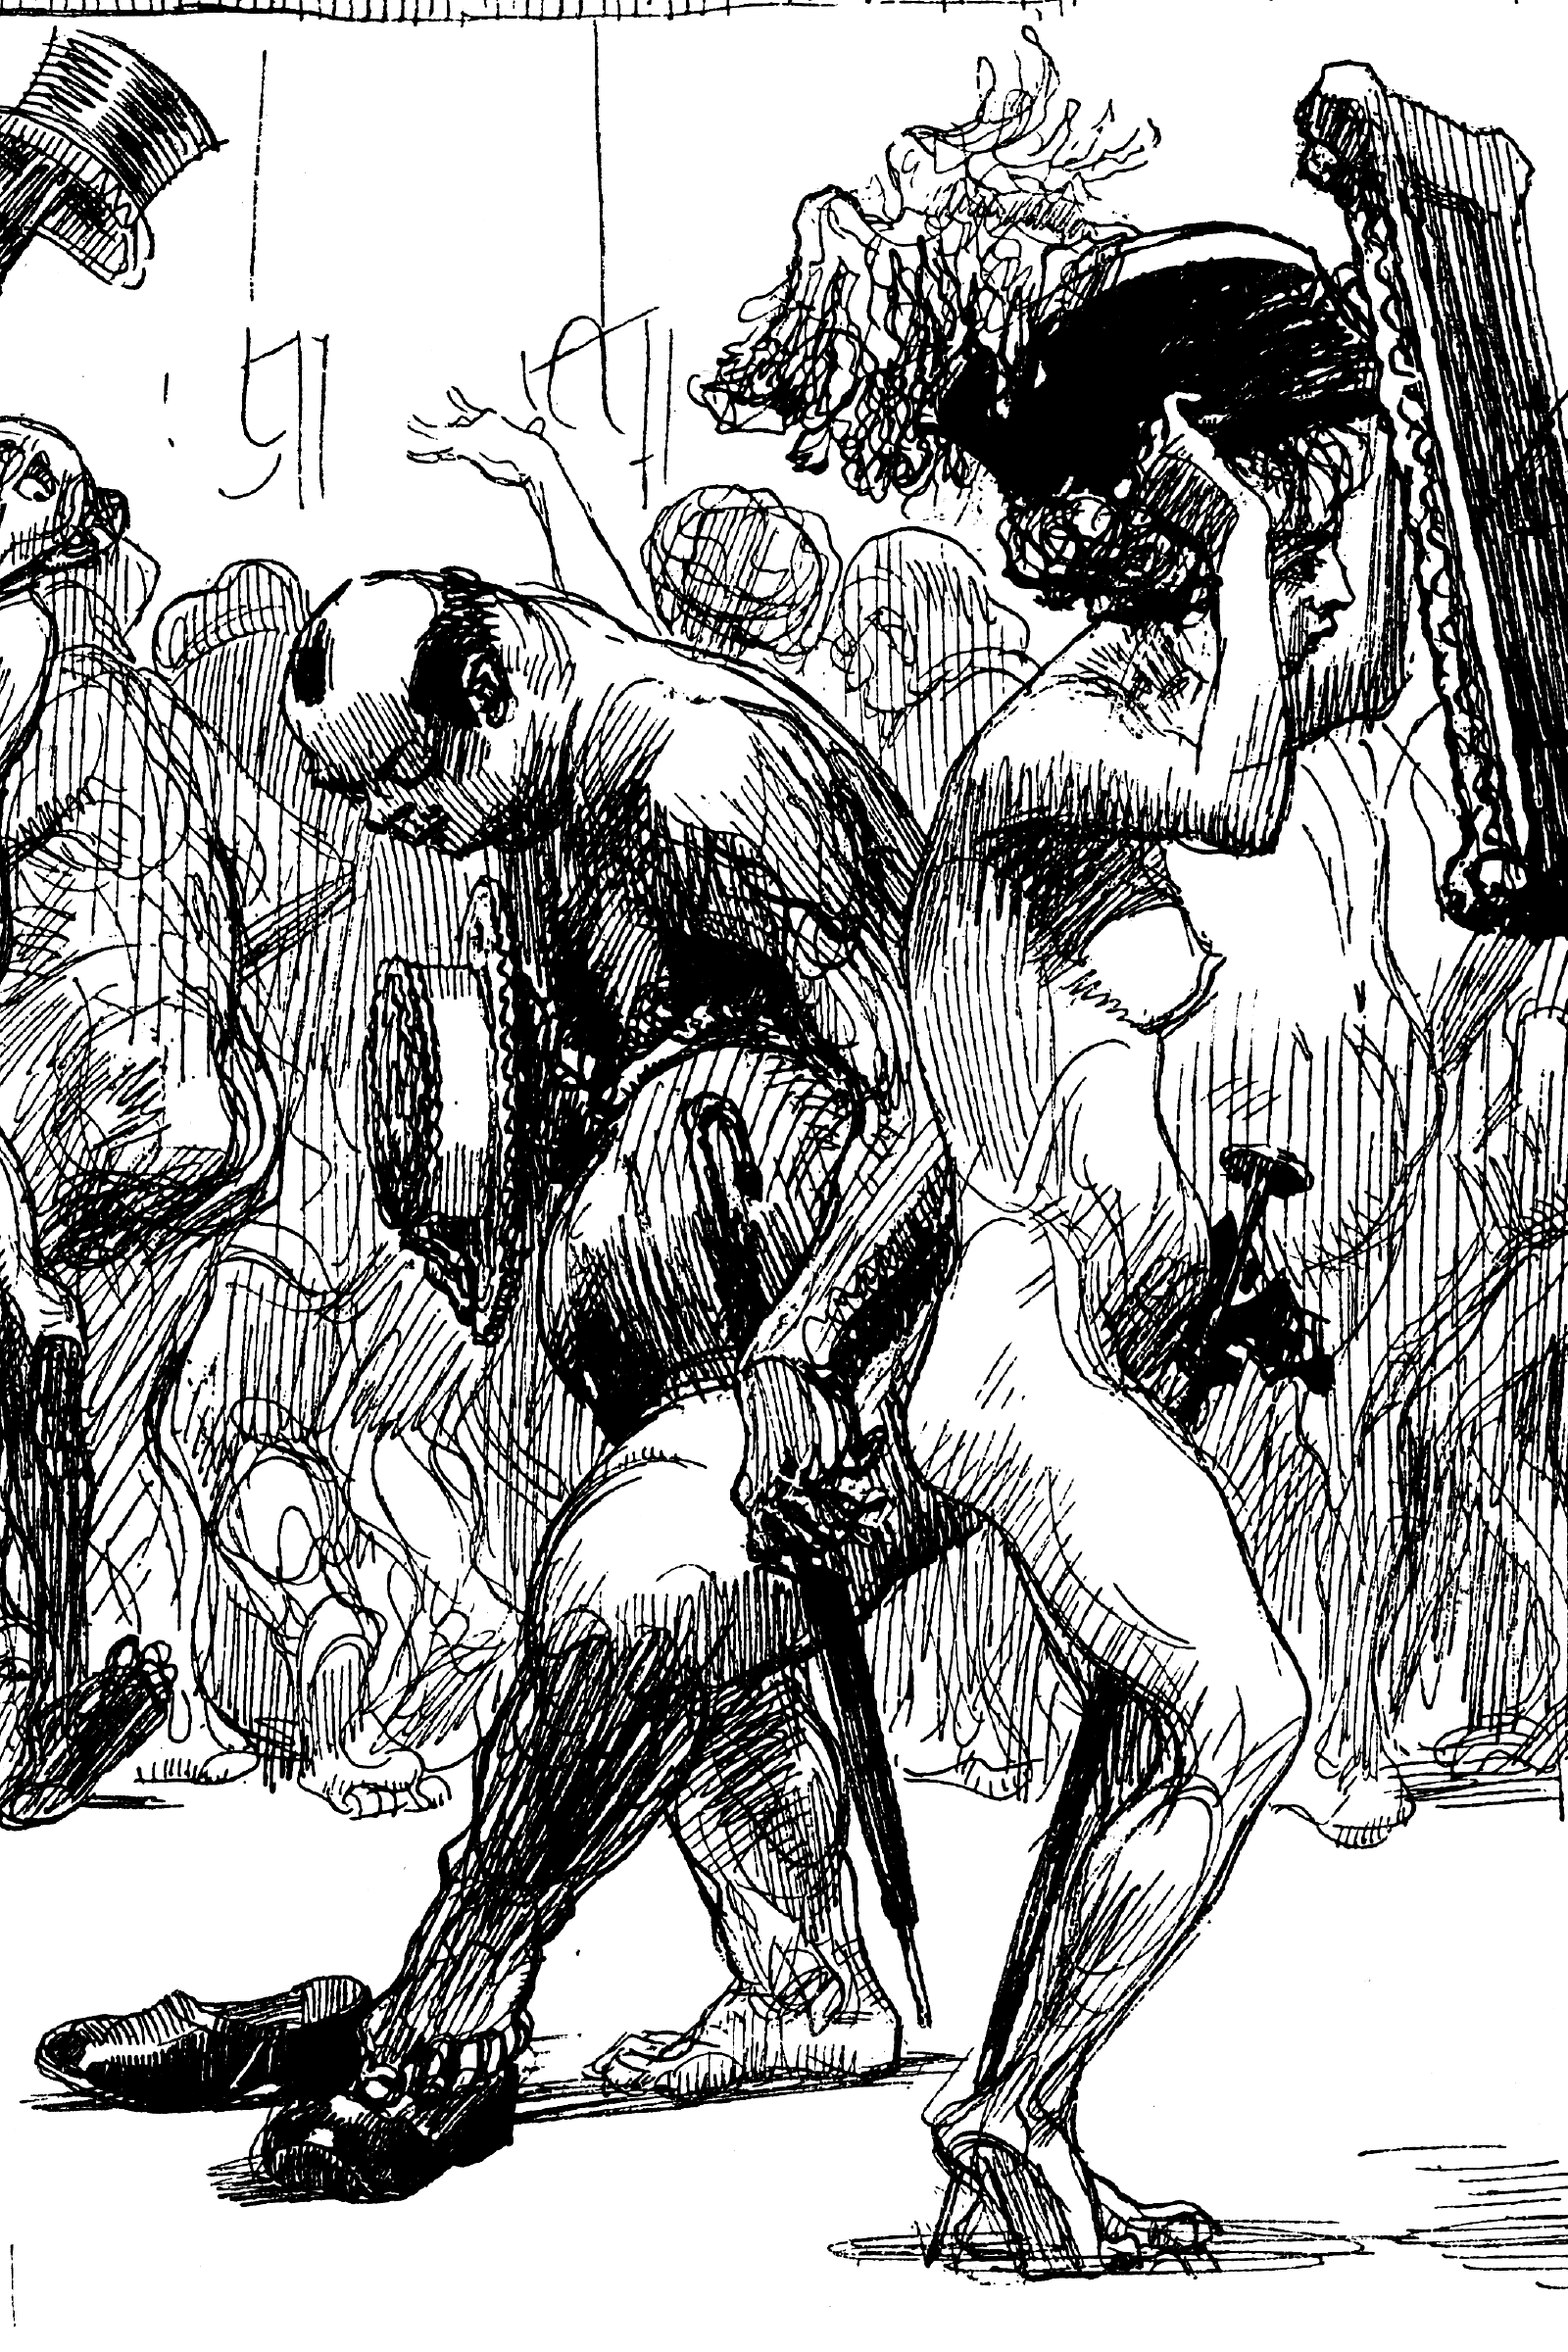 Heinrich Kley, scanned from 1911 book.
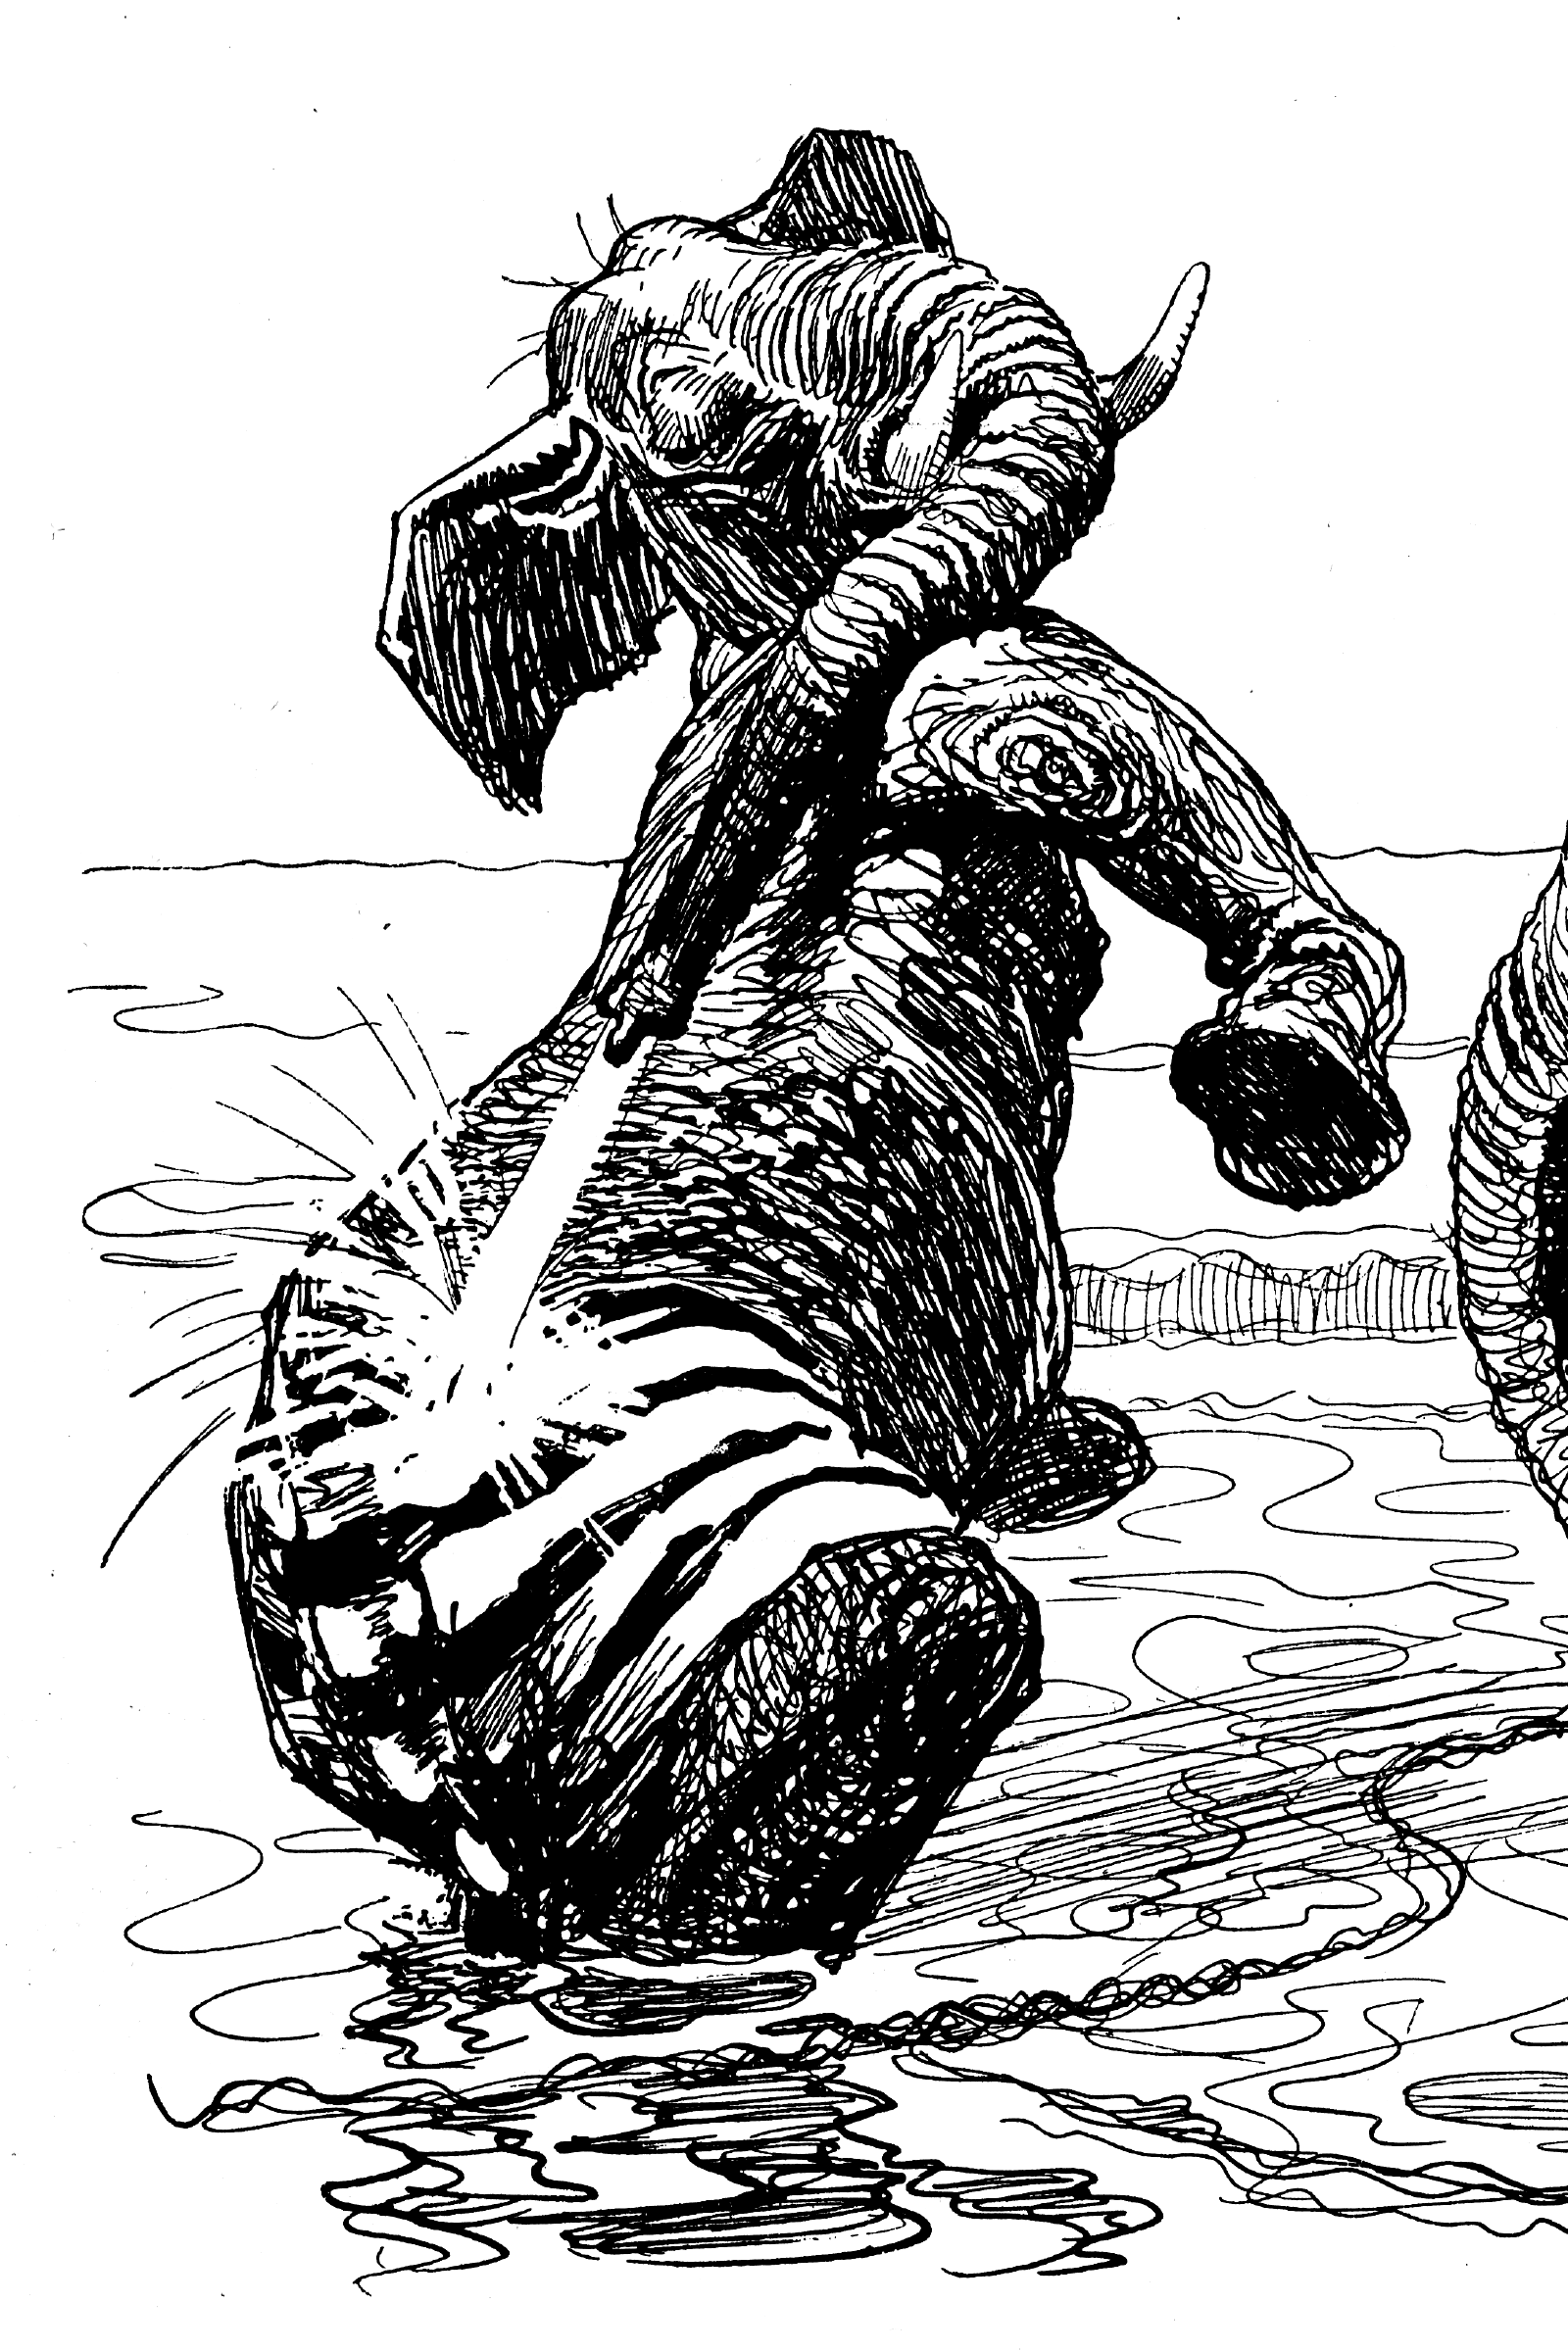 Heinrich Kley, scanned from 1911 book.
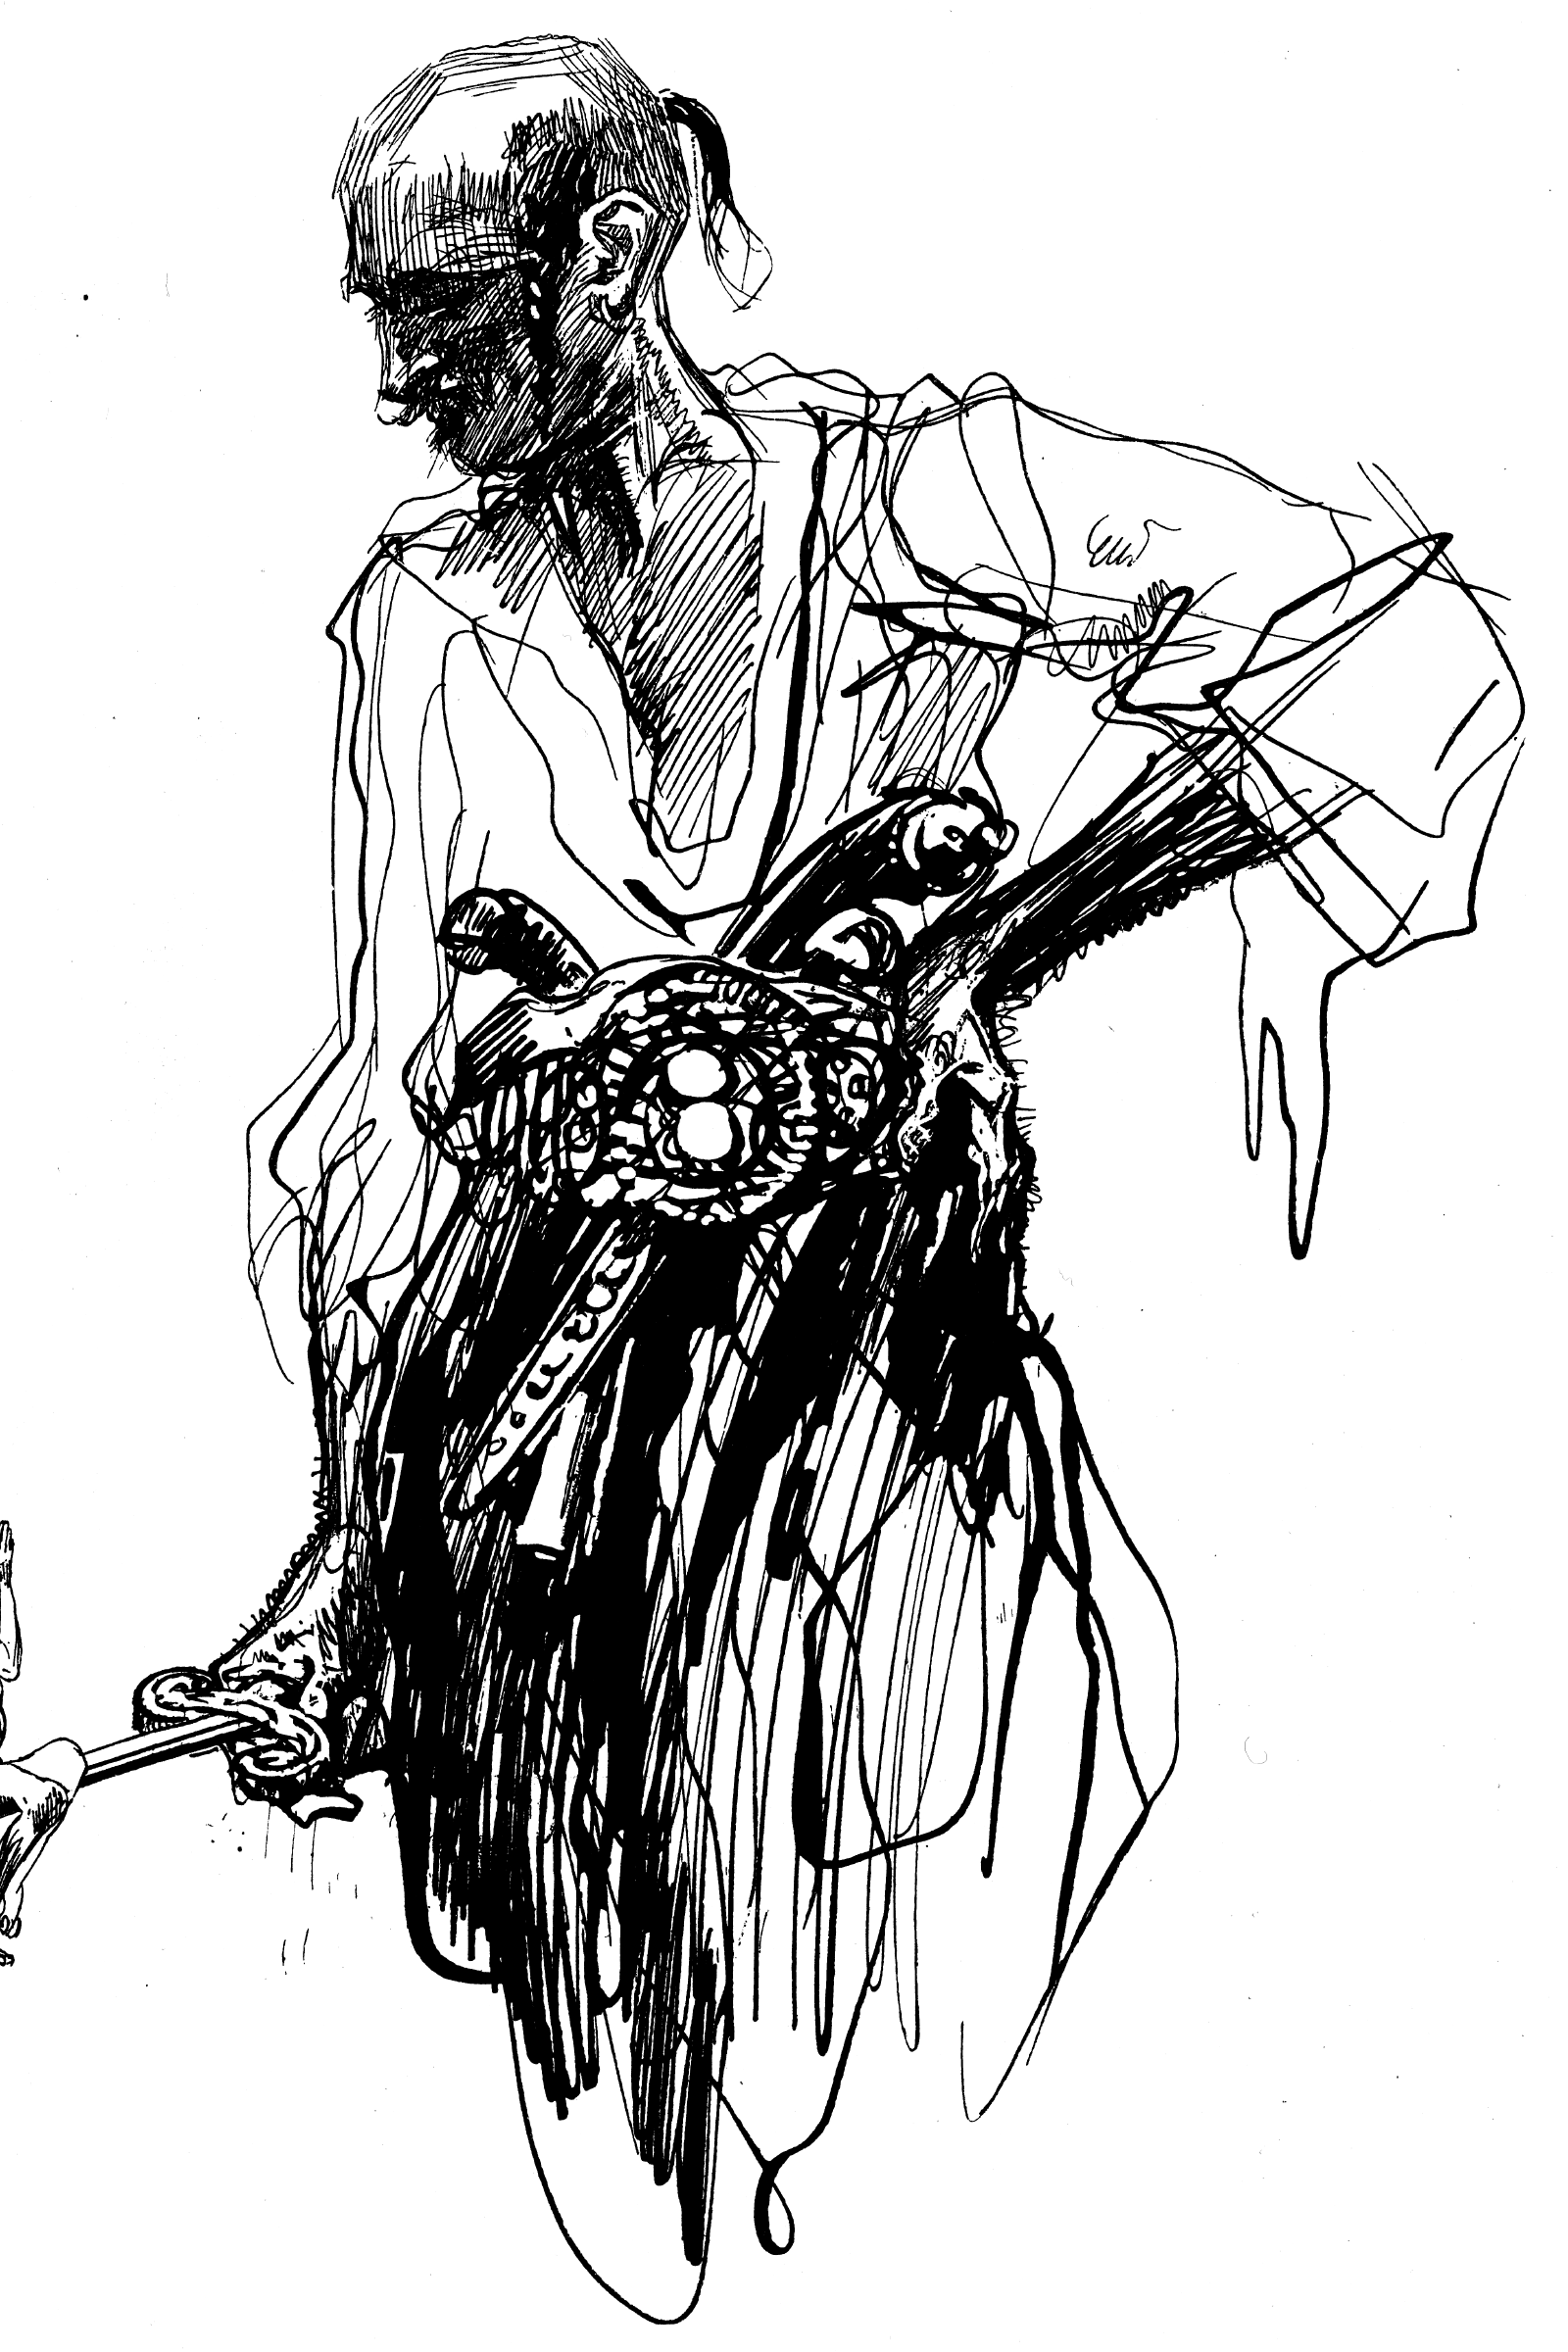 Heinrich Kley, scanned from 1911 book.
 Heinrich Kley, scanned from 1911 book.
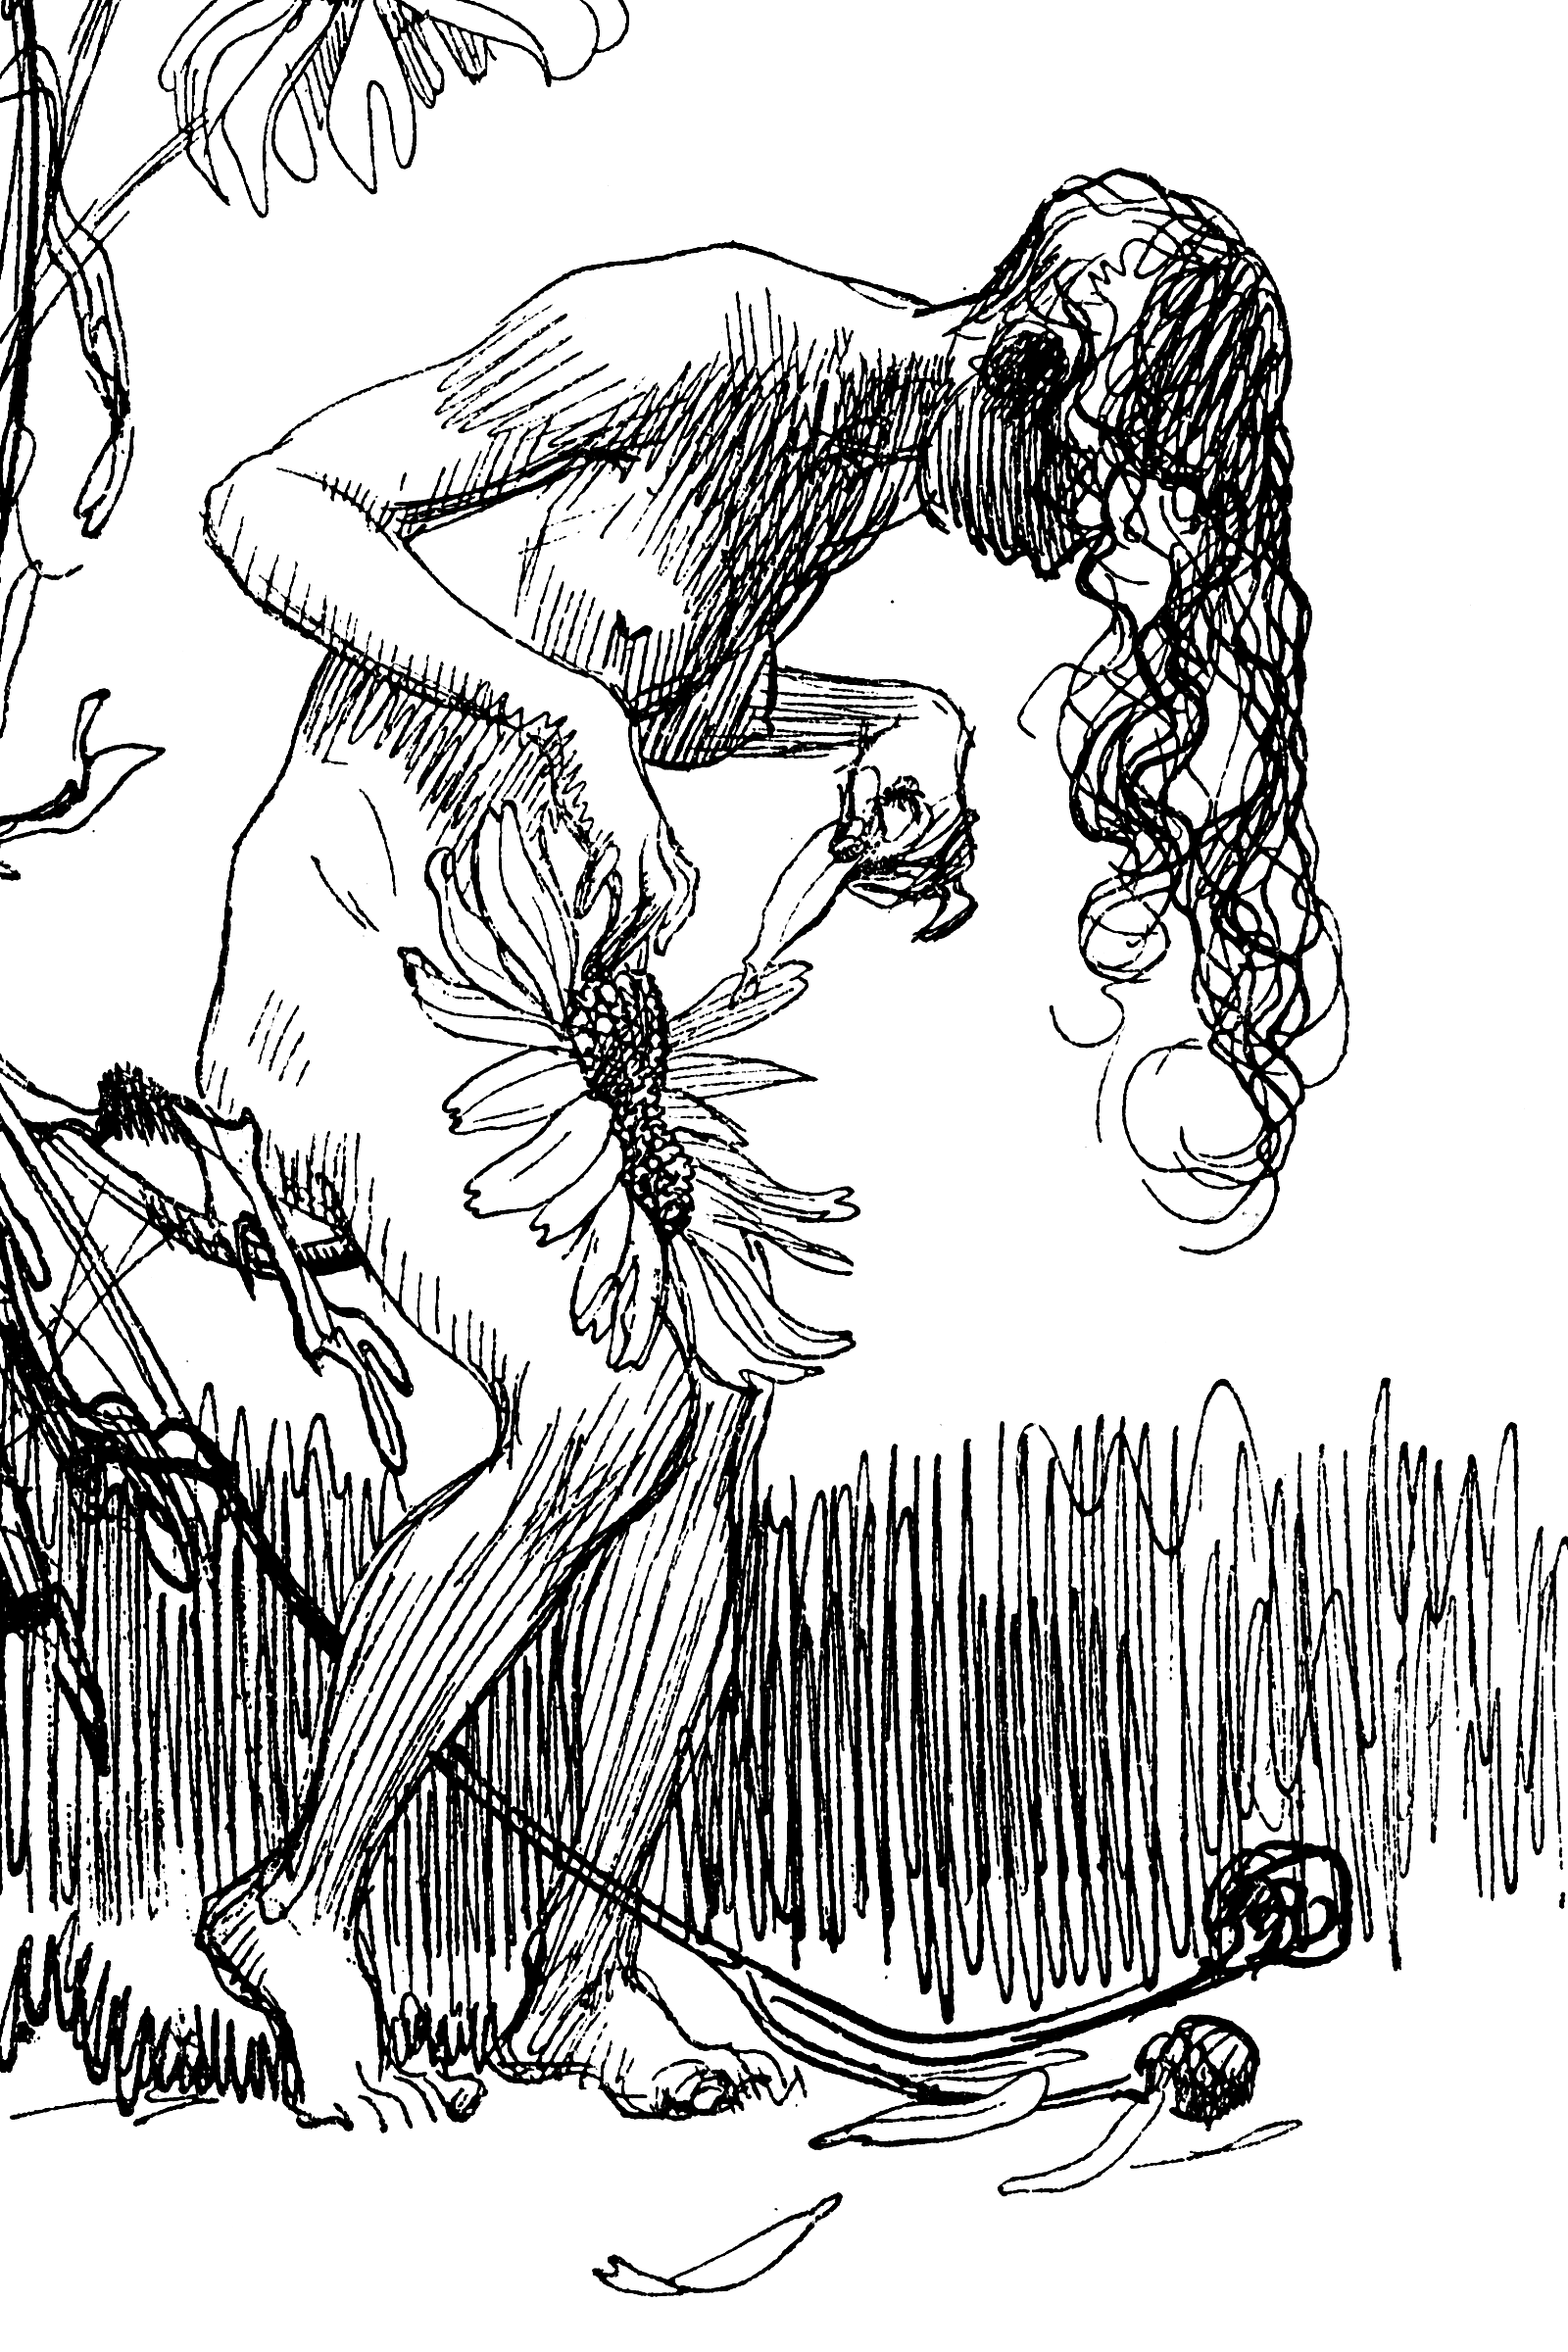 Heinrich Kley, scanned from 1911 book.
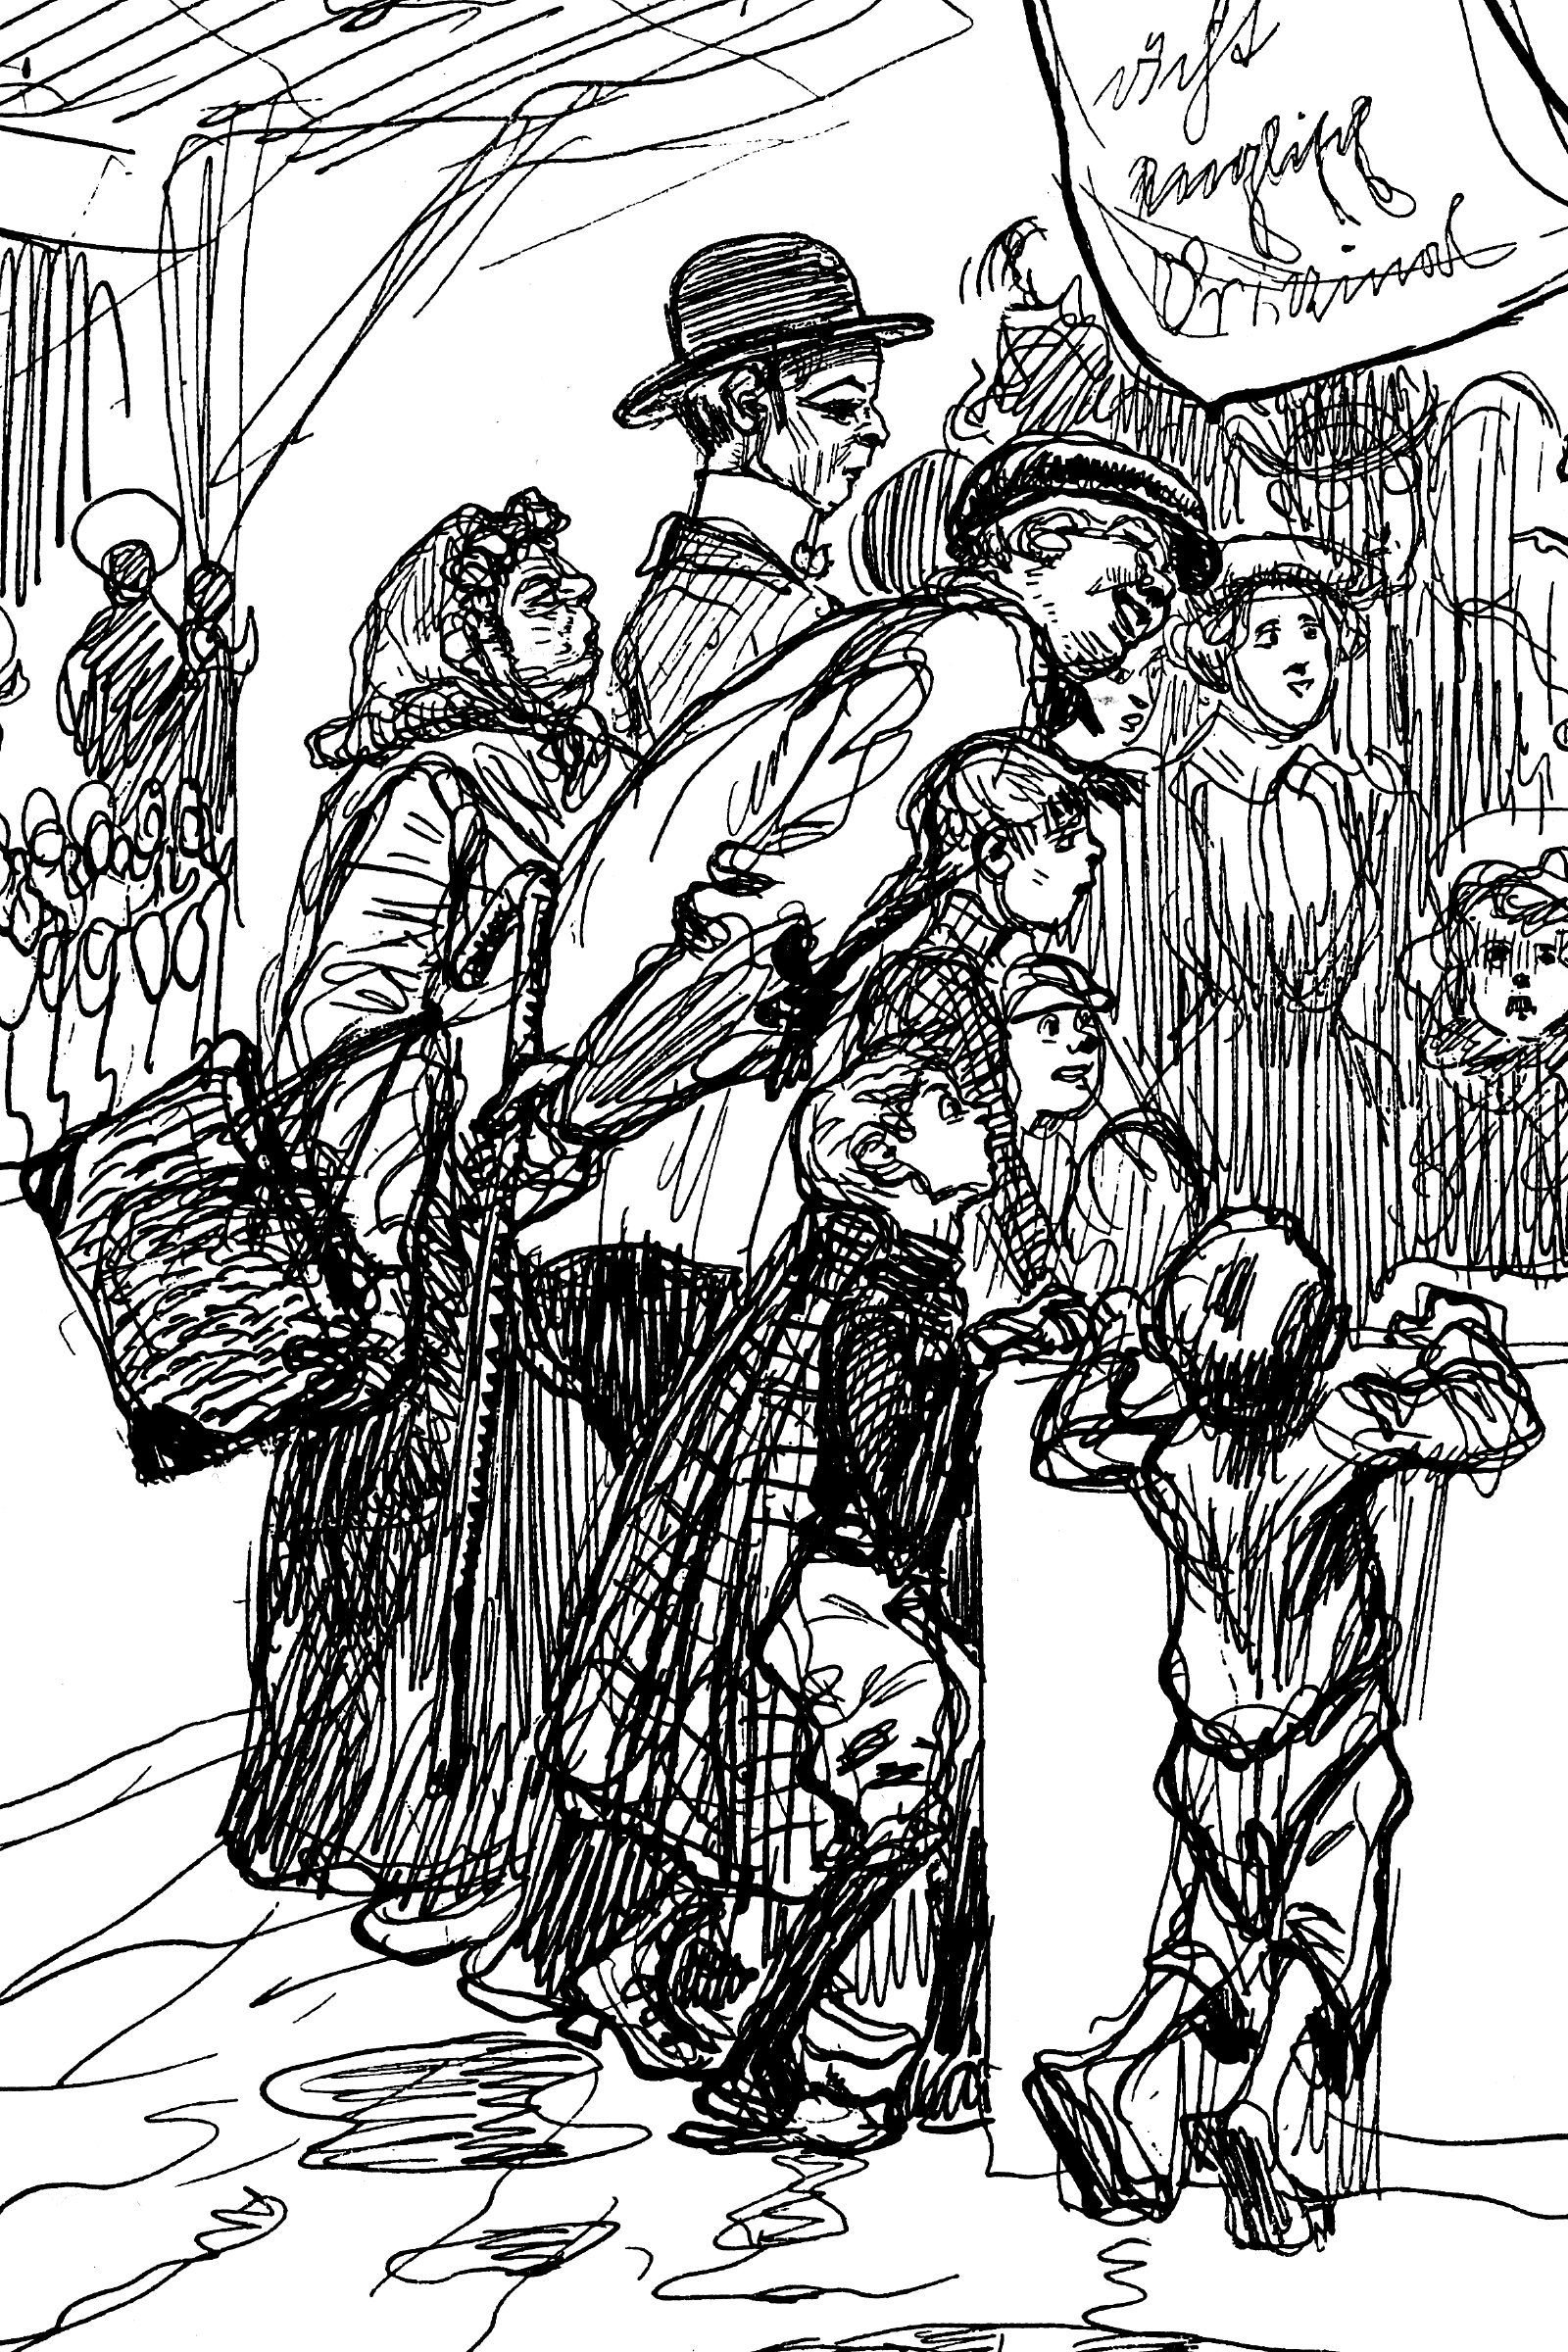 Heinrich Kley, scanned from 1911 book.
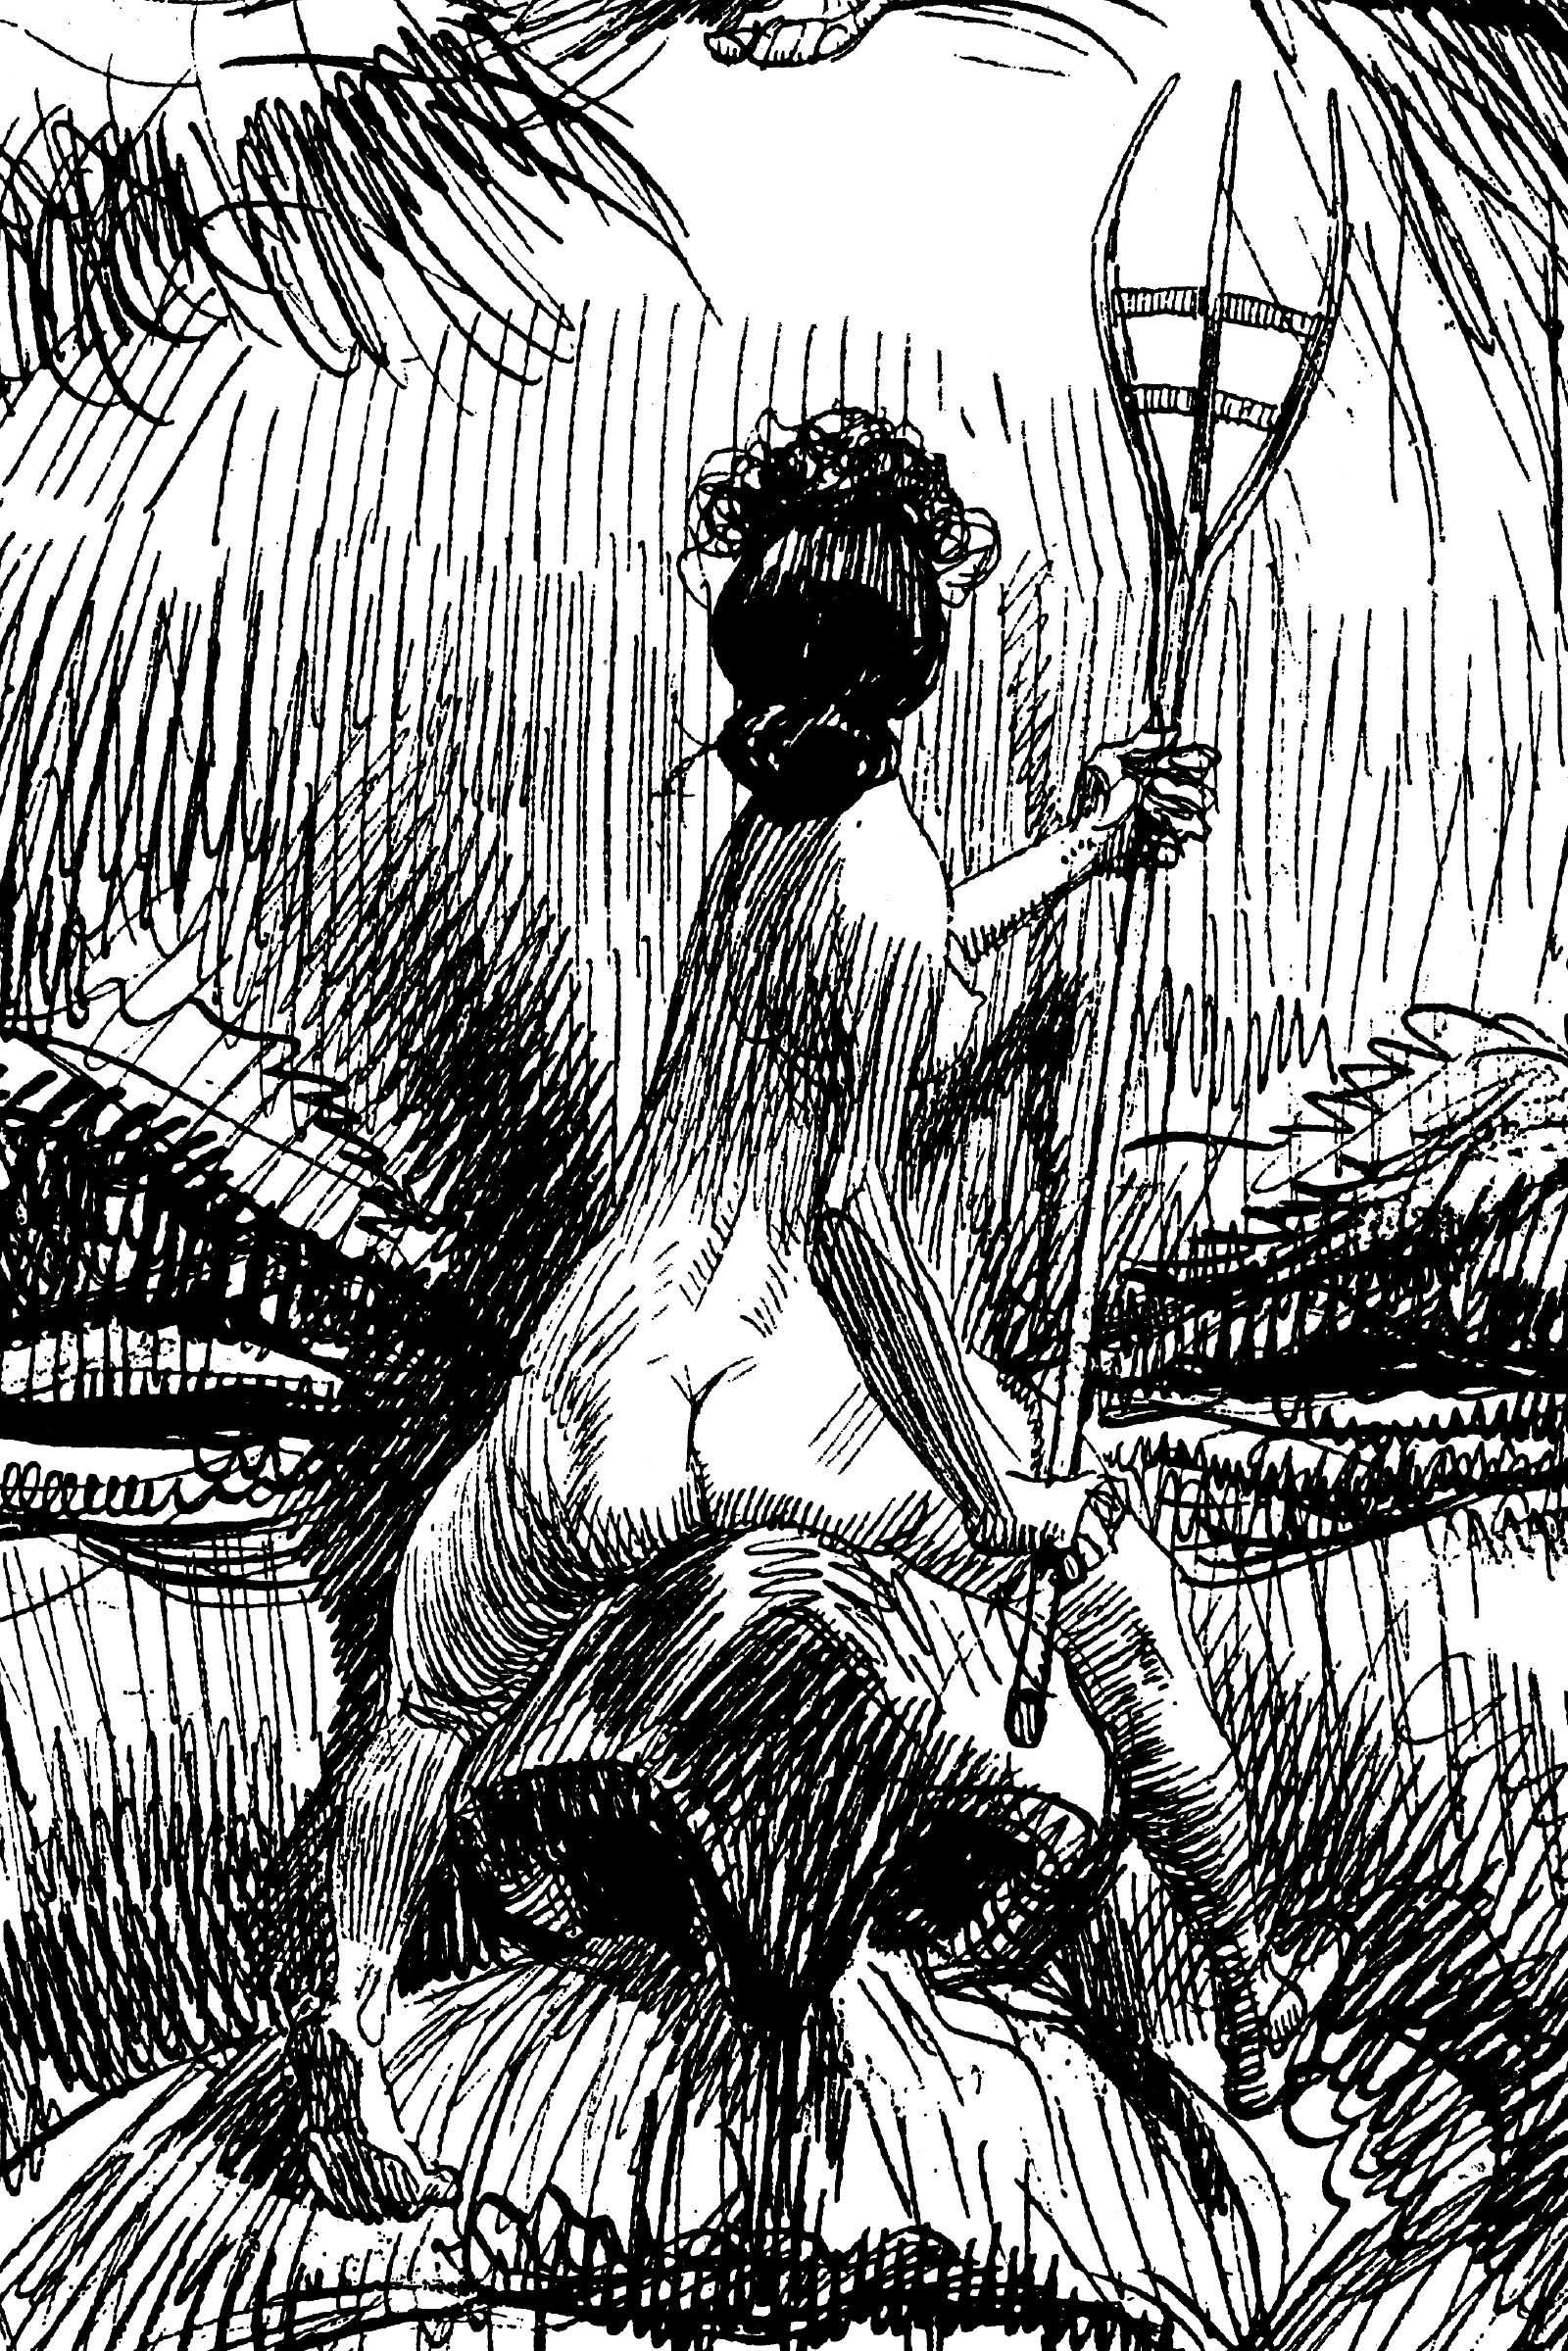 Heinrich Kley, scanned from 1911 book.
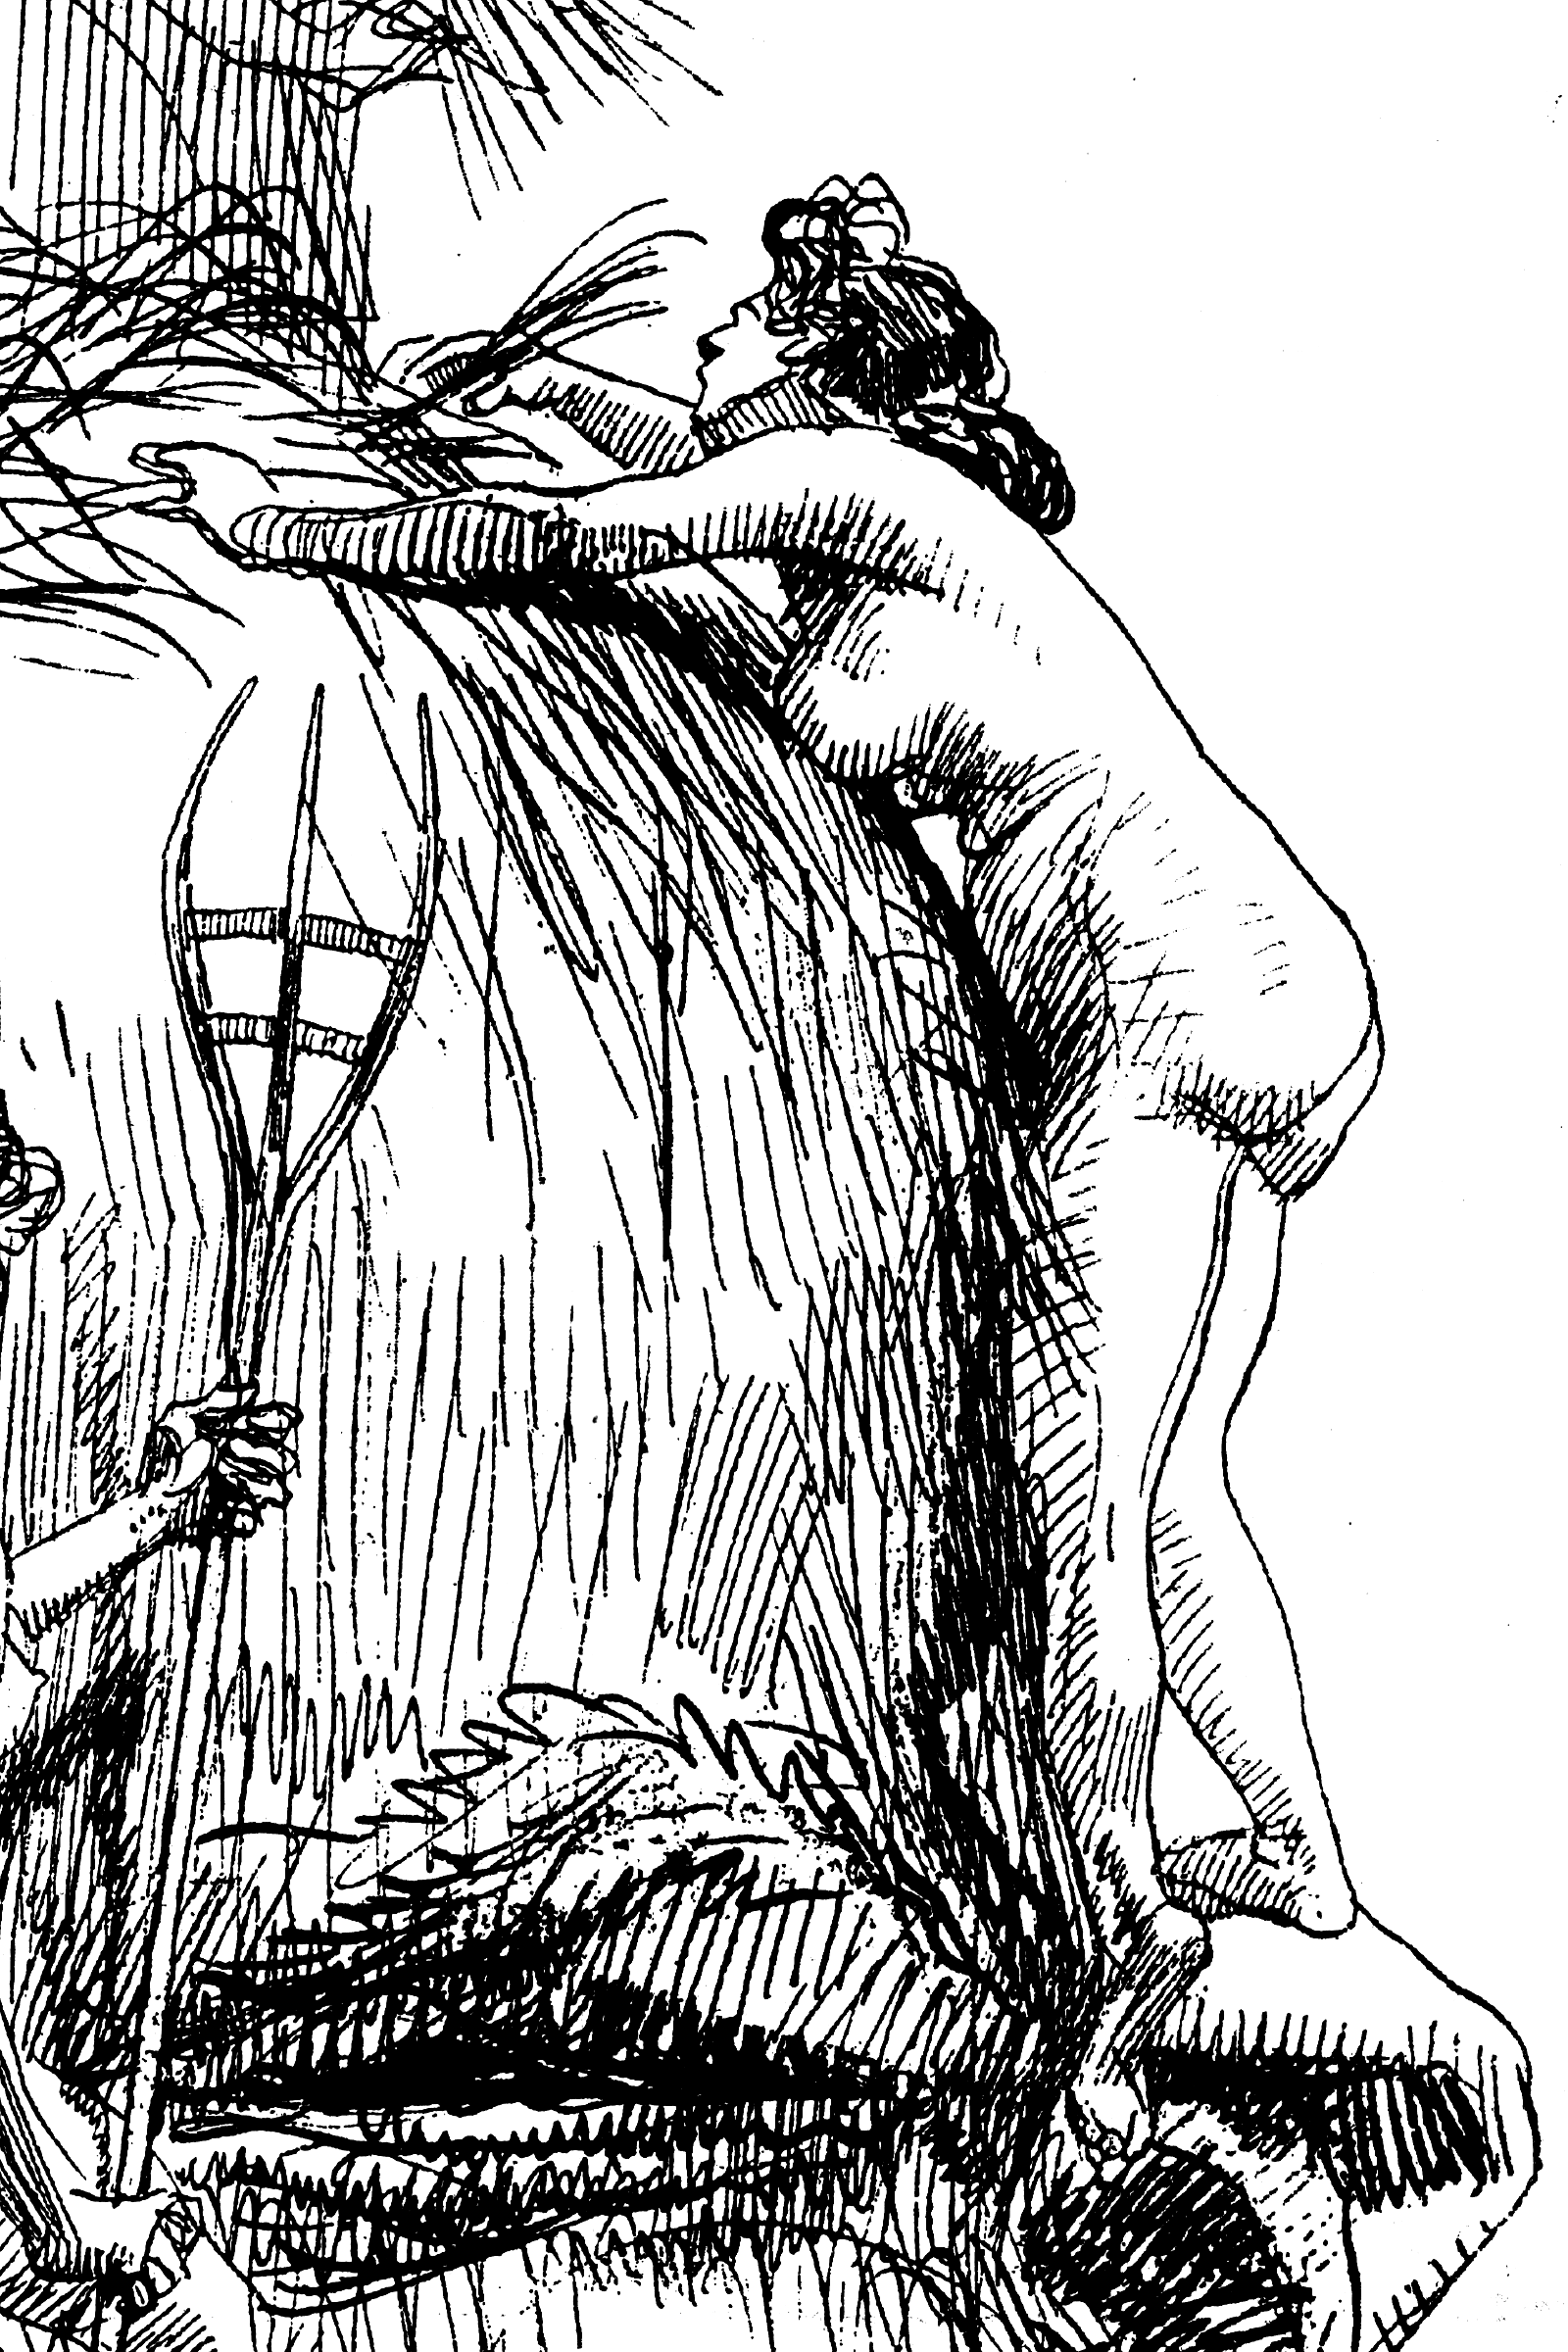 Heinrich Kley, scanned from 1911 book.
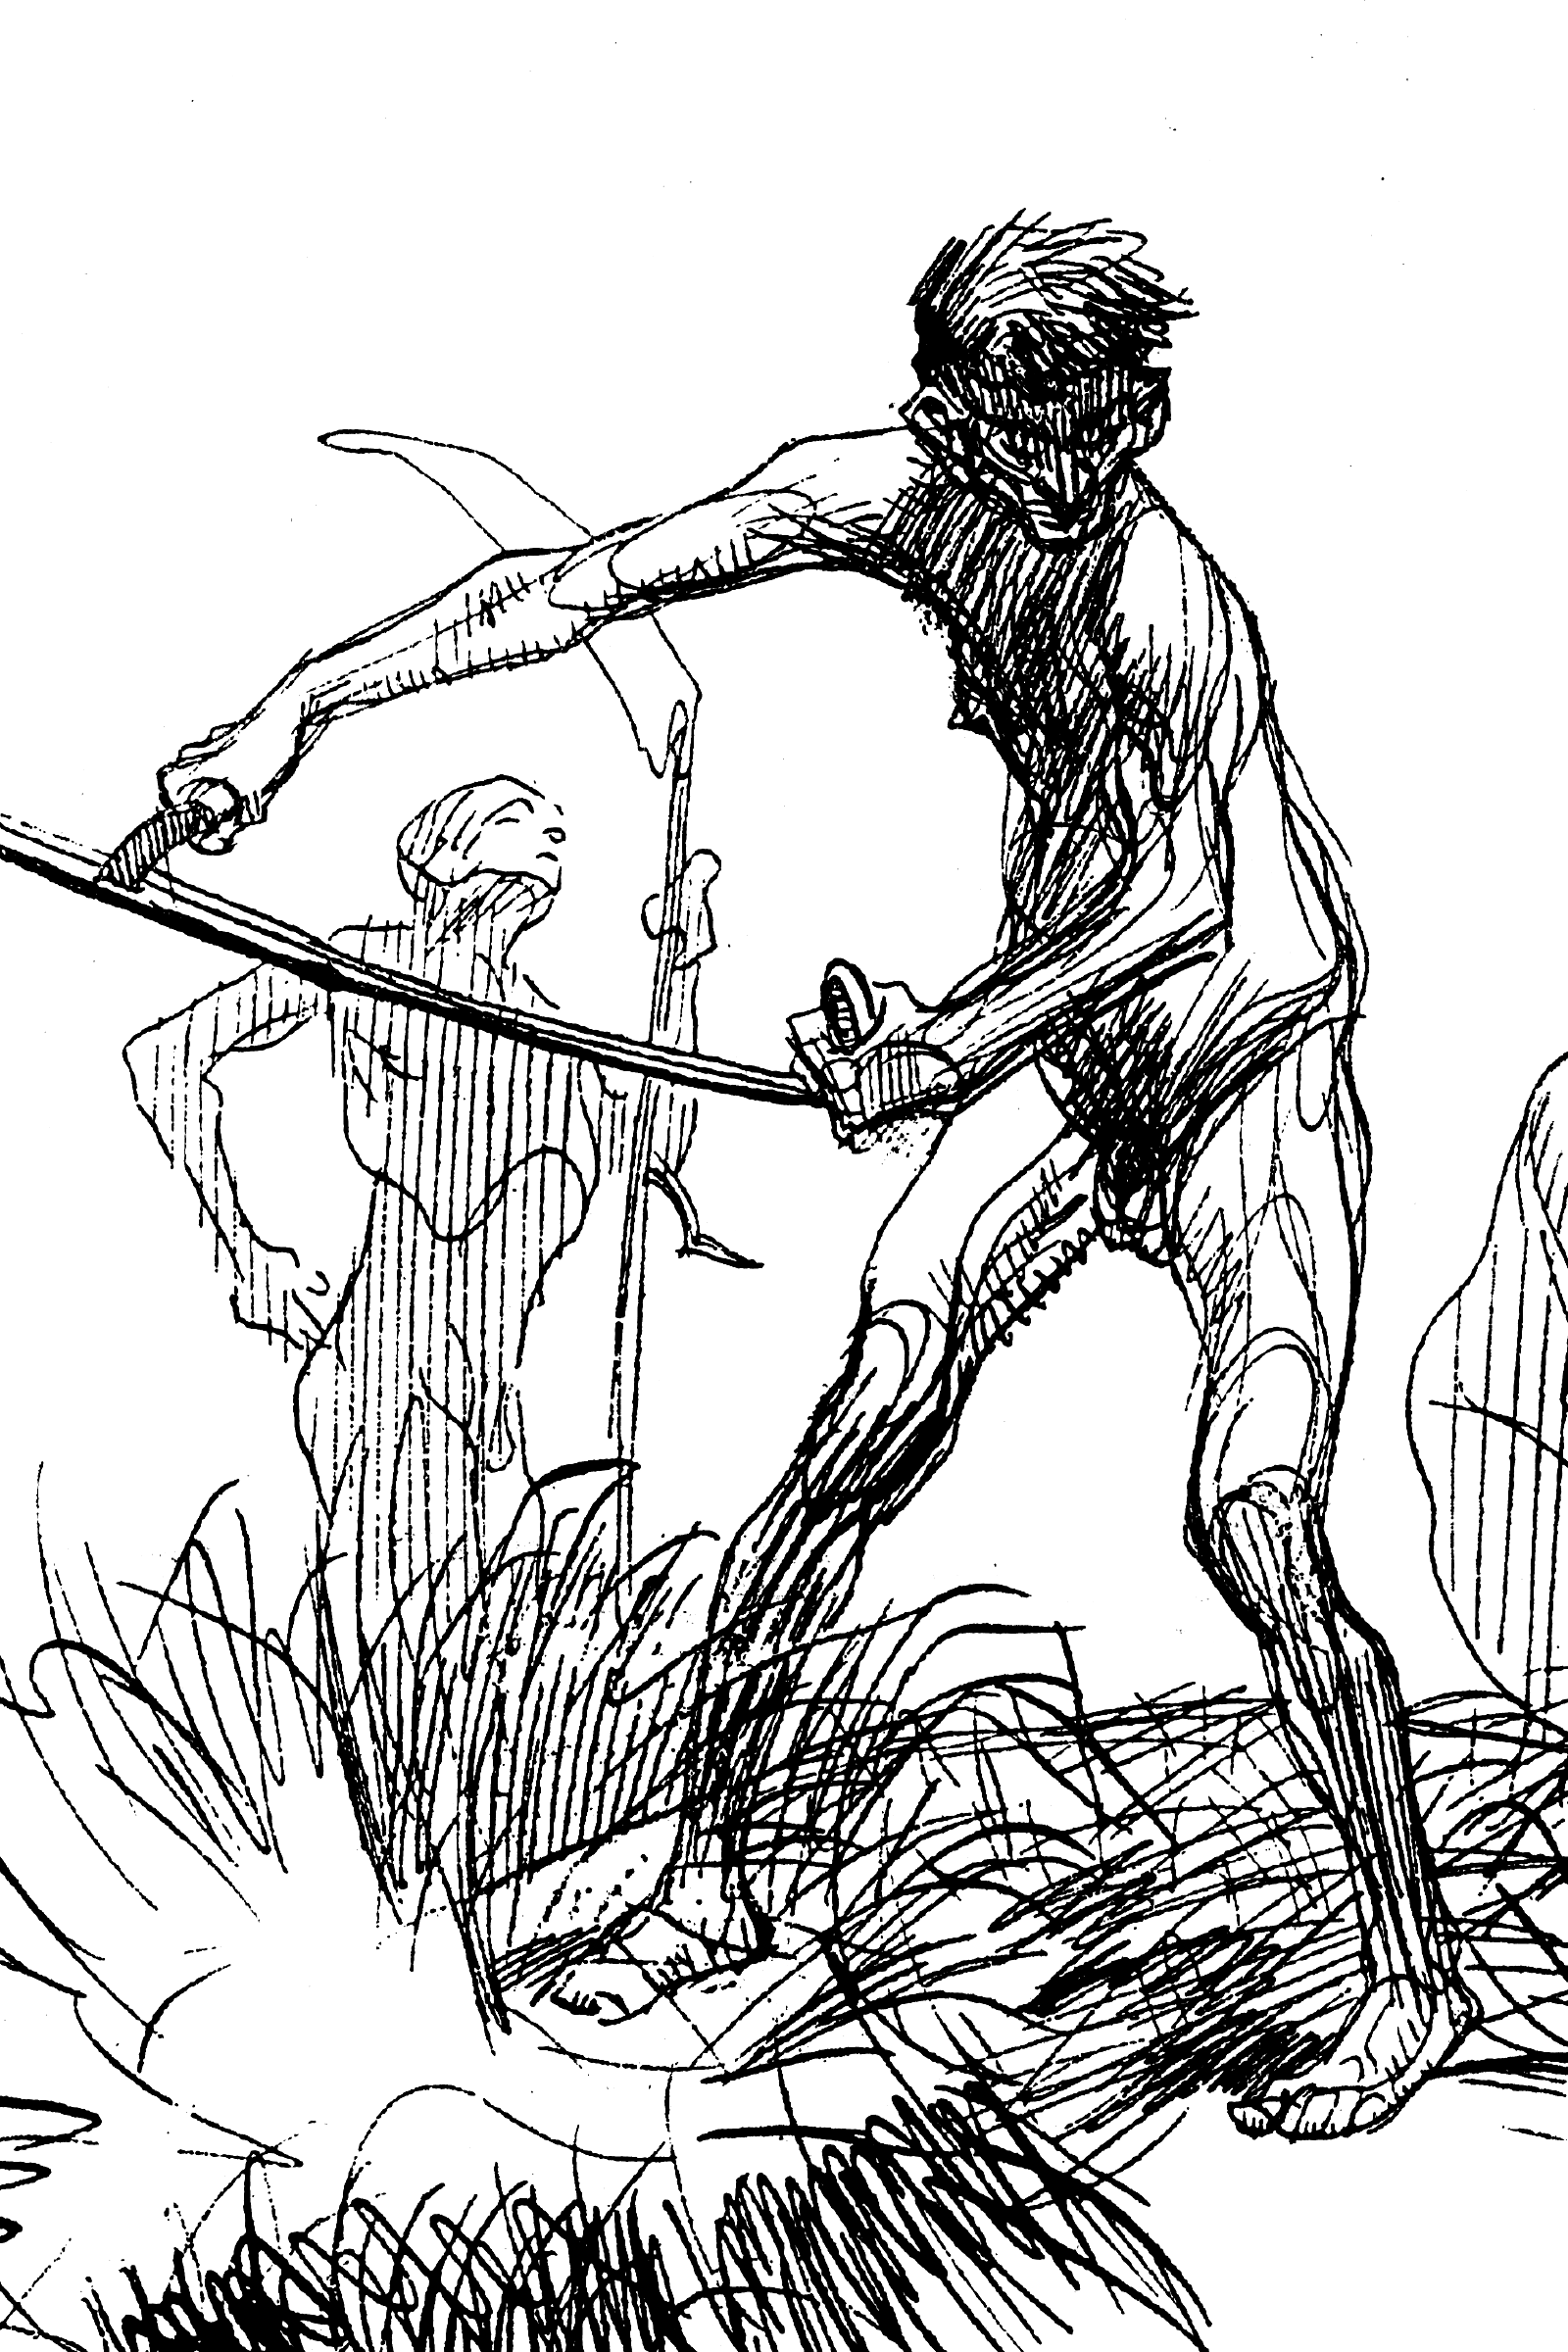 Heinrich Kley, scanned from 1911 book.
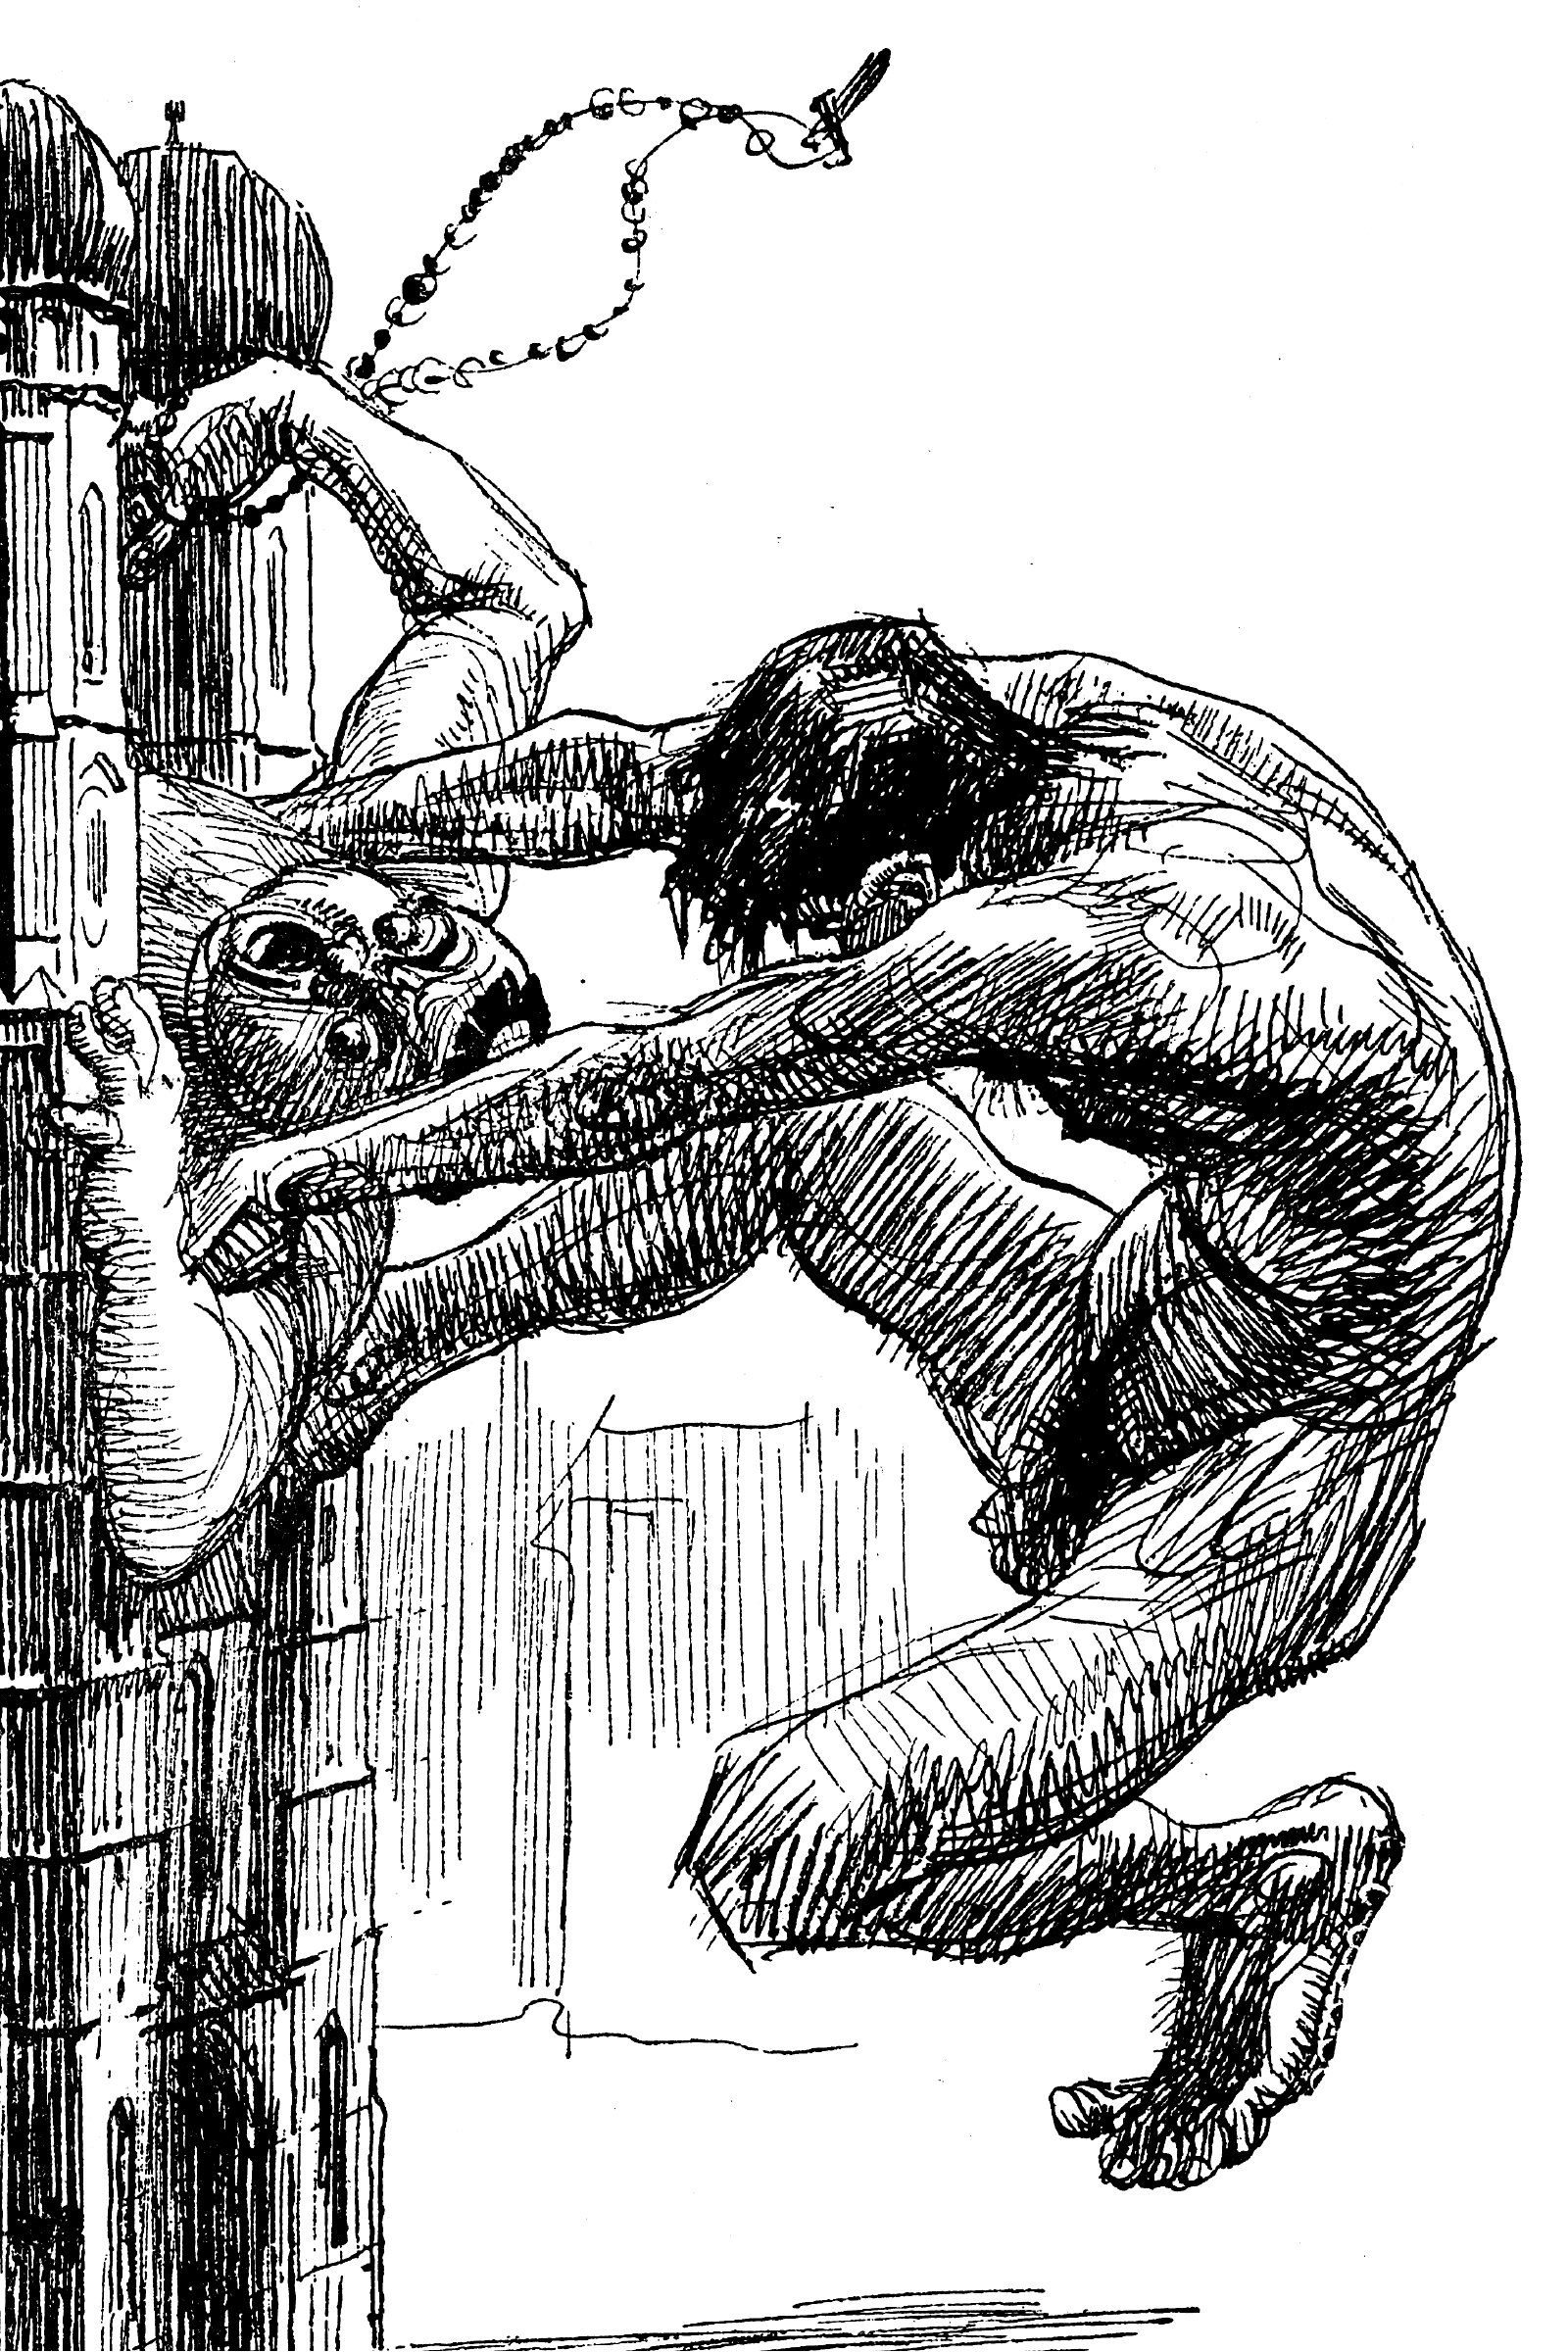 Heinrich Kley, scanned from 1911 book.
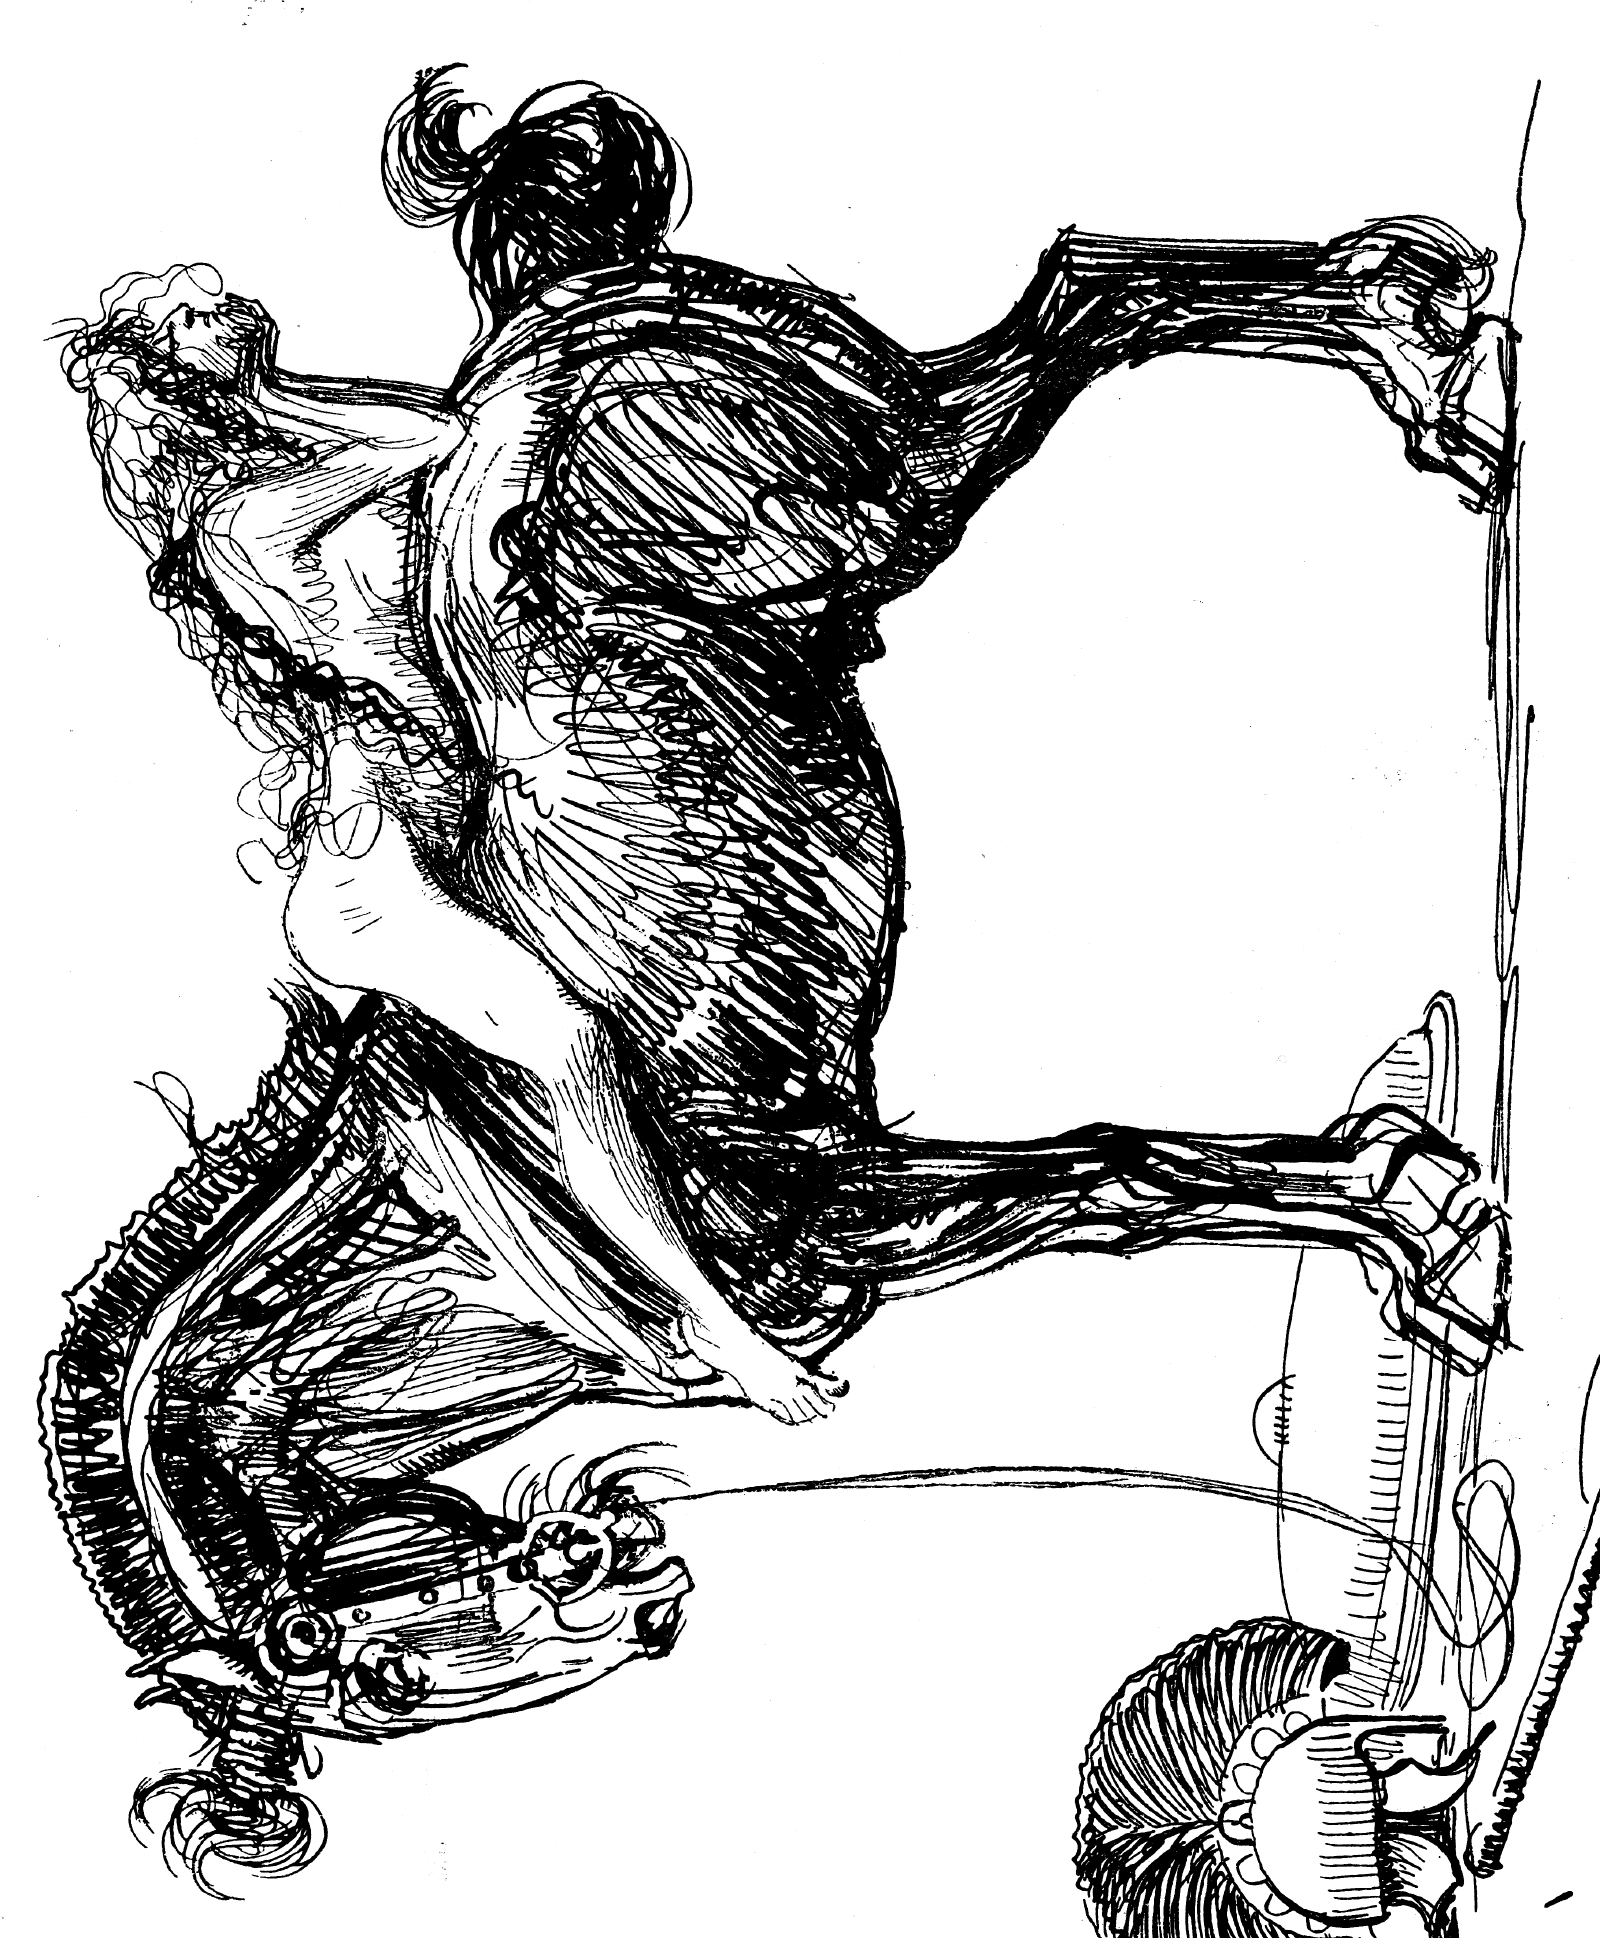 Heinrich Kley, scanned from 1911 book.
 Heinrich Kley, scanned from 1911 book.
 Heinrich Kley, scanned from 1911 book.
 Heinrich Kley, scanned from 1911 book.
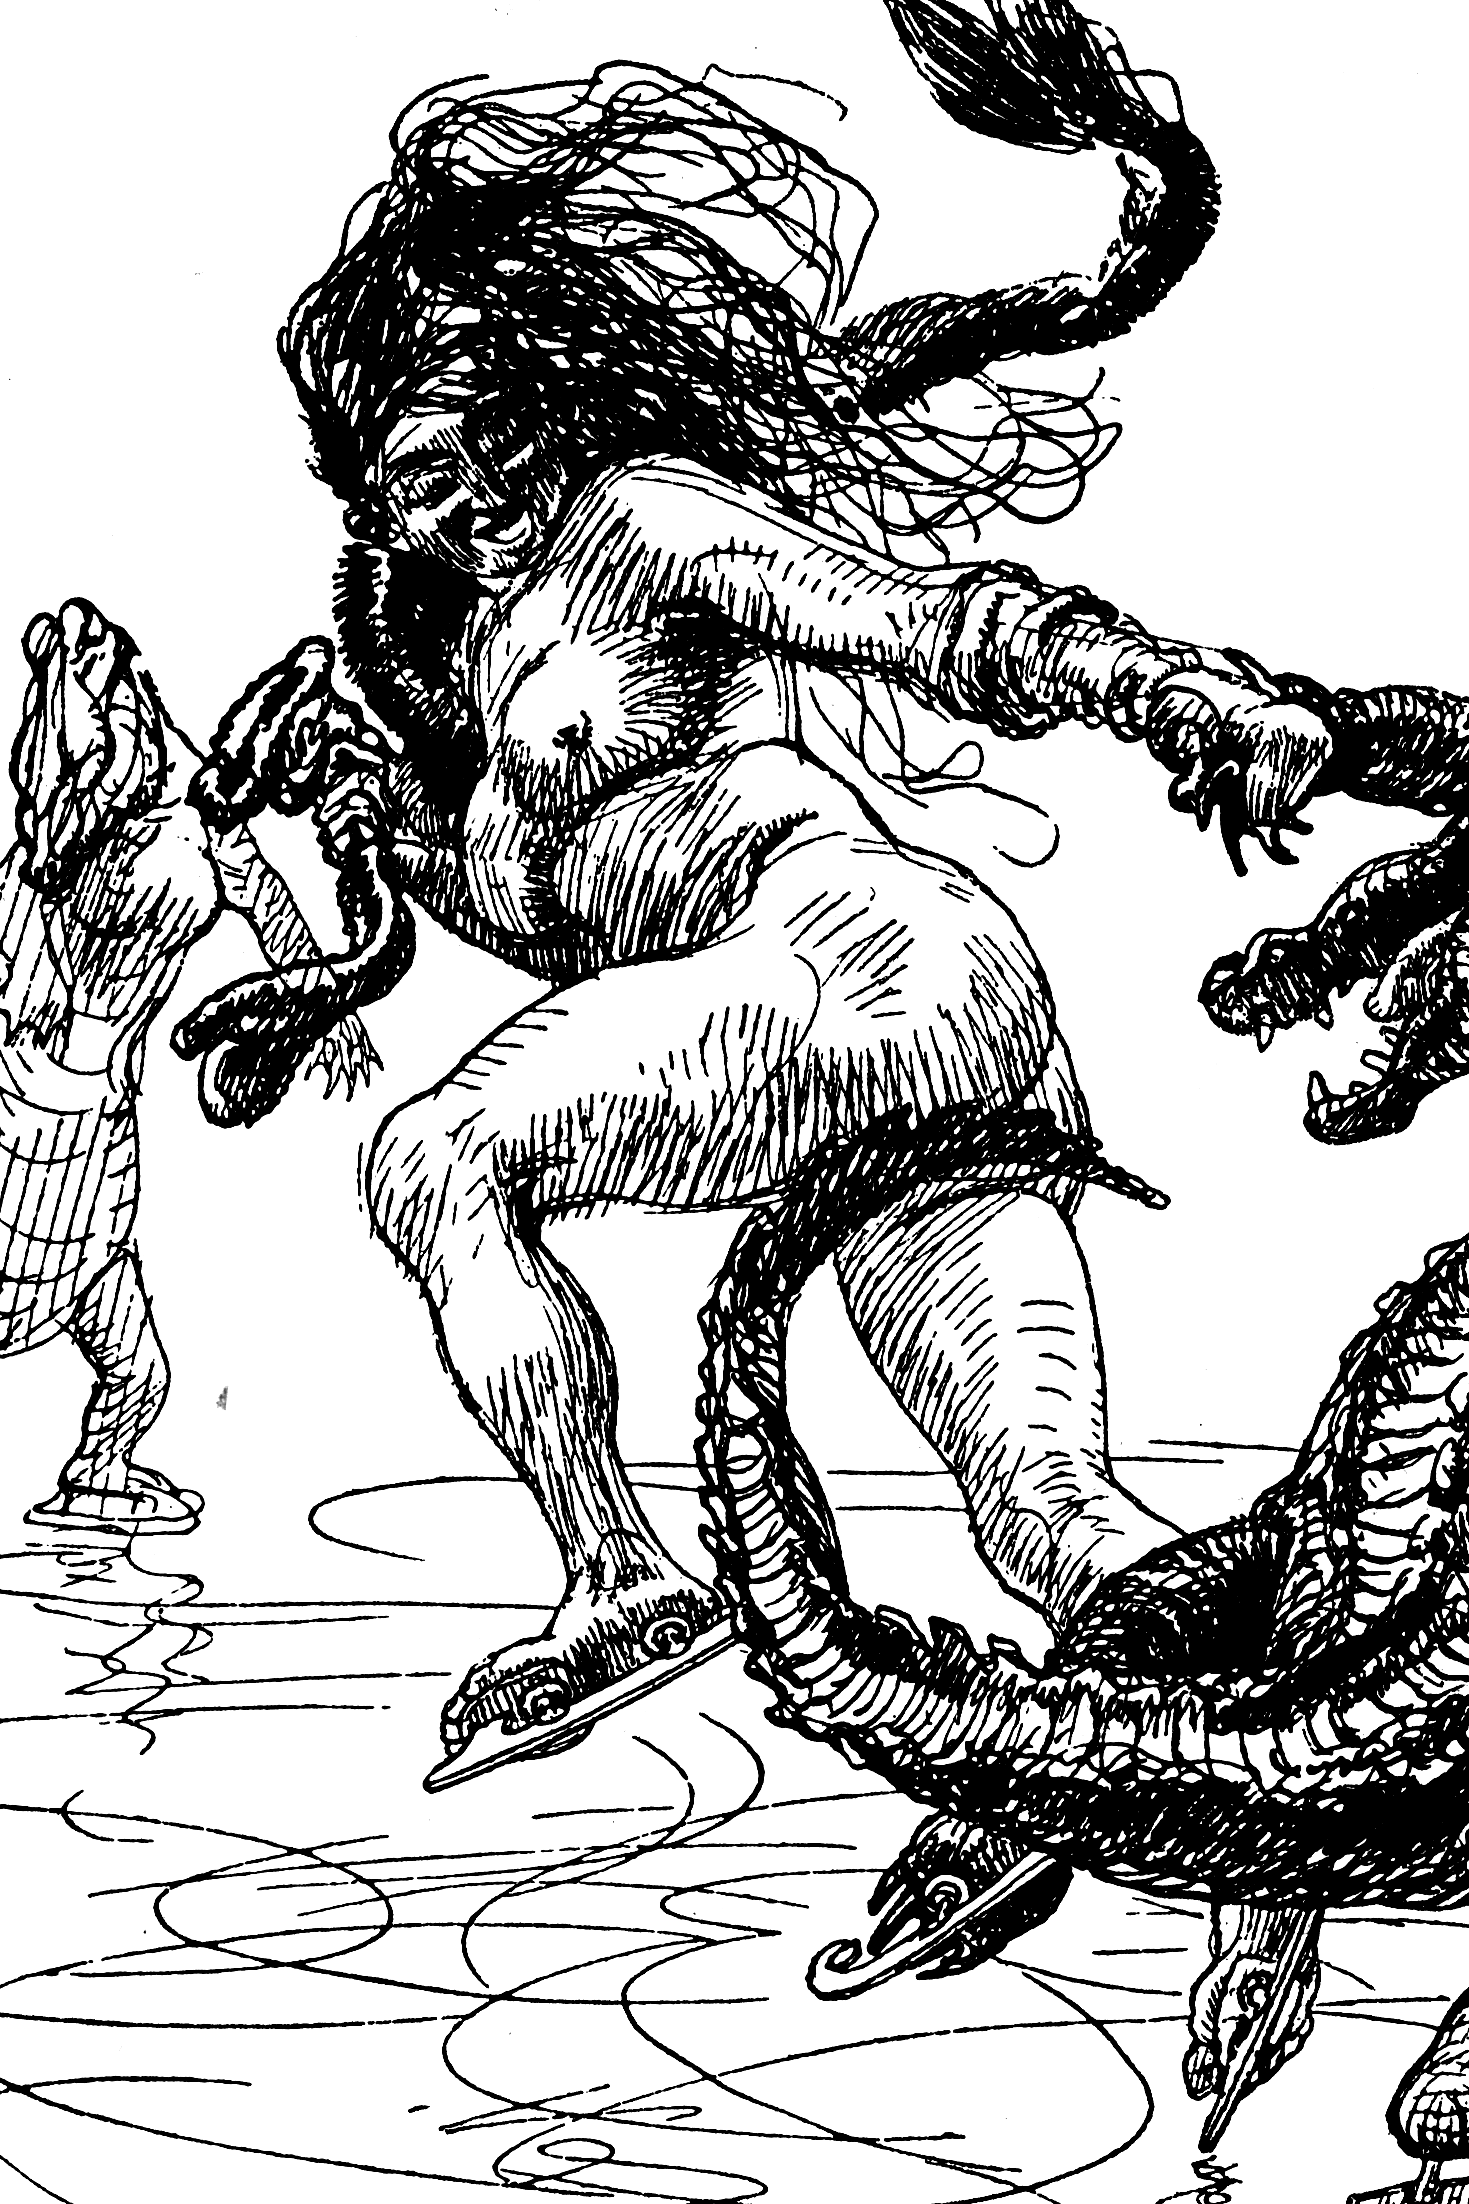 Heinrich Kley, scanned from 1911 book.
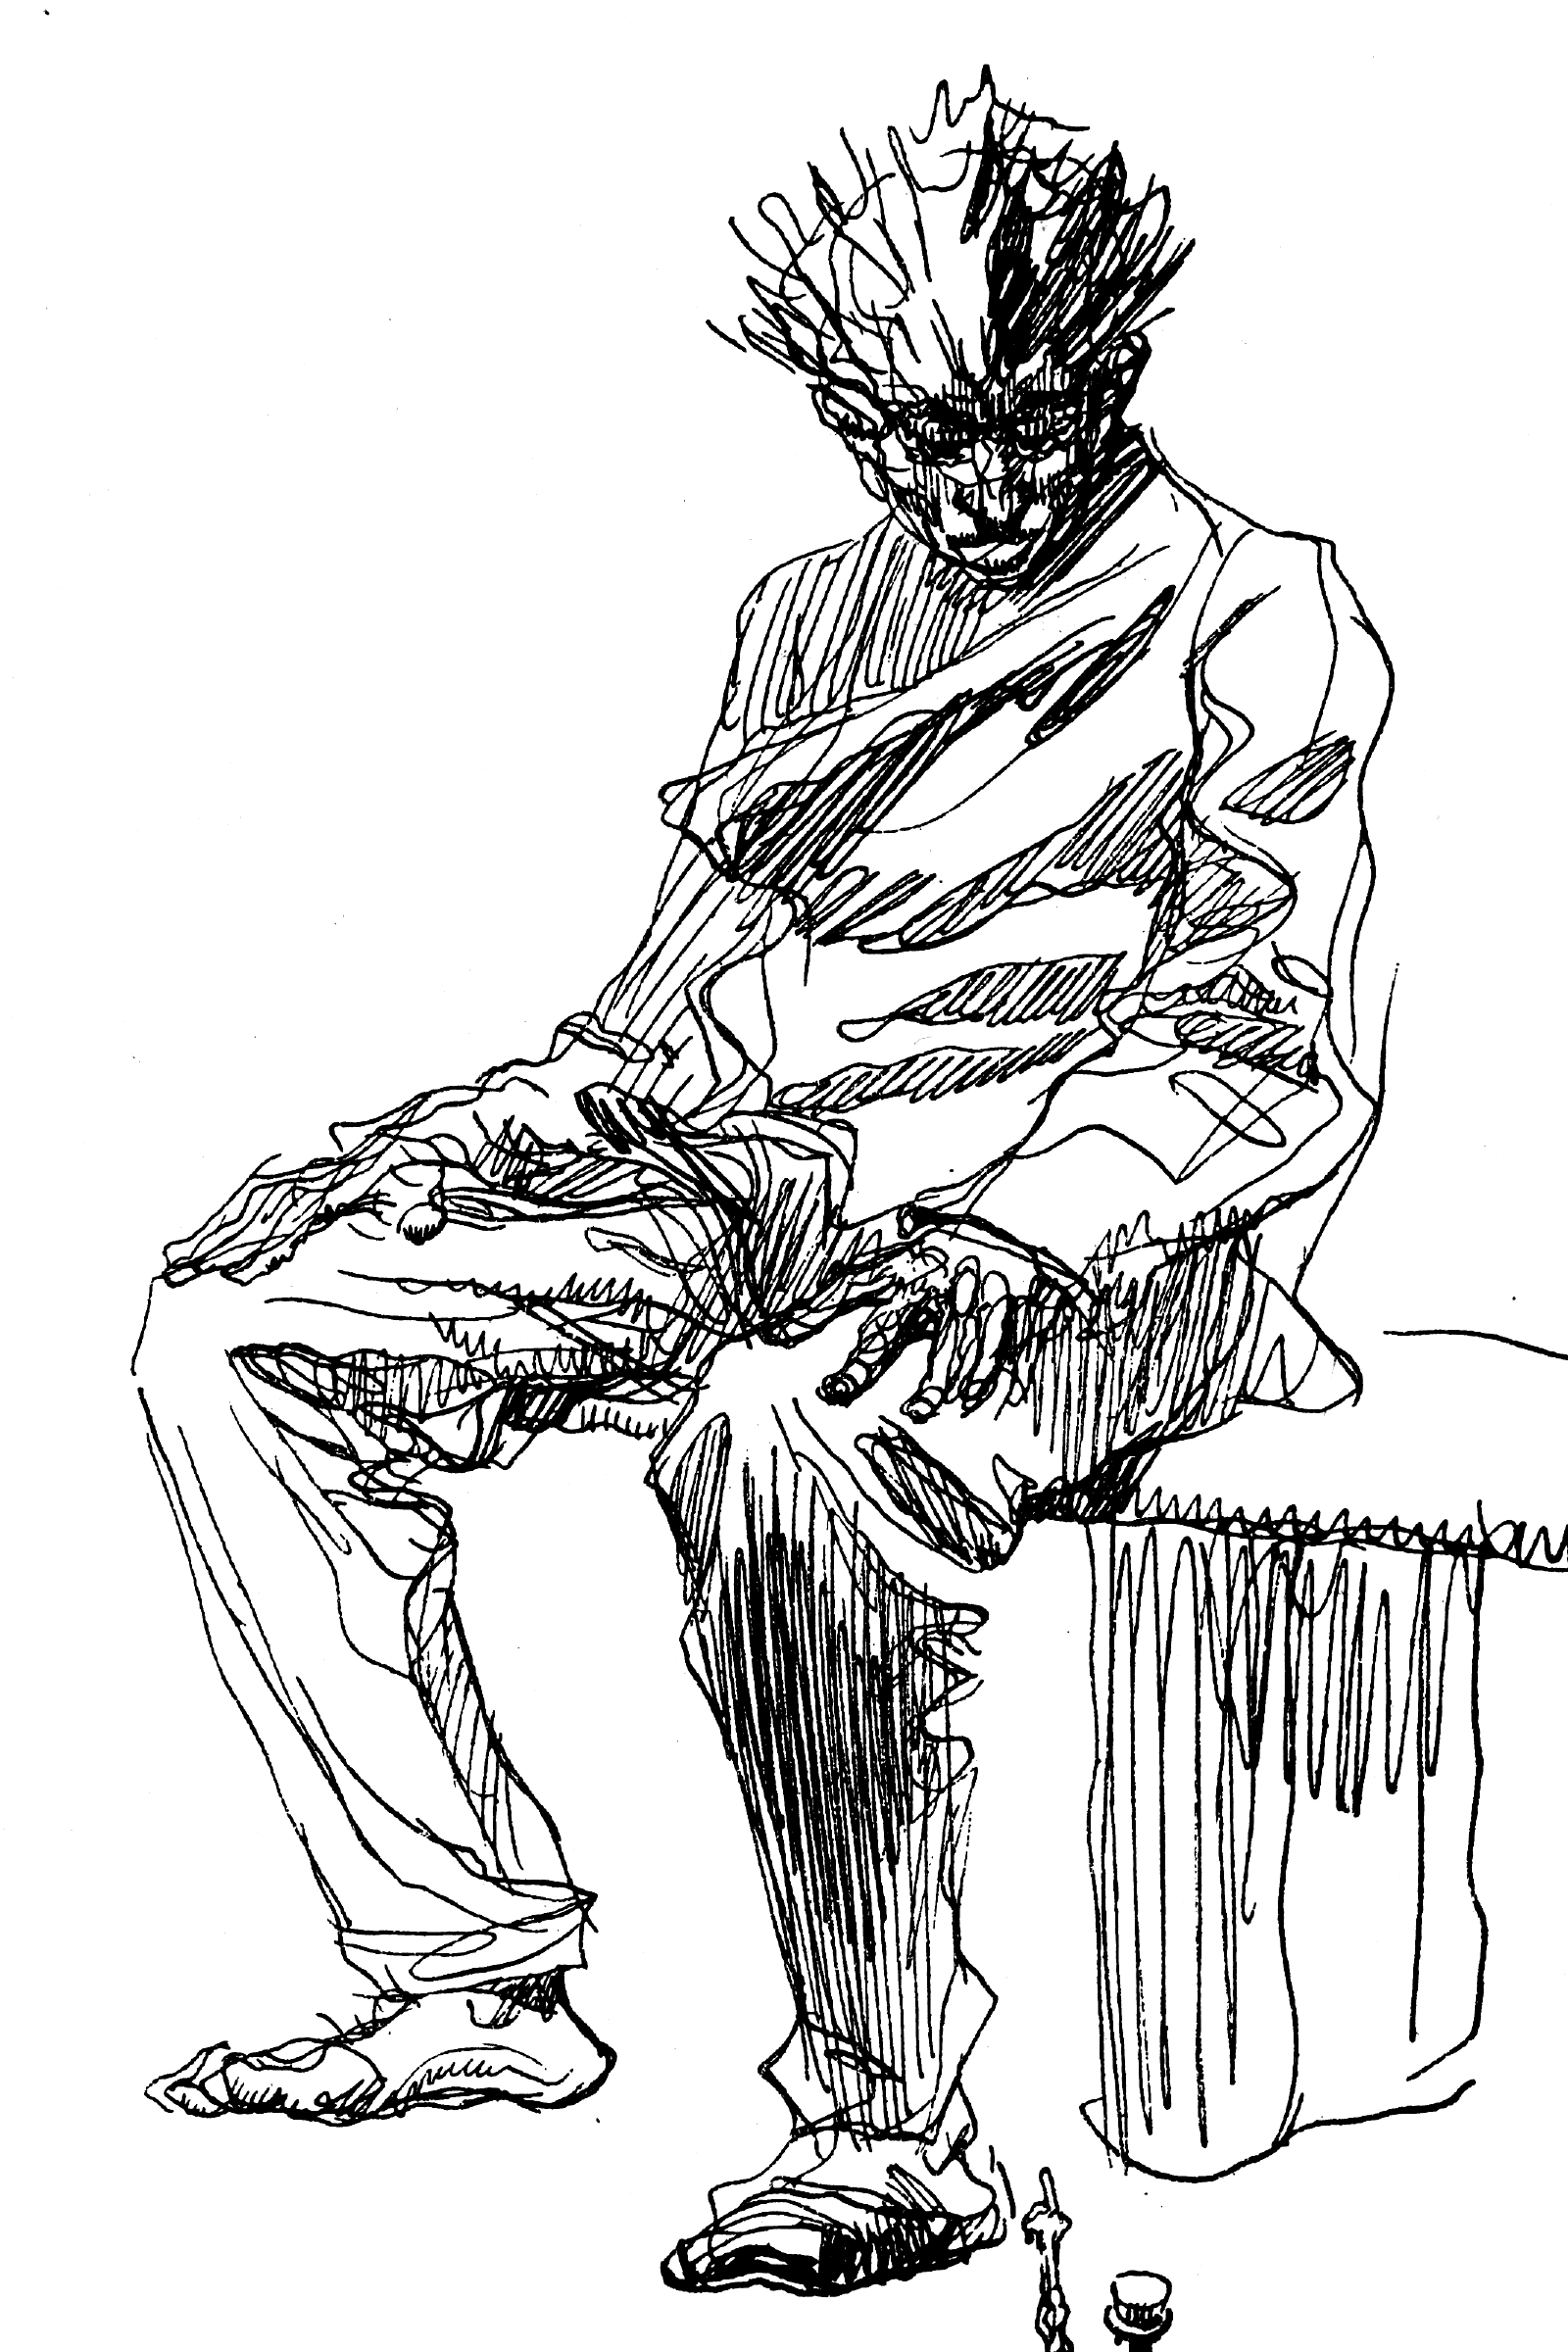 Heinrich Kley, scanned from 1911 book.
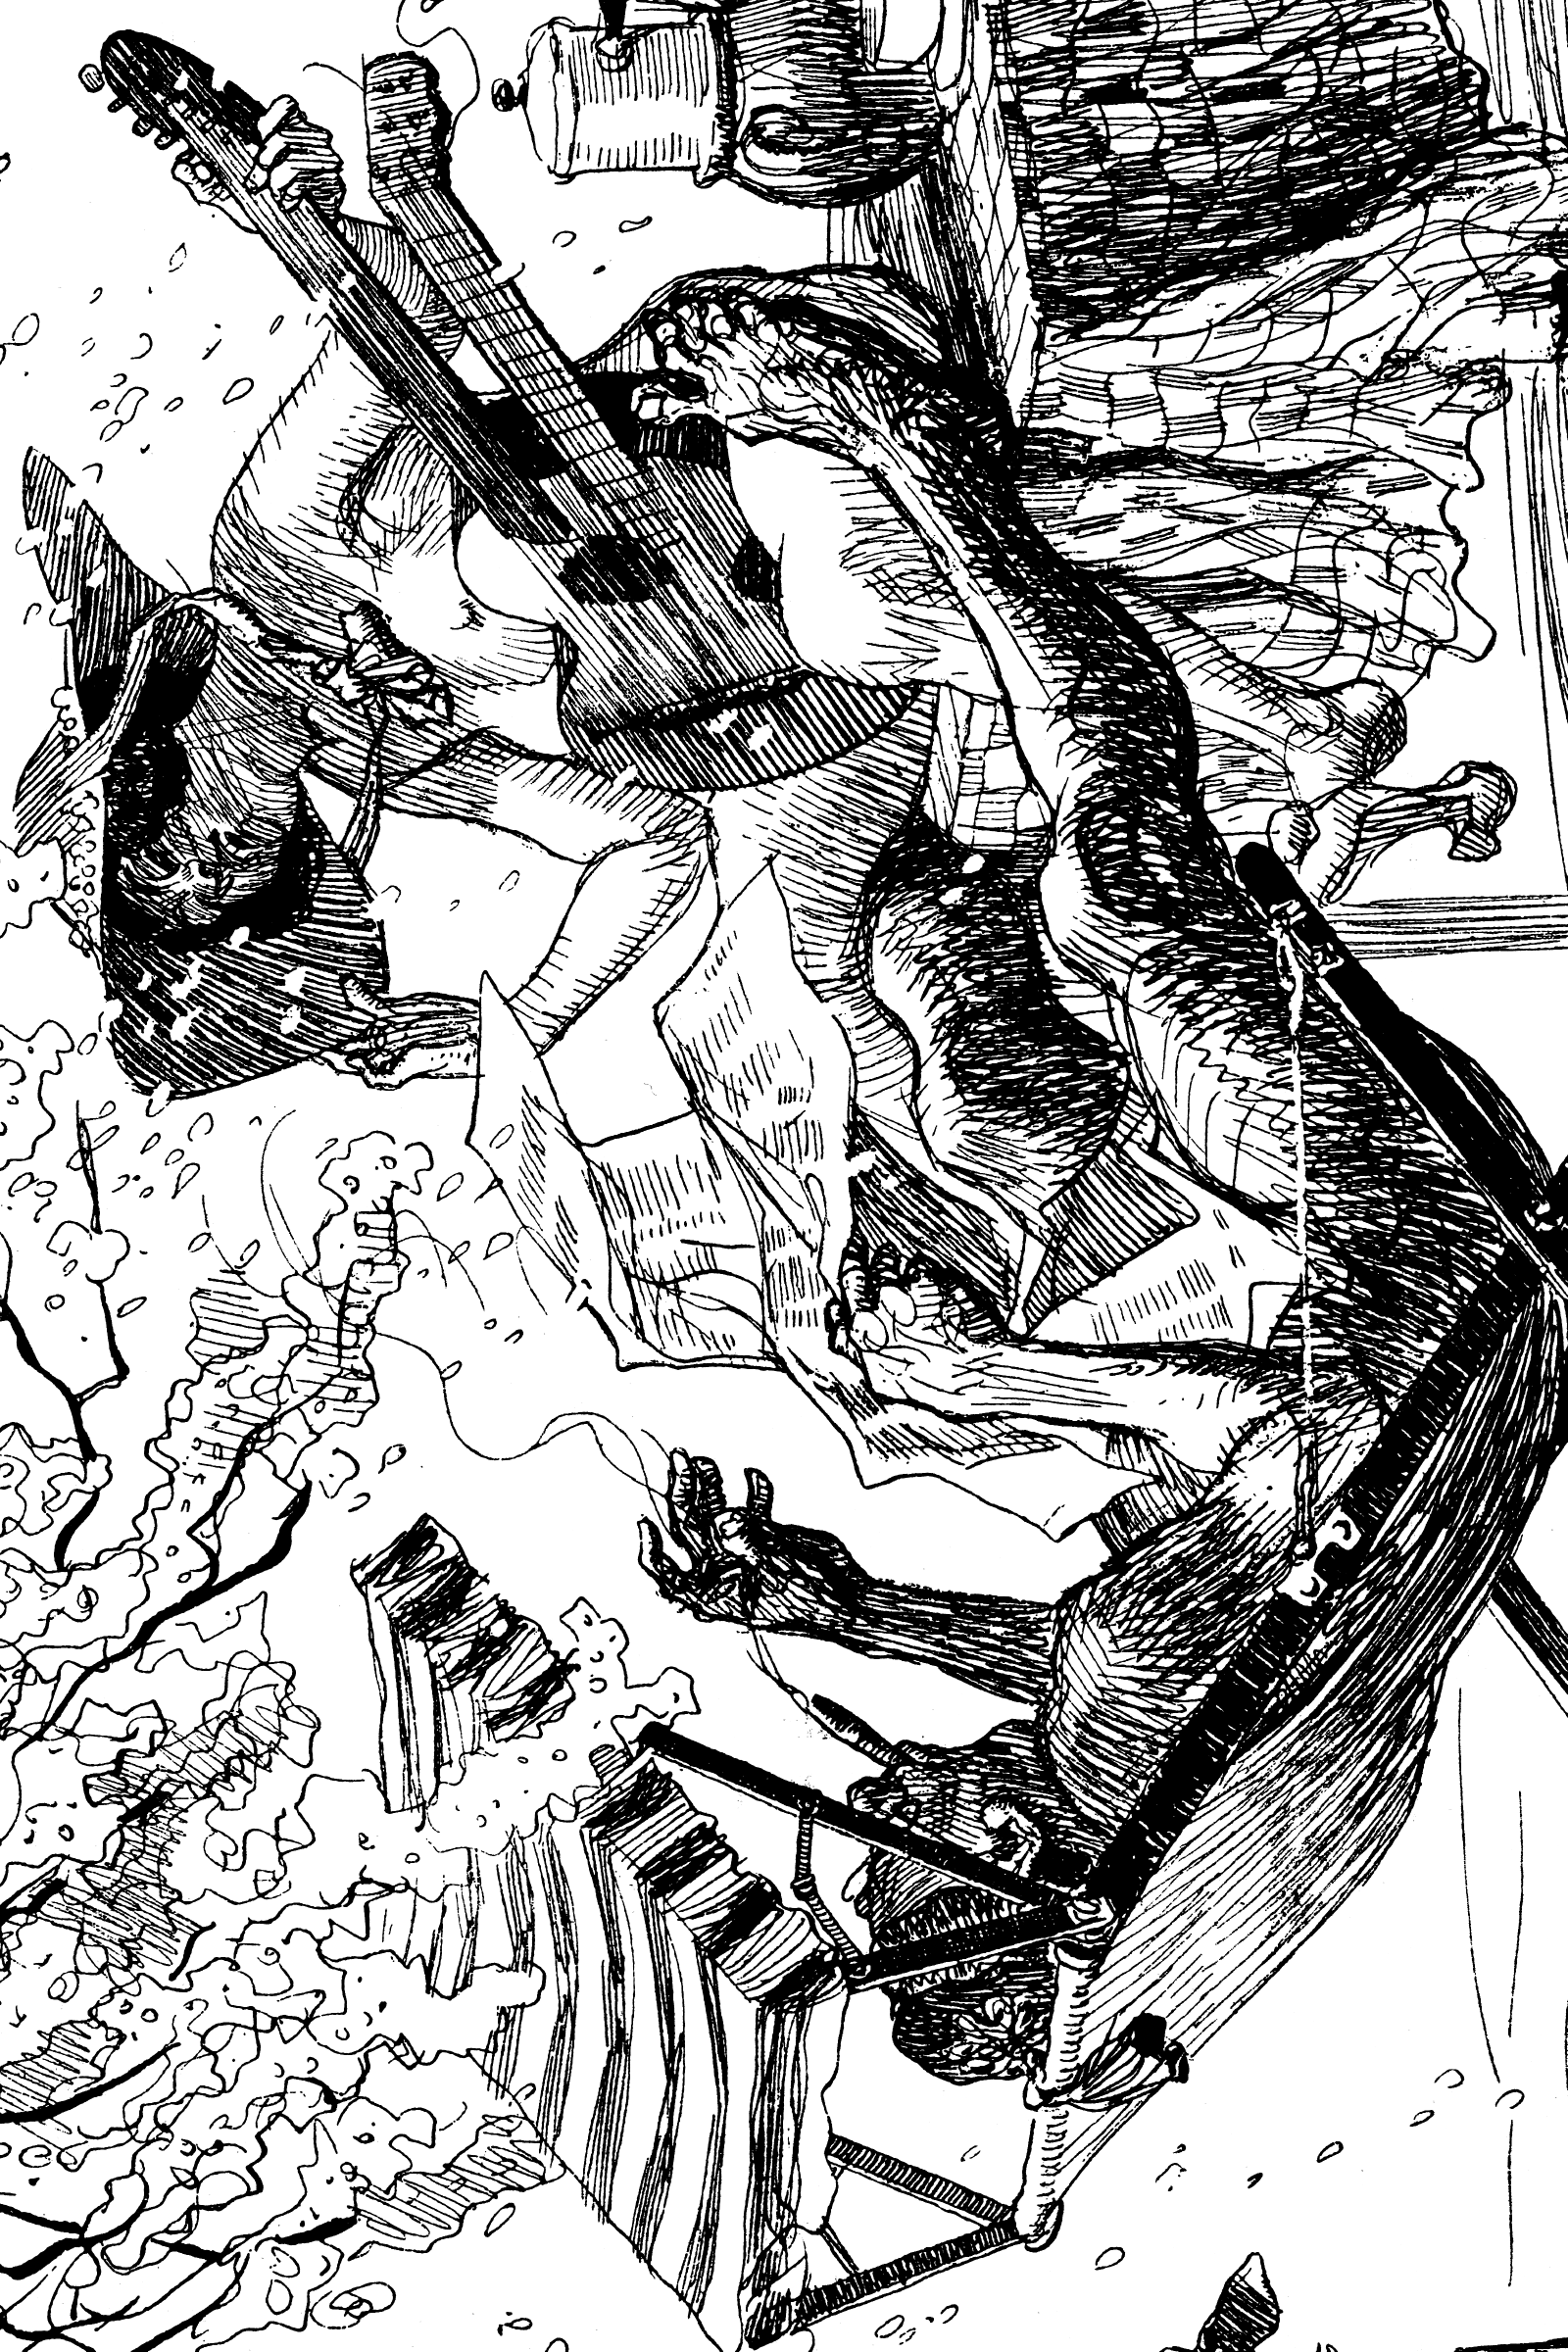 Heinrich Kley, scanned from 1911 book.
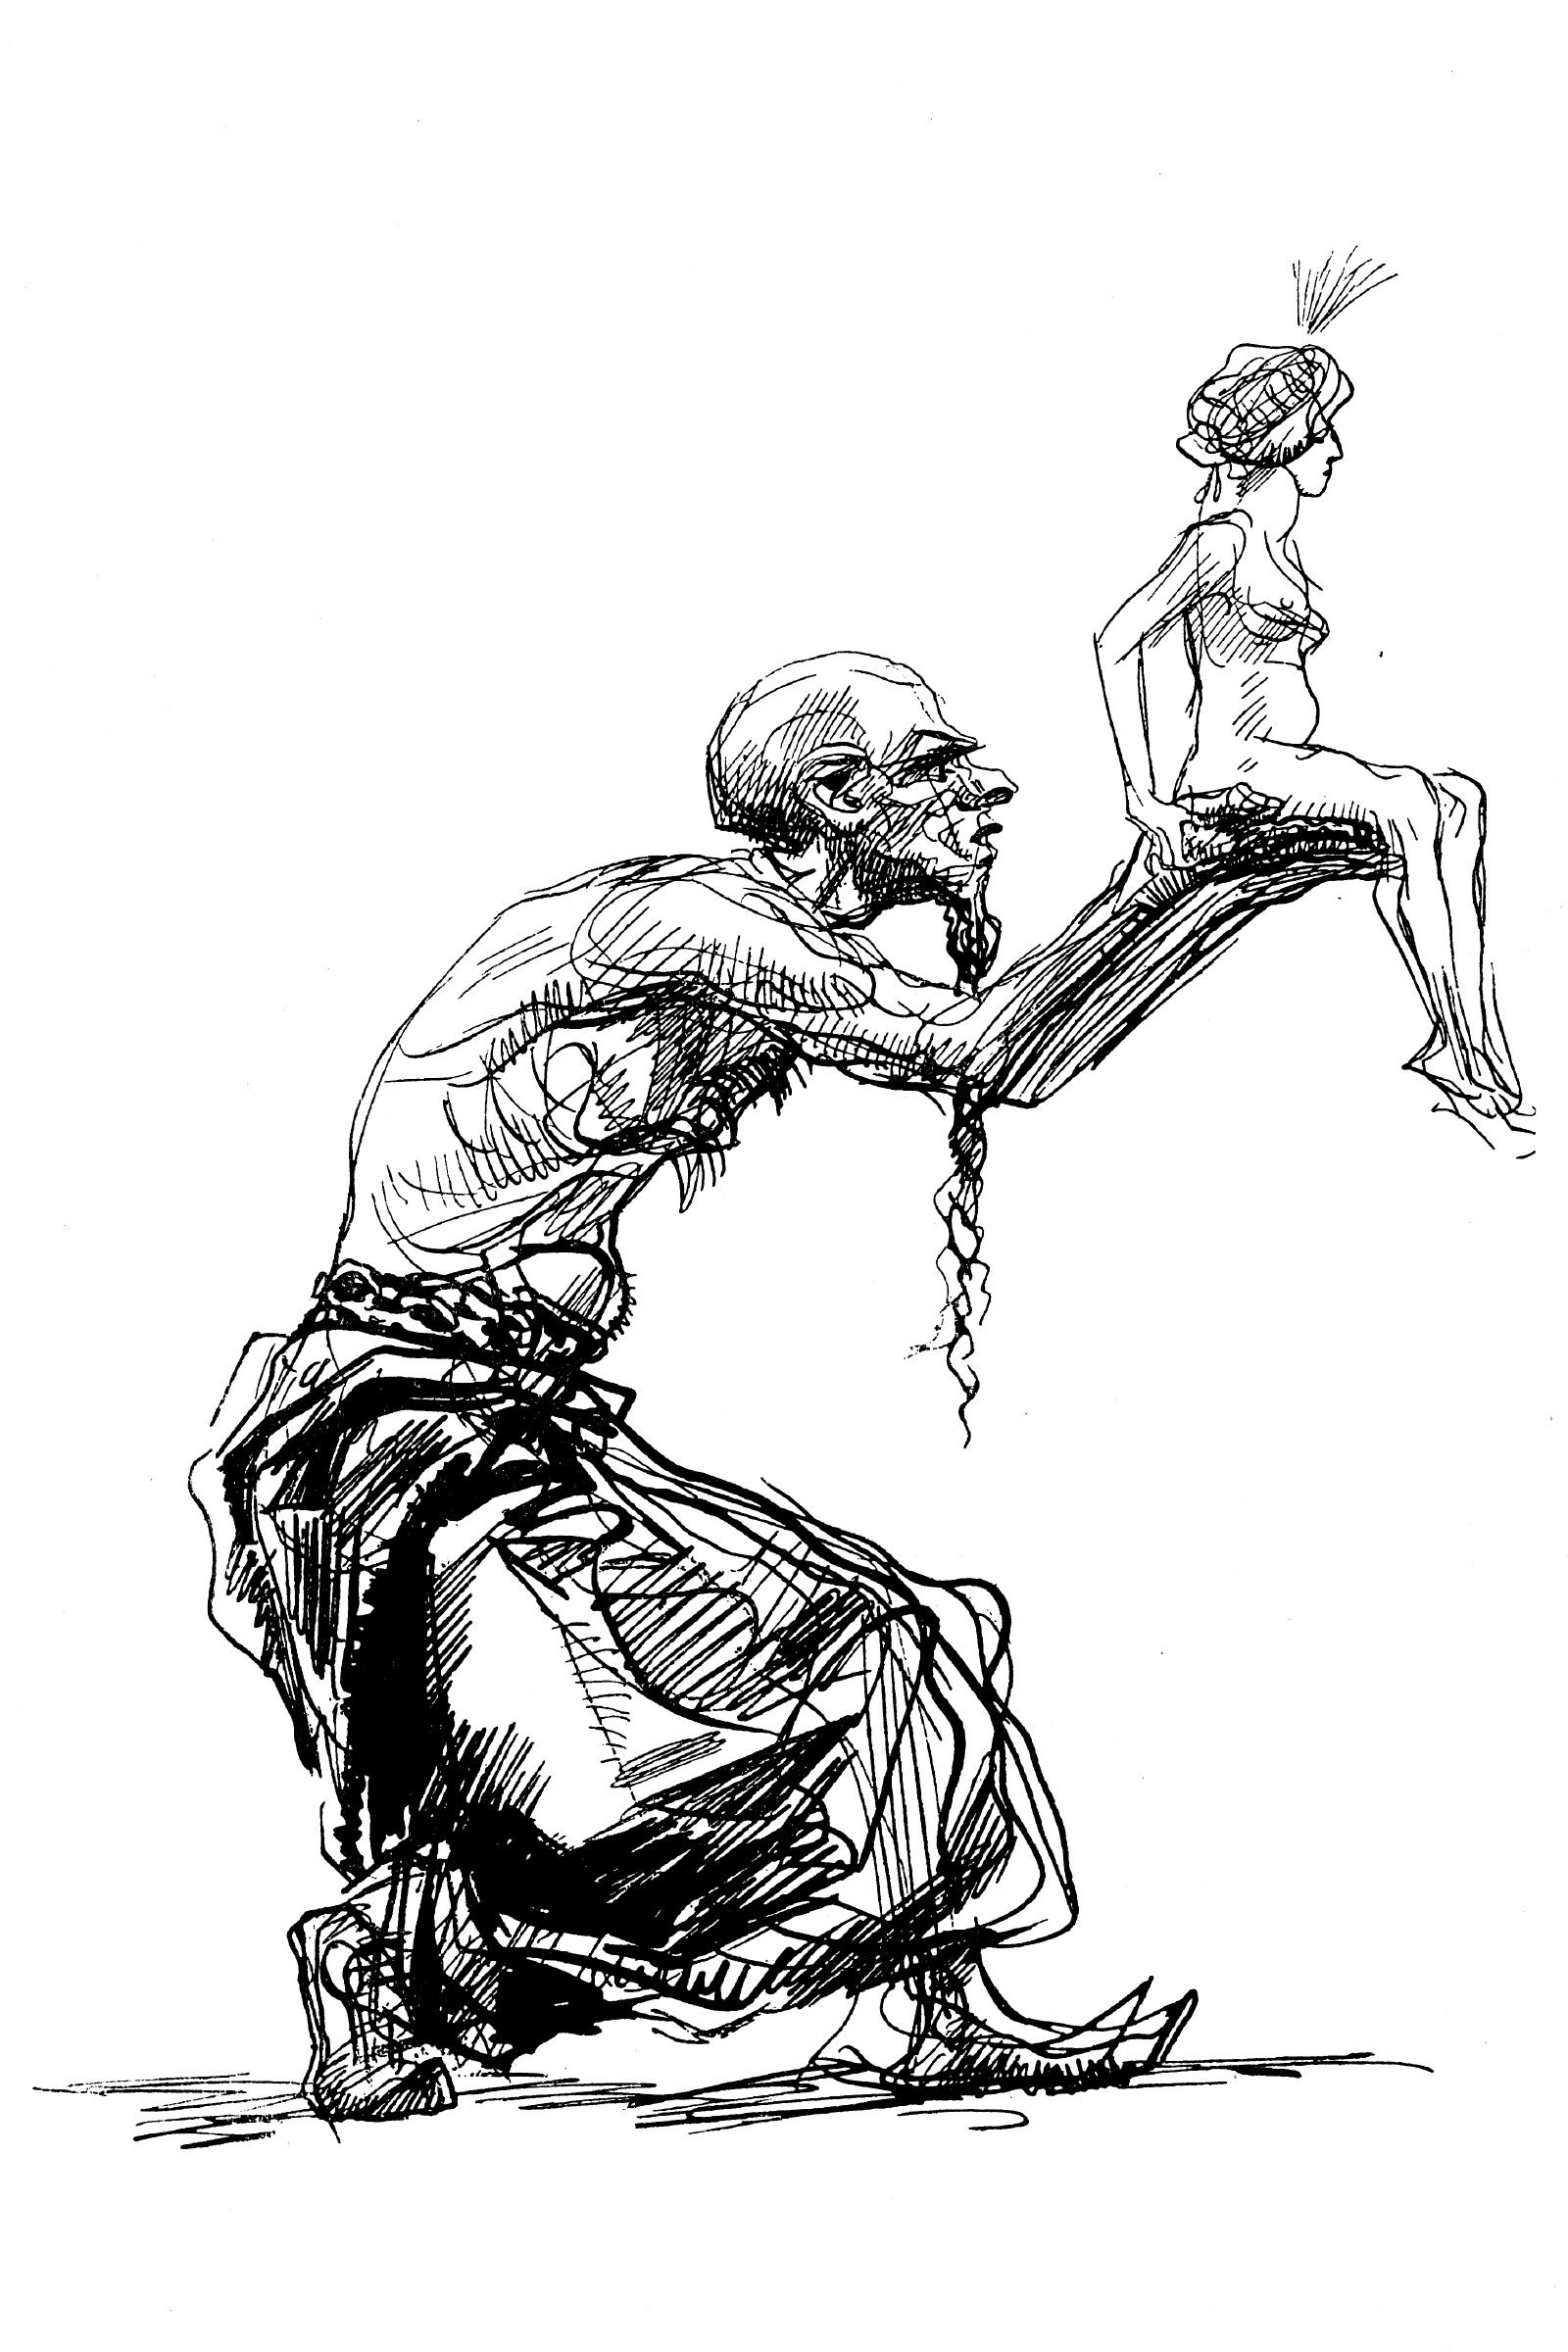 Heinrich Kley, scanned from 1911 book.
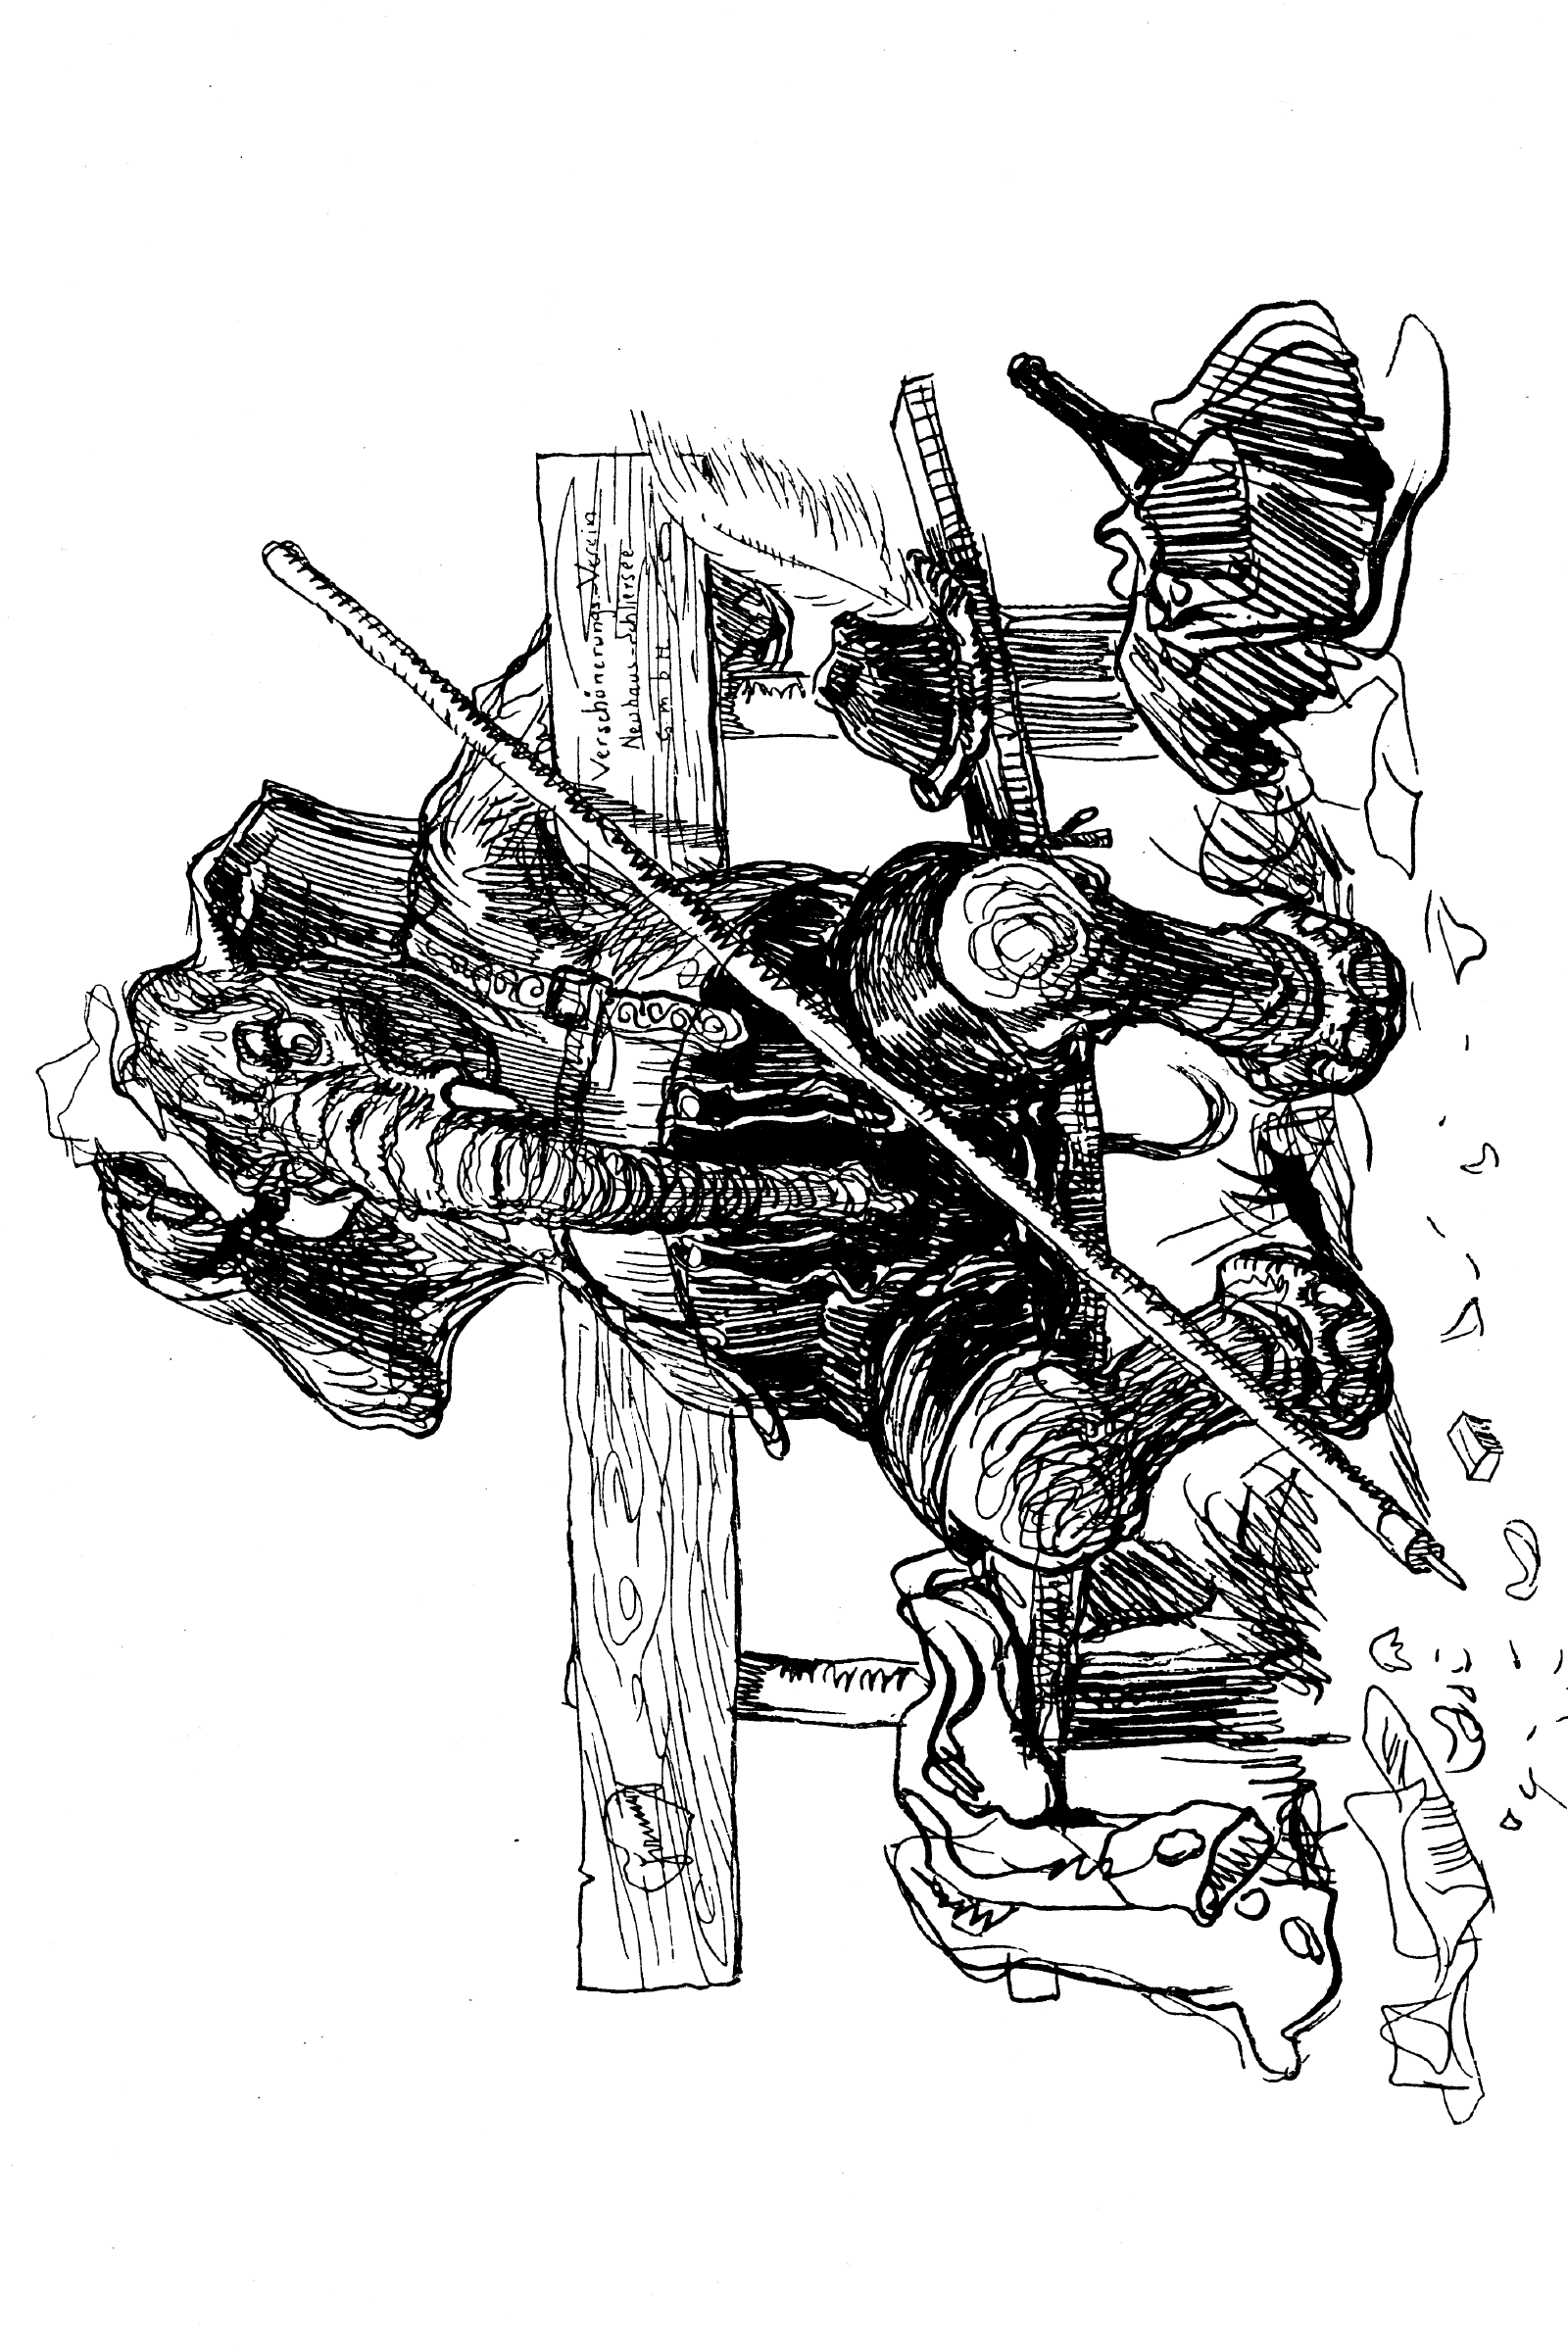 Heinrich Kley, scanned from 1911 book.
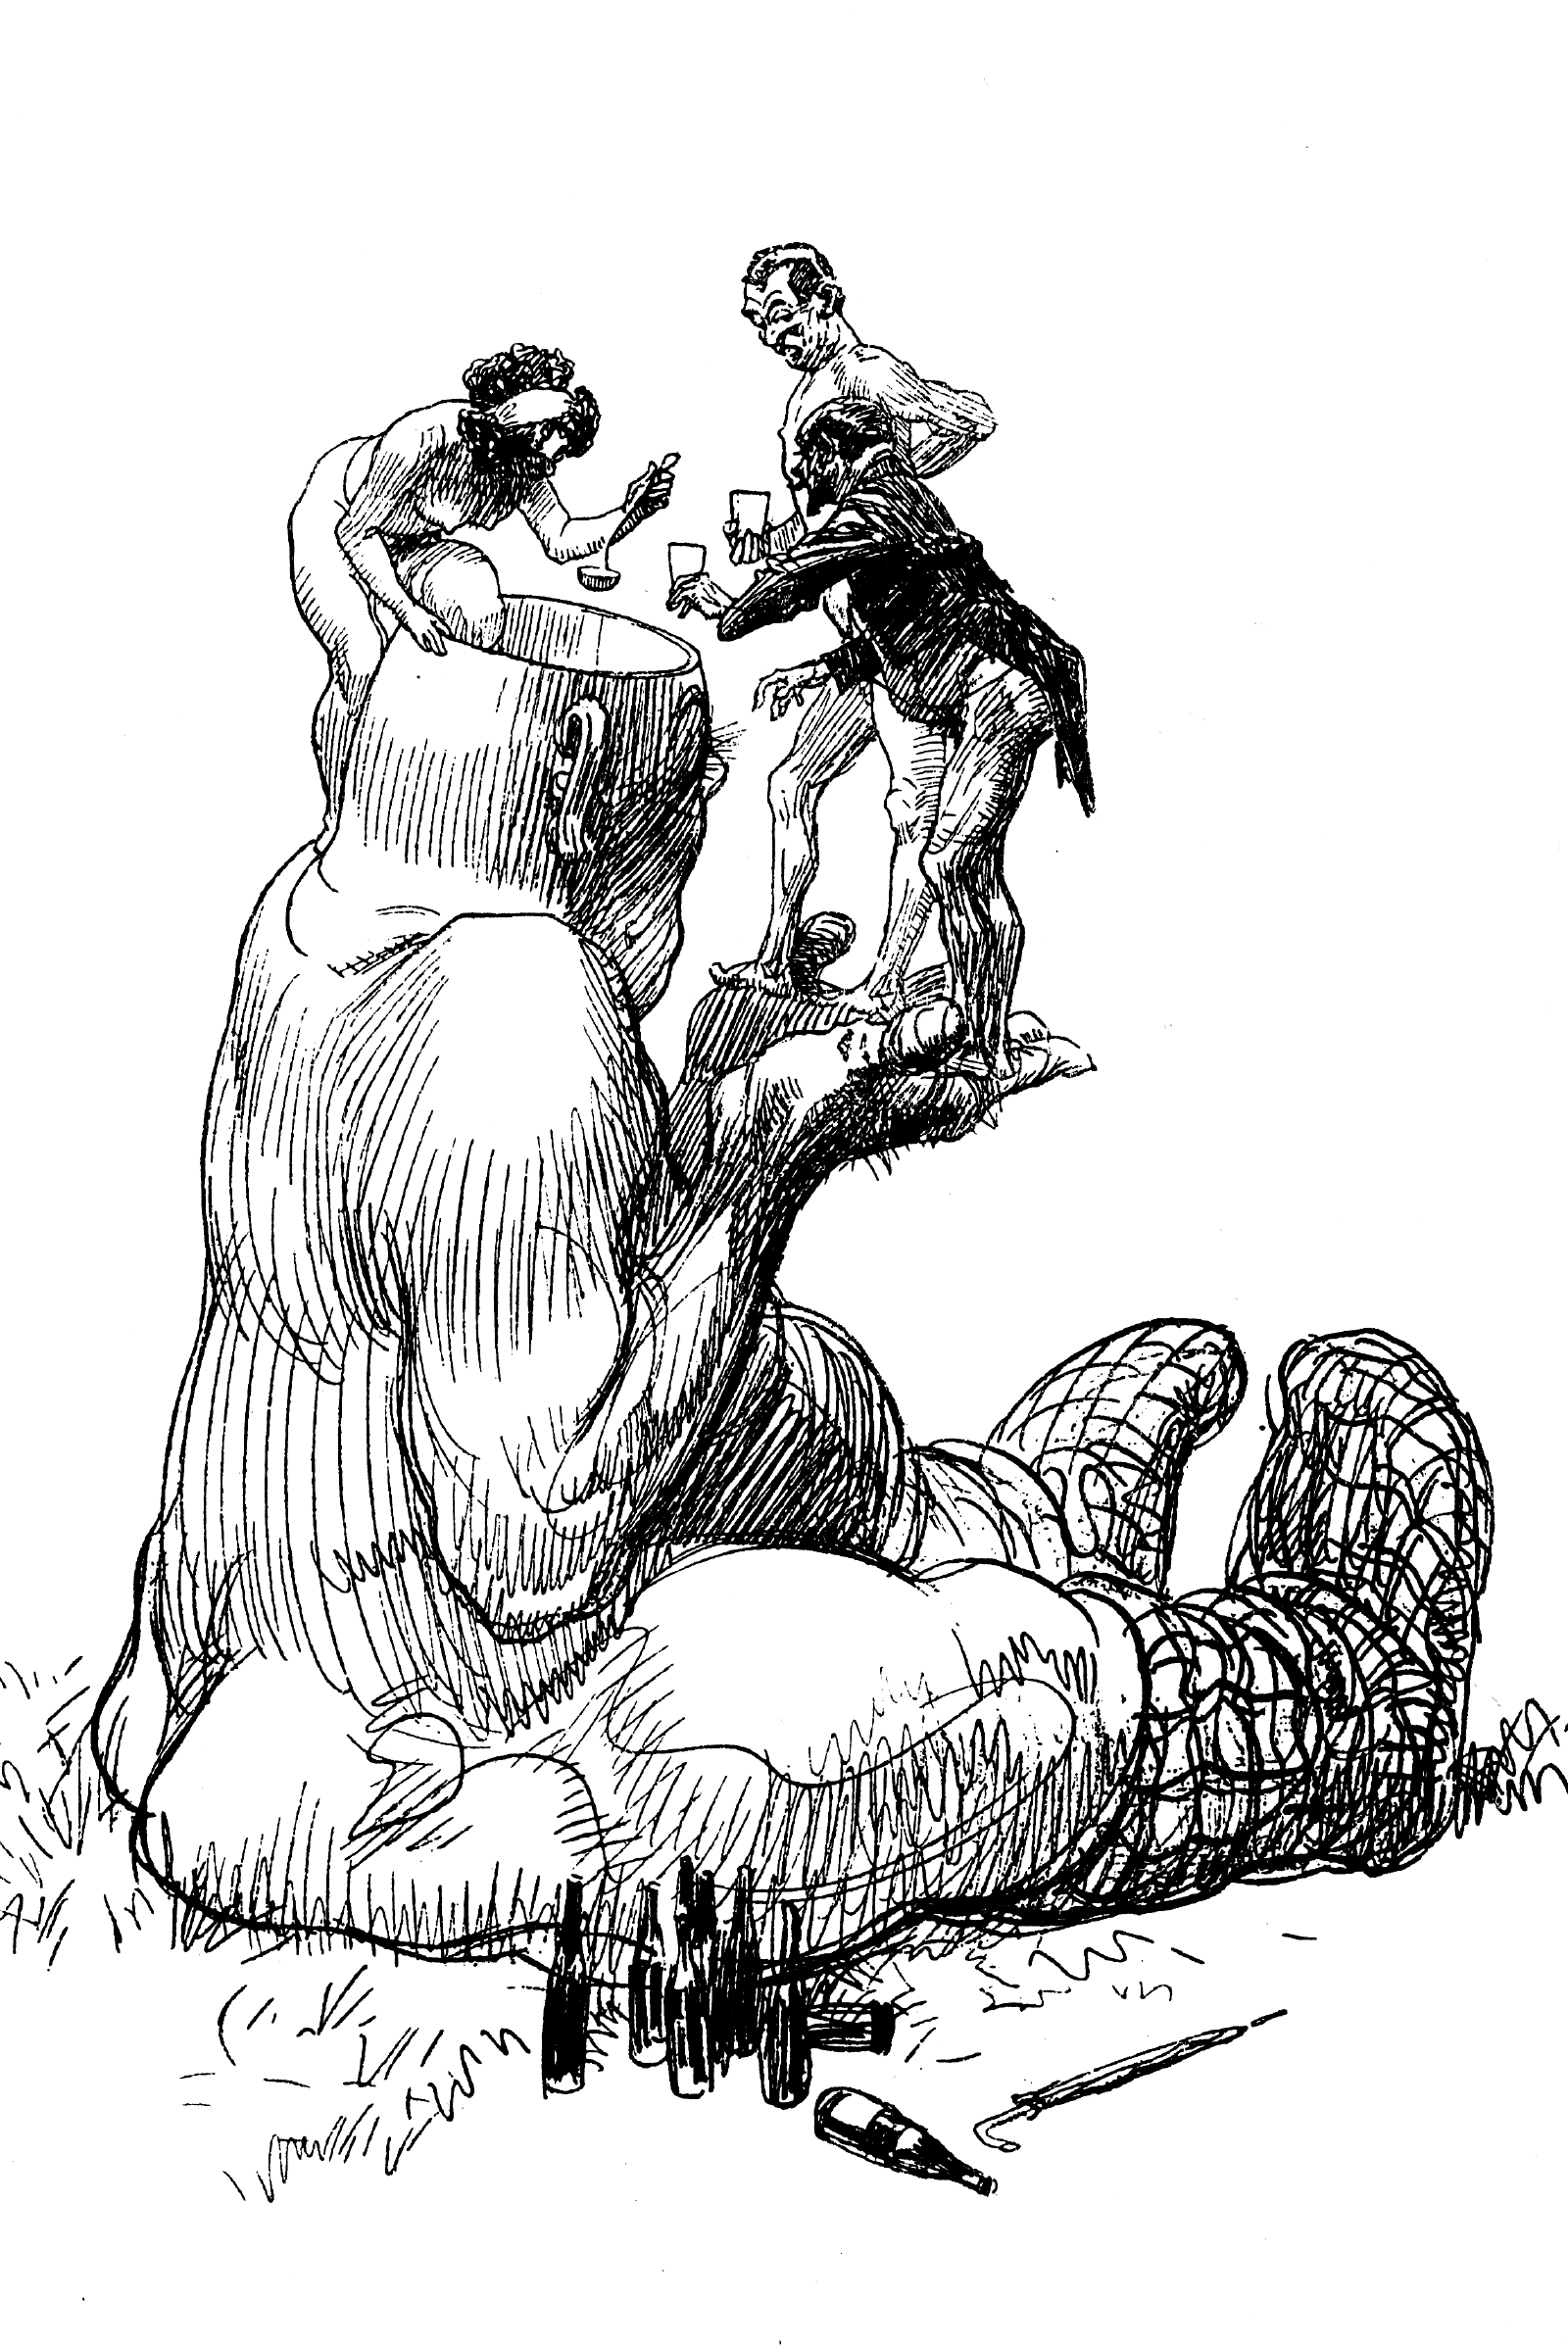 Heinrich Kley, scanned from 1911 book.
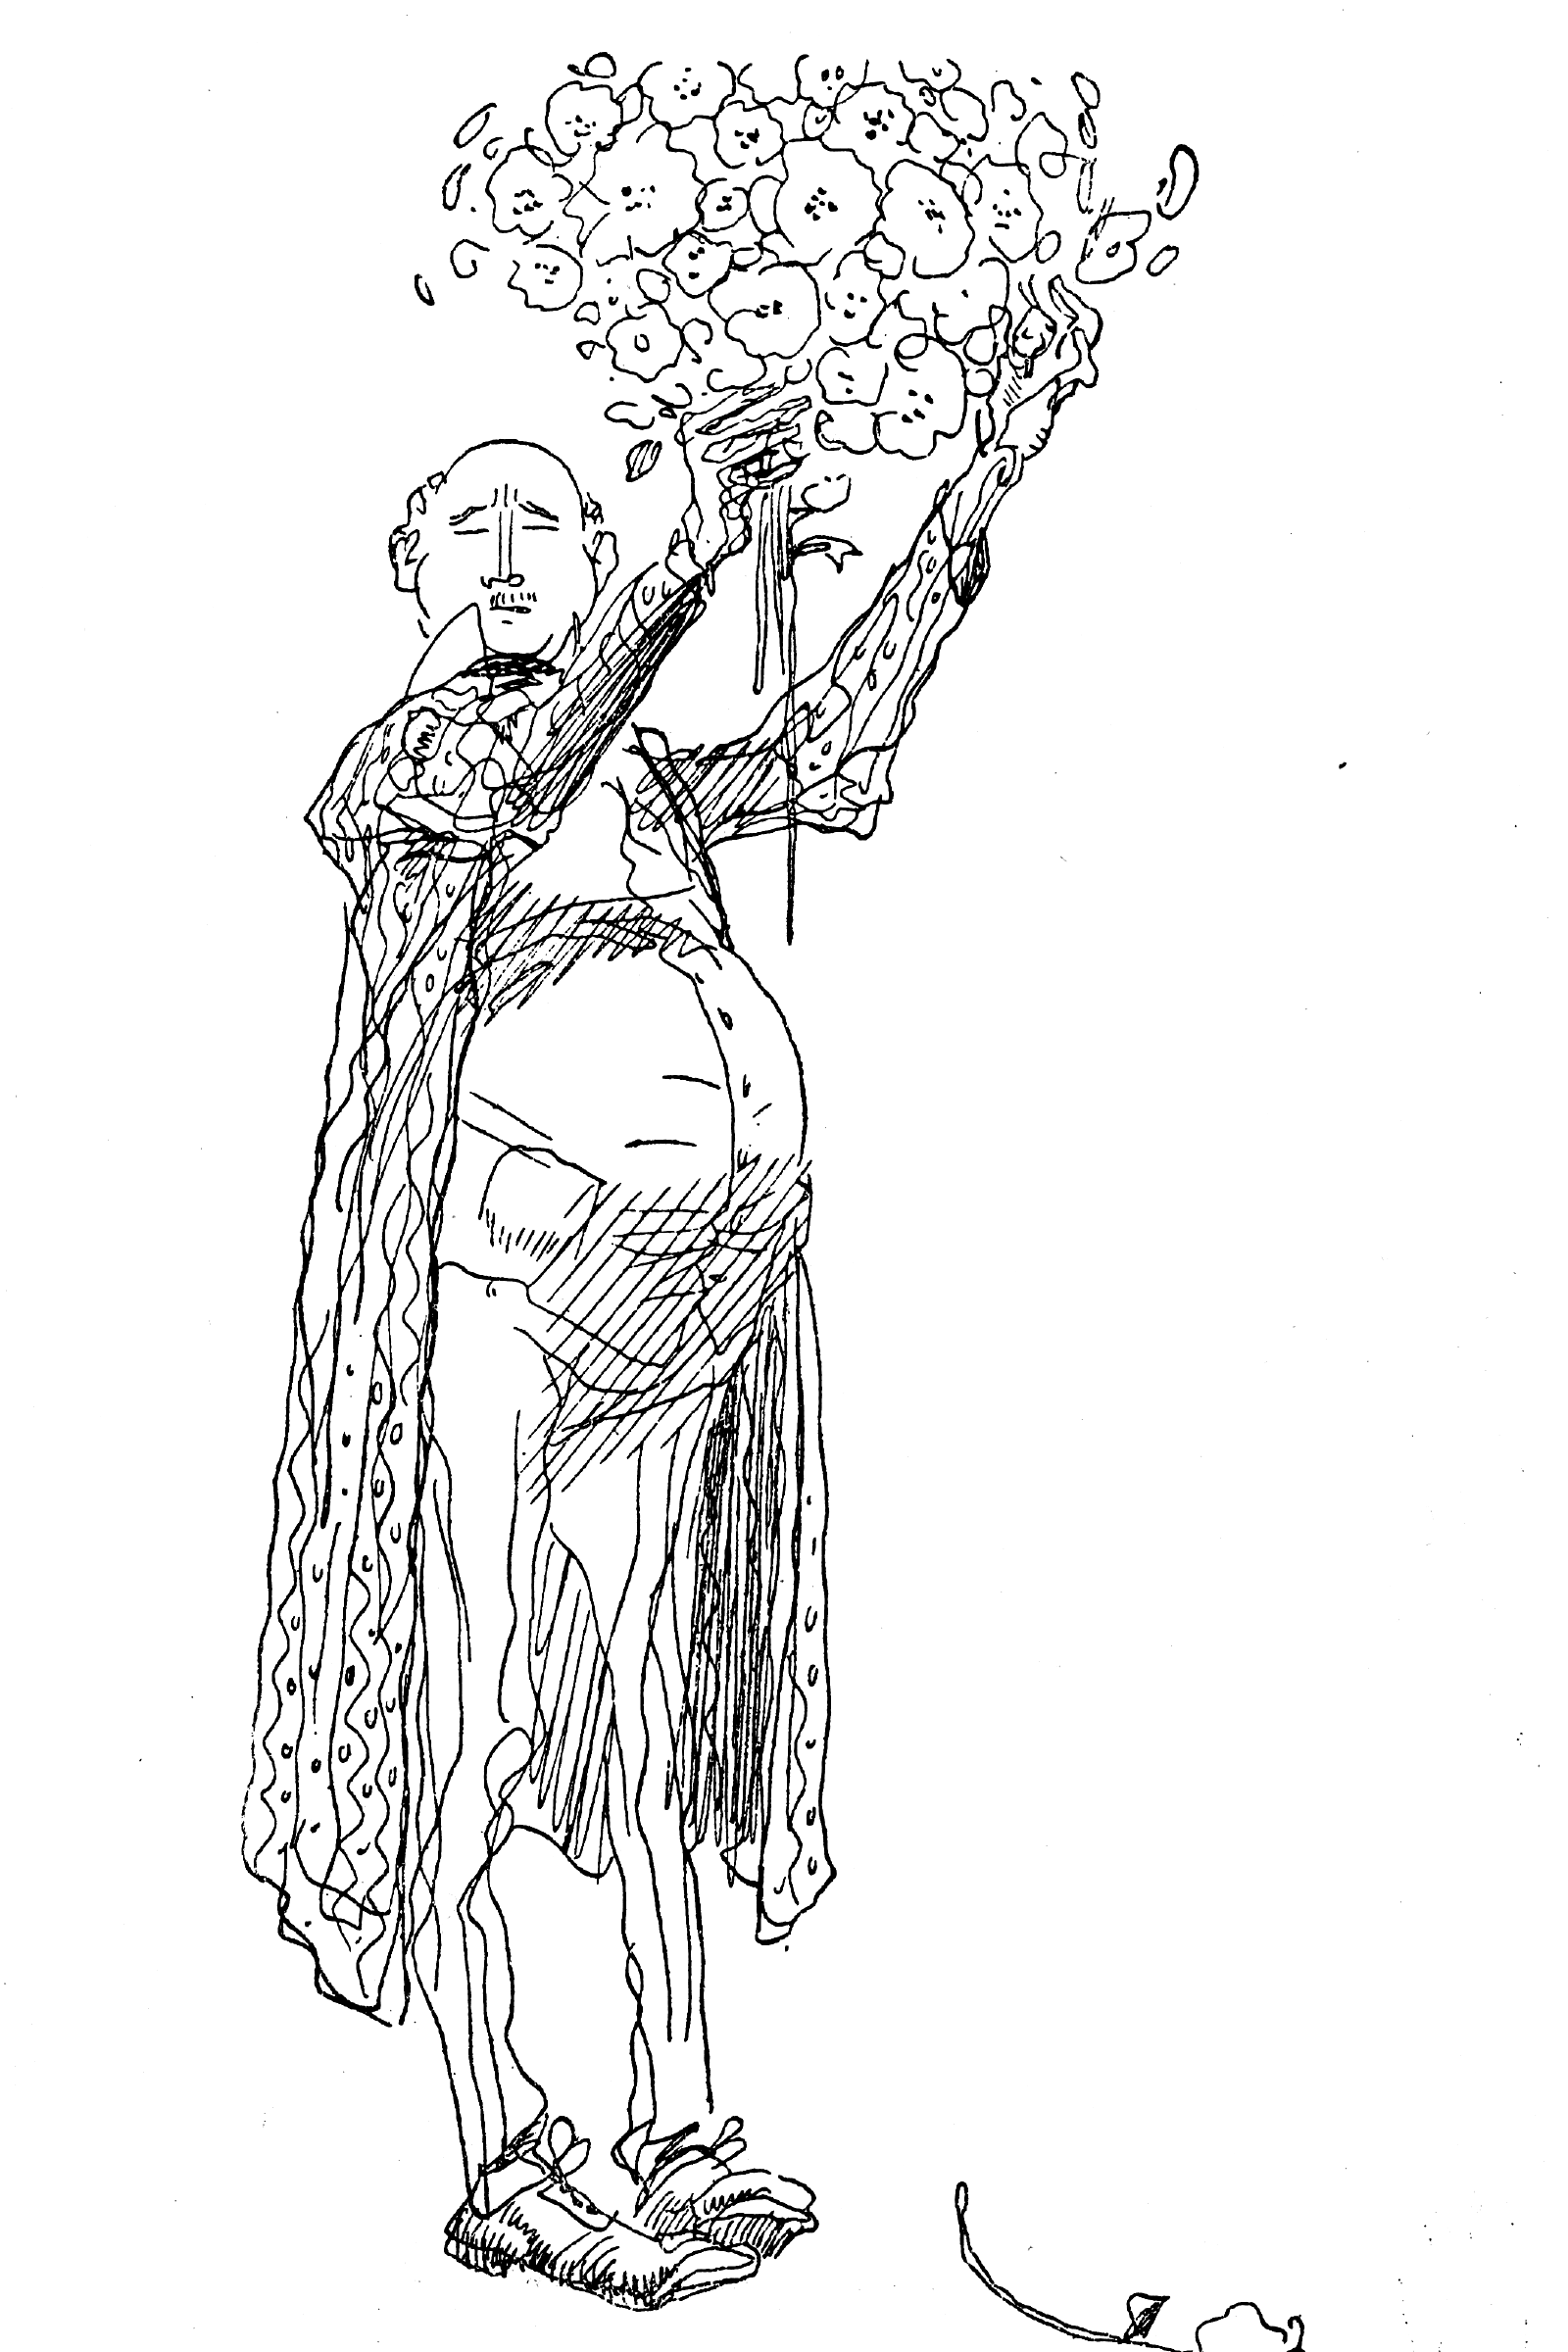 Heinrich Kley, scanned from 1911 book.
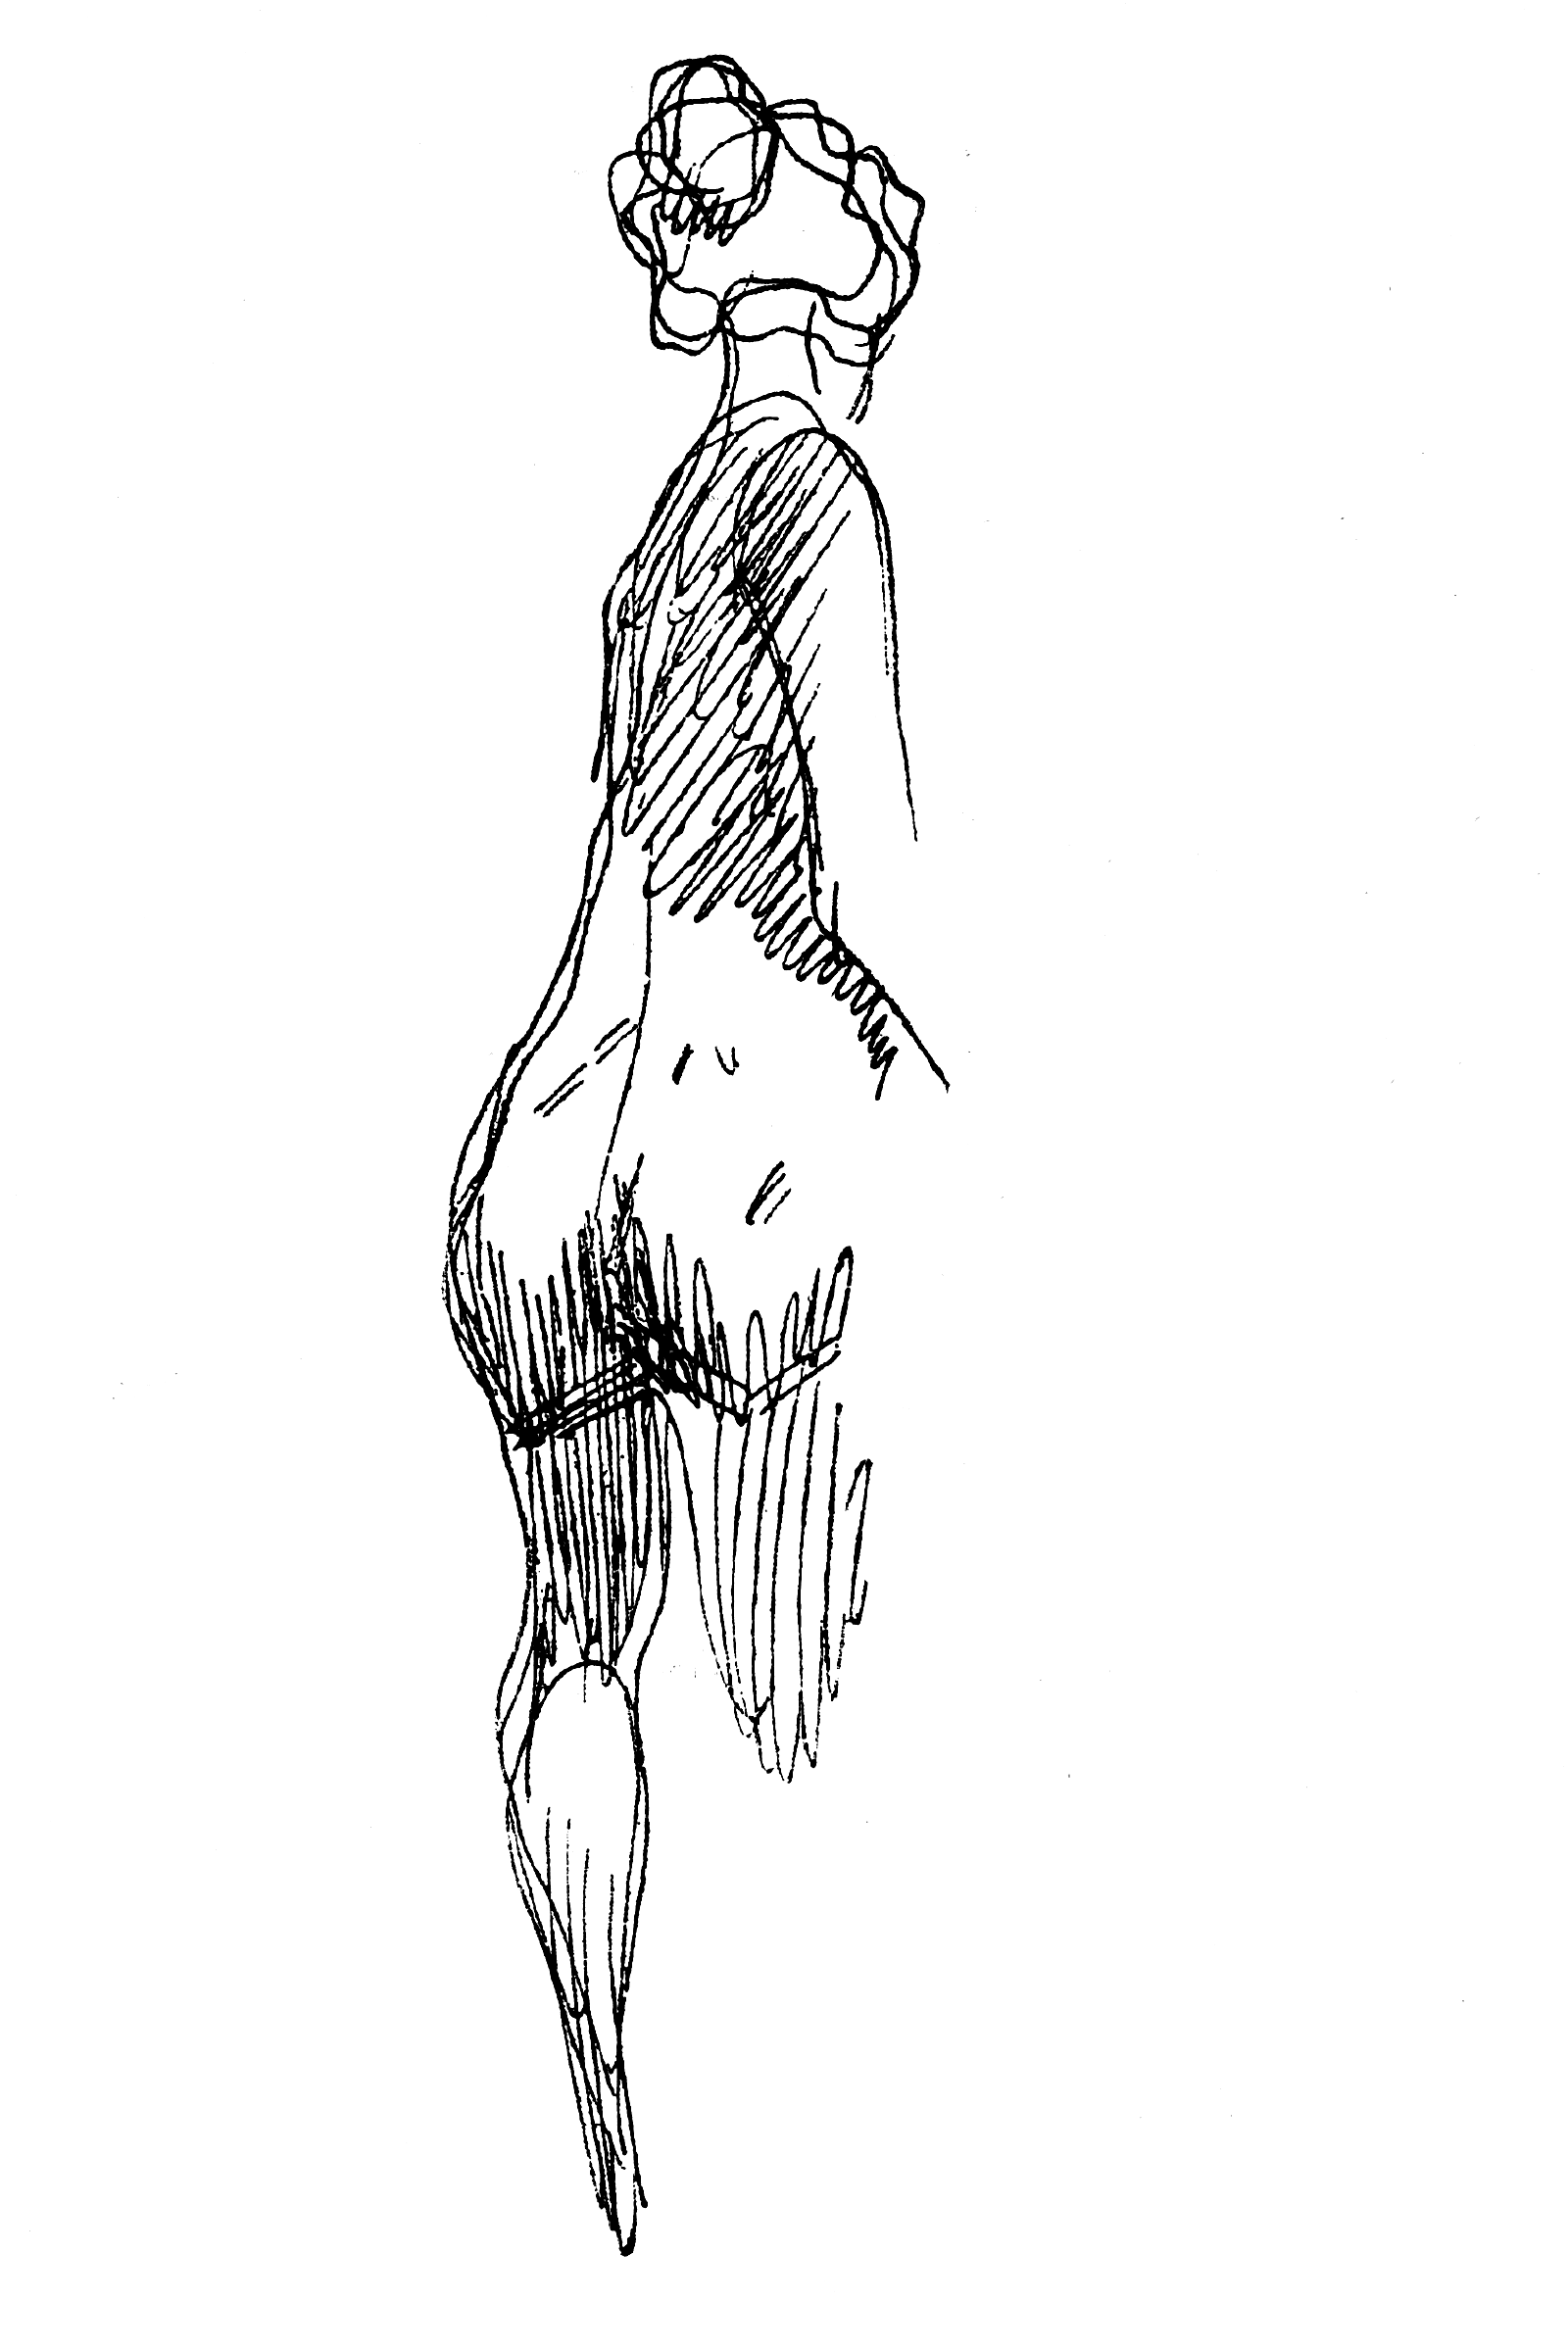 Heinrich Kley, scanned from 1911 book.
 Heinrich Kley, scanned from 1911 book.