Drawing Demo: Angry Butler-Heinrich Kley
Demonstration of a system to rotate a pose in a reference image. Try it out on your own reference poses! 
This reference is unique in that we see the back of the figure and that he is even covered by a big coat, which means we miss a lot of information on what this person looks like. We don't know what he looks like from the front, so we need to imagine details as we rotate the figure. For this one, I informally referenced other illustrations by Heinrich Kley, where the characters were self-portraits. An angry old guy with a mustache and a potbelly.
The illustration, however, fortunately, gives enough hints to figure out the body's pose.
In general, though, this does happen. When using a reference, you will be missing information.
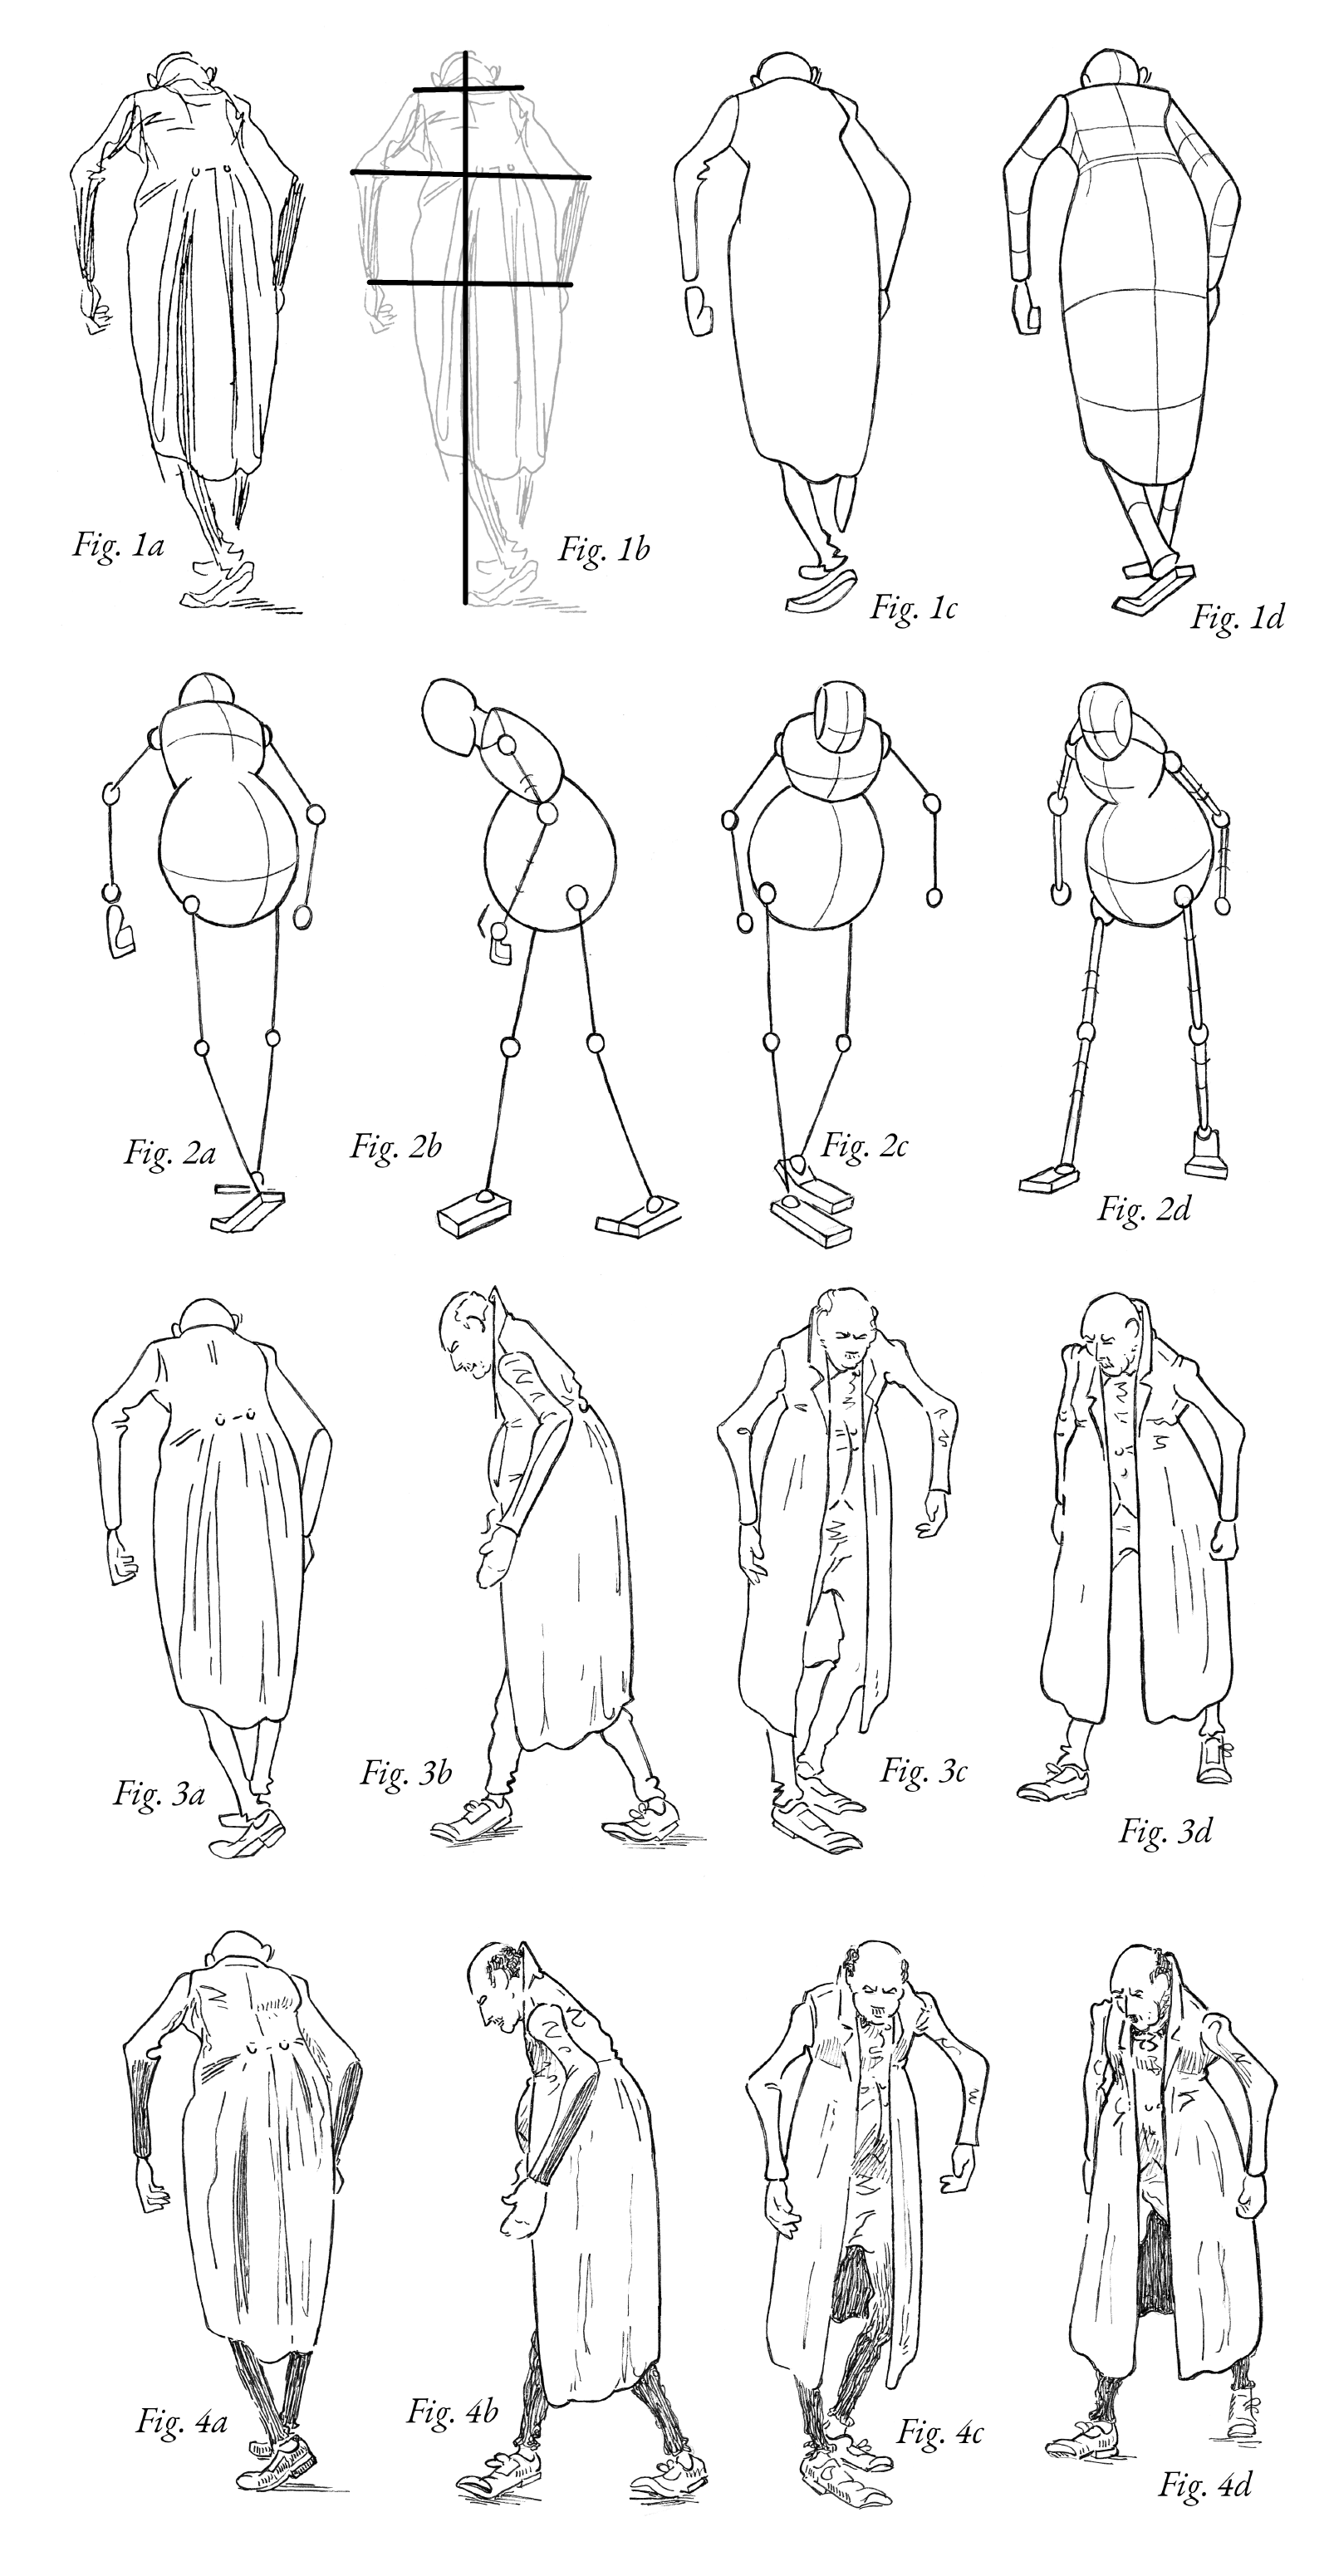
Figure 1a: The reference used for this demonstration: an illustration by Heinrich Kley.
Figure 1b: The ‘landmarks”: notice the relative alignment of the elbows, hands, et cetera. These will have to be observed for the final result to be believable.
You should do each of the steps below multiple times as quick sketches in your sketchbook until you feel you can sketch them confidently.
Figure 1c: Repeatedly Draw the outline and the internal shapes. The outline and shapes studies will help you get a grasp of the proportions of the parts of the figure and the relative orientations of the elements it is constructed from.
Figure 1d: Do form studies to understand the underlying form. They will help you construct the figure more accurately later.
Draw these repeatedly until you have a feel for the proportions and can do it from memory. This will help you place the forms more accurately.
Figure 2a: Draw a stick figure of the pose. This is the essence of the pose. You can get the relative proportions right, and also some of the landmarks as discovered in figure 1b.
Figures 2b-d: Now you can try to rotate the stick figure so that you can rotate the figure later. If you're unsure, take on the pose yourself, and look at yourself in the mirror.
It is important to note that this isn’t about getting it ‘right’. There is information that is missing in the initial illustration, and it is your task to imagine it, to come up with something that is believable and pleasing to look at.
Figure 3a-d: Do a line drawing of the figure. Draw the underlying form if necessary to get it right.
Figure 4a-d: Try rendering. You don't have to follow the reference, you can make it your own.